Paint Changes Everything | ORC, Week 07

It’s midnight on a Friday night, the day after the one I should have originally posted this update. I’m nearing the end of the One Room Challenge (next week will be the final reveal!) and even though it’s been a blast, I’m ready for a breather. I somehow managed to completely finish the built-in bench and wall feature over this past week and if I weren’t so tired from it all, I’m sure I would be jumping for joy as I write this. This was a big piece of the project puzzle - by far the most intimidating and most labour-intensive. Suddenly, with the bench and wall feature completed, it feels like a huge weight is lifted off my shoulders and the question of “will I even finish this in time?” is no longer one that keeps me up at night (but seriously, I’m so dang tired that it really wasn’t actually keeping me up at night). There’s a light at the end of the challenge tunnel.
This built-in bench area was a huge undertaking. I had the opportunity to brush up on some construction skills I had learned from my fireplace project (like planning and framing), but was also challenged with a whole new crop of materials and processes. I had the opportunity to figure out the mechanics of building an operable hinged lid, how to re-route some air ducts, and install tongue and groove pine. It was difficult at times, but generally I felt a lot more calm and confident and I certainly shed much fewer tears. If the beautiful built-in bench I’m excited to now have in our dining room wasn’t enough of a reward, the satisfaction of making progress towards more confidence in taking on these types of DIY projects is definitely a win.
Let’s recap this built-in.

Before

The Bench

The Bench + Wall Feature
This entire project was inspired by the weird bulkhead and column combination along the back wall of our dining room. Since removing it was not in our budget at this point, I decided I wanted to try to work with it, rather than try to disguise it. I thought that by nestling a bench between the columns and adding an interesting wall feature part-way up the wall, I could make this little area feel cozy and intentional. Over a series of weeks (seriously, I shared about this during week two, four, five, and six) I worked away at brining this little corner of our dining room to life. Although each step of the process made this space feel closer to my vision, it wasn’t until this past week, when I finally added the paint, that it finally felt right.
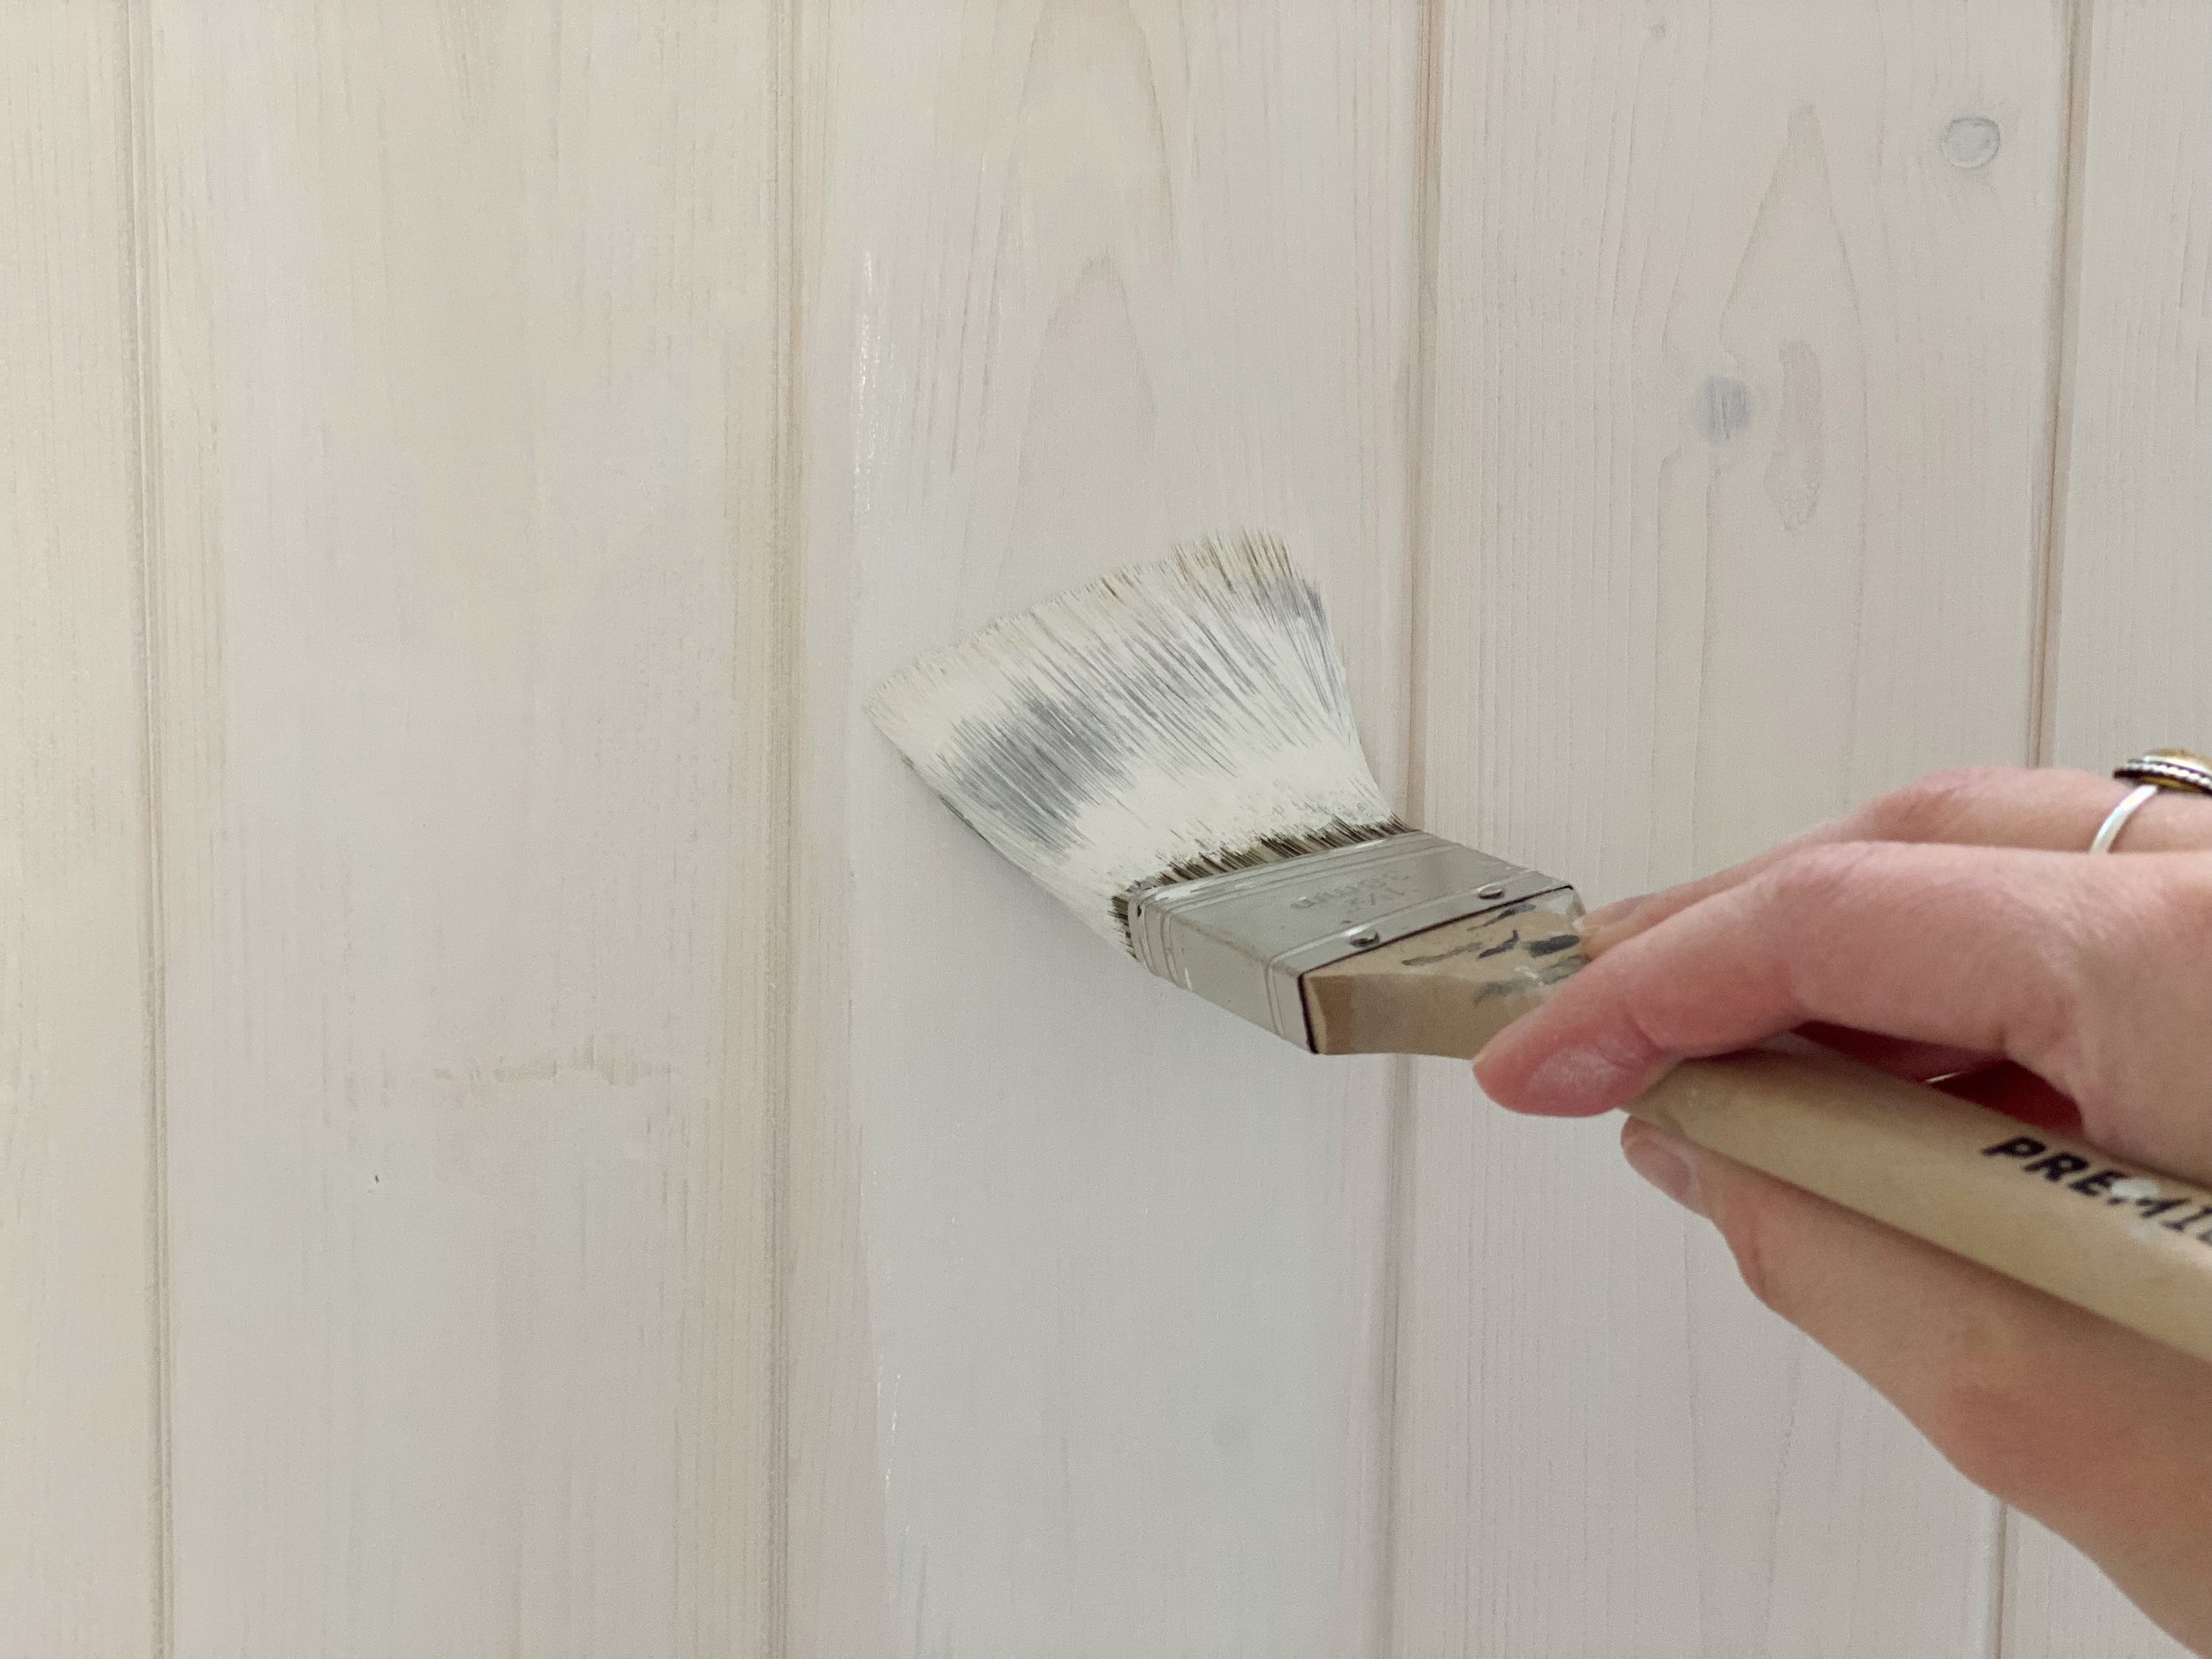
I used a variety of materials to create the built-in. Different types of plywood, MDF baseboards, v-grooved knotty pine tongue and groove panels - you name it! Where I left it in last week’s update, everything was completely built and assembled, but this corner of the room was looking a little Frankenstein-ish. I couldn’t wait to paint all the components in one consistent colour so it looked like one solid unit. To ensure that my paint finish took to all the different materials in the same way, I first coated everything with a shellac-based primer. This is my favourite primer to use because the shellac creates a barrier on the surface to lock in any wood tannins that can bleed through to your paint finish from the raw wood beneath. It also goes on really smoothly so you have a consistent surface to apply your finishing paint to.
It’s worth noting that before I applied the primer, I filled all the nail holes and sanded the entire surface smooth with a 220 grit sandpaper. I used an orbital sander and then somewhat regretted it when I turned it off and saw a fog of dust floating through my entire main floor. I knew that it would happen, but I still felt ill-prepared. I should have tried to block off this area before sanding or maybe just should have tackled the job by hand, but regardless, a quick vacuum and wipe down did the trick and the surface was perfectly smooth for applying paint to.


After applying two coats of primer, it was time to caulk all of the many cracks and joints. I prefer to do this step after priming because I find that having one consistent white surface makes it easier to see the areas that need to be filled in. I used an entire tube of caulking on this feature, filling in the cracks around the window frame, along the walls, around the trim pieces, and in some areas of the grooves between the wall panels. After priming, I also noticed a few areas where I missed filling in the nail holes, so I did a few extra fill-and-sand steps at this point too.
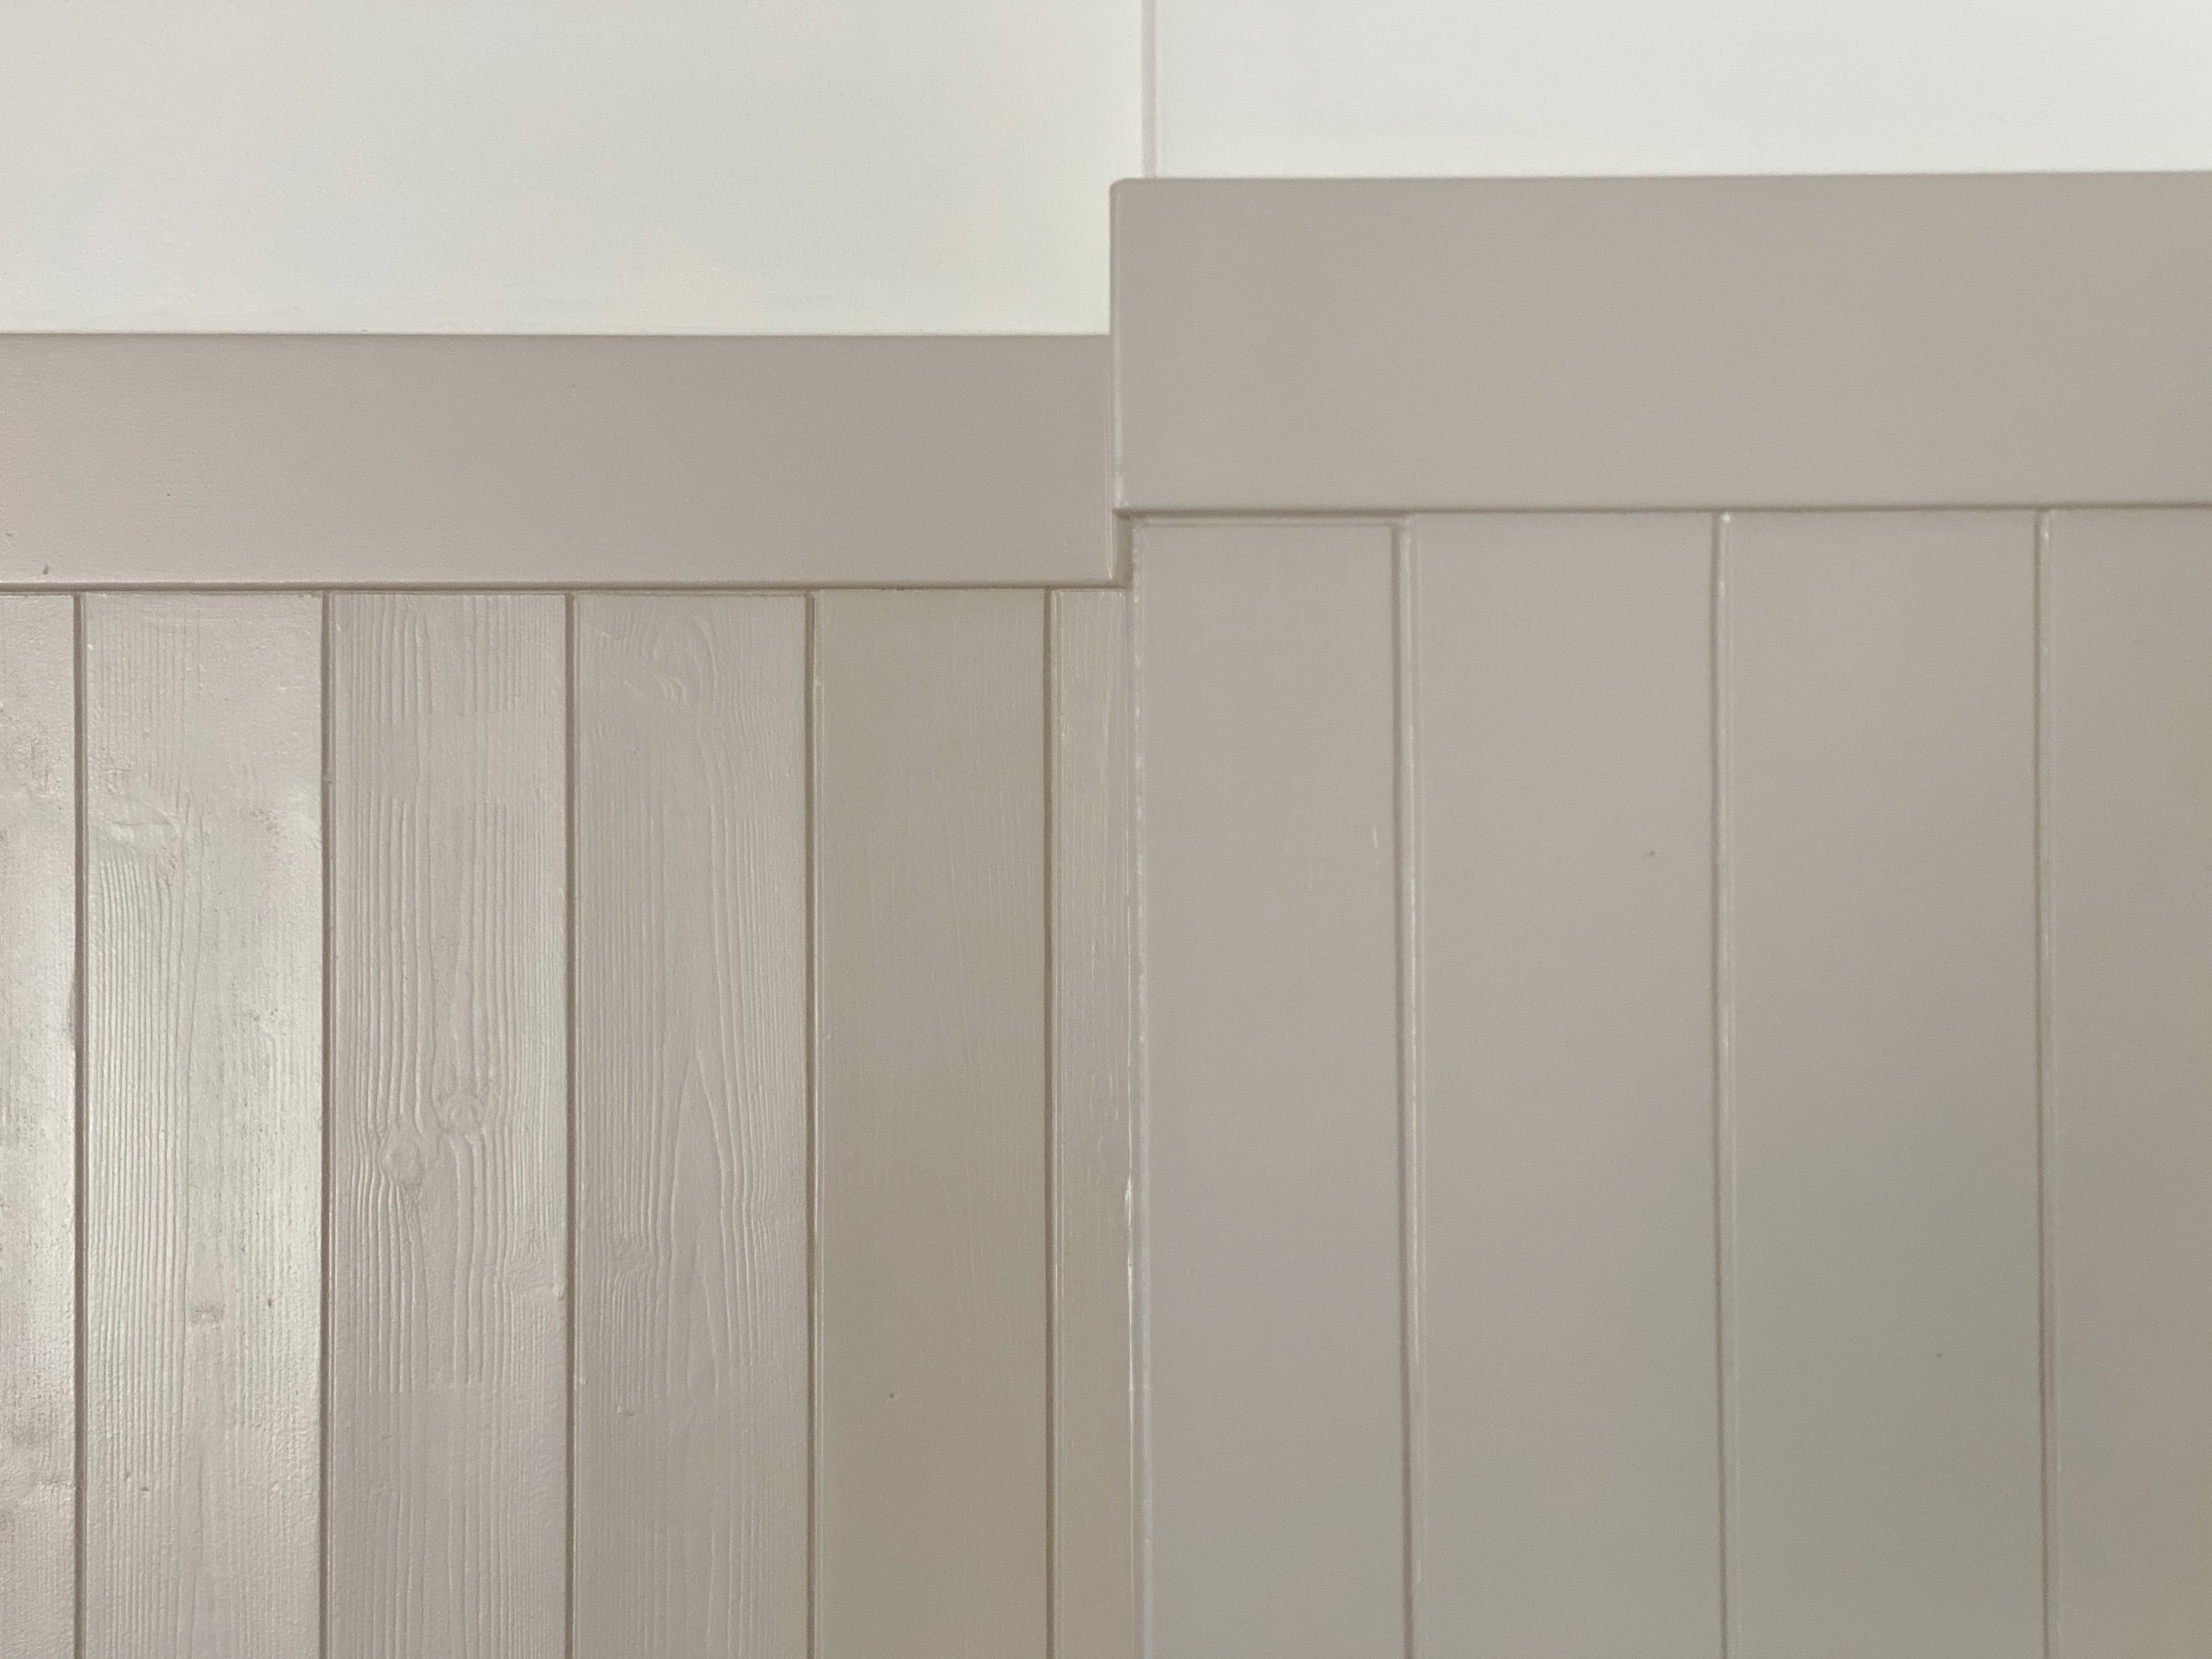
And finally, paint! I used a beautiful greige tone from Benjamin Moore that is incredibly popular (for good reason). This colour (Revere Pewter) was never even a question for the built-in because I used it to paint our fireplace mantle back in the Spring. Our living room is openly connected with our dining room, so it felt like a very natural way to marry the designs of both spaces together. I purchased the colour in Benjamin Moore’s Advance line so that the paint would hold up over time. The Advance paint is ideal for high-traffic and heavy-use areas, like cabinetry and furniture. I applied two coats by cutting in the corners and cracks with a brush and rolling on the flat surfaces with a soft roller. Paint changes everything.


This week I was also able to cross the DIY roman shade project off my to-do list. I was hoping to share more about that process here, but like every other sewing project, I ended up cursing my way through each step and decided that I may not be the best person to share how to create your own. In short, I ended up using a striped linen table cloth as my shade fabric and an old white bed sheet as the liner, and I followed a combination of this tutorial and this tutorial to create the very imperfect shade you see in these images. It may not be executed as perfectly as I imagined it could be, but it was still a really affordable solution for this strange window and it’s growing on me.


This is a huge part of this room project to have completed. I have a few more steps to complete on the dining room table, but other than that, all that’s left to do is the fun decorative parts. I’ve been slowly collecting decor pieces over time (through both thrifting and shopping online) and I can’t wait to bring them all together to take this room from 90 to 100. You’ll see all of those details in the final reveal post next week, but for now, you can glimpse a little sneak peek below.
The Next (Final) Steps
Add more coats of stain to the table
Put a protective coat on the table
Decorate the crap out of this space (install the light, roll out the rug, find/make pillows for the bench, hang art)
Enjoy this space with the ones I love!

Pillows, Vases, and Rugs, oh my!
I shared the entire build of this built-in bench on our YouTube channel, so if you’d like to see the full process, be sure to check that out. If you enjoyed this update and want to be inspired by what other people are doing in their spaces for this challenge, be sure to check out what some of the other guest participants of the ORC are up to this week. The finishing touches are rolling out and these spaces are going to be good.