Our Dining Room Reveal! | The One Room Challenge, Week 08

We did it! It’s the eighth and final week of our first One Room Challenge and I have to say, I didn’t know if we would make it in time. I’m writing this at the eleventh hour - Sunday evening - because life caught up with us in these final weeks and I wasn’t sure I’d have a finished room by this point. But the entire purpose of this challenge was to set a goal and aim for progress, not perfection. And progress is exactly what you will see in these photos. I’m so glad I dug my heels in because seeing this room finally come together in our home has really inspired me.
To recap, our dining room has mostly sat empty since the day we closed on our house. We didn’t previously own any dining room furniture and we have an eat-in kitchen, so it was never a priority to get it in working order. As time went on, we slowly began to use this space to hold random bits of furniture that didn’t have another place in our home and the space became a hogwash of random items. Nothing too messy or junky, but it definitely didn’t have a purpose or focus. Our dining room is open to our main living room, so it finally felt like a priority to clear it out and set it up to be properly utilized. Over the past two years, we have also realized how desperately we need more space in our kitchen, so I went into this challenge with the intention of setting up this eating area to use for all our family meals so that we can remove the table in our kitchen and create more space for storage in there.
This is how our dining room looked at the beginning of this challenge.

Before

Before
And here’s this space now, eight weeks later.

There’s no denying that the before shots of this space showed just how little character the room had. As I mentioned, it is openly connected with our living room, but it didn’t have any distinctive features that made it feel like its own. At the beginning of this room transformation, I broke the entire project down into five different sub-projects that I would need to complete to give this room it’s own character and style.
Build a built-in storage bench and wall feature along the back window wall.
Flip a thrifted china cabinet into a beautiful stand-alone glass display cabinet to hold my barware.
Refinish a secondhand dining table.
Create a DIY version of a roman shade for the window.
Decorate the space with all the finishing touches that make it feel lived in, warm, welcoming, and ours.
I can’t believe I completed all five. Let’s walk through them a little bit.
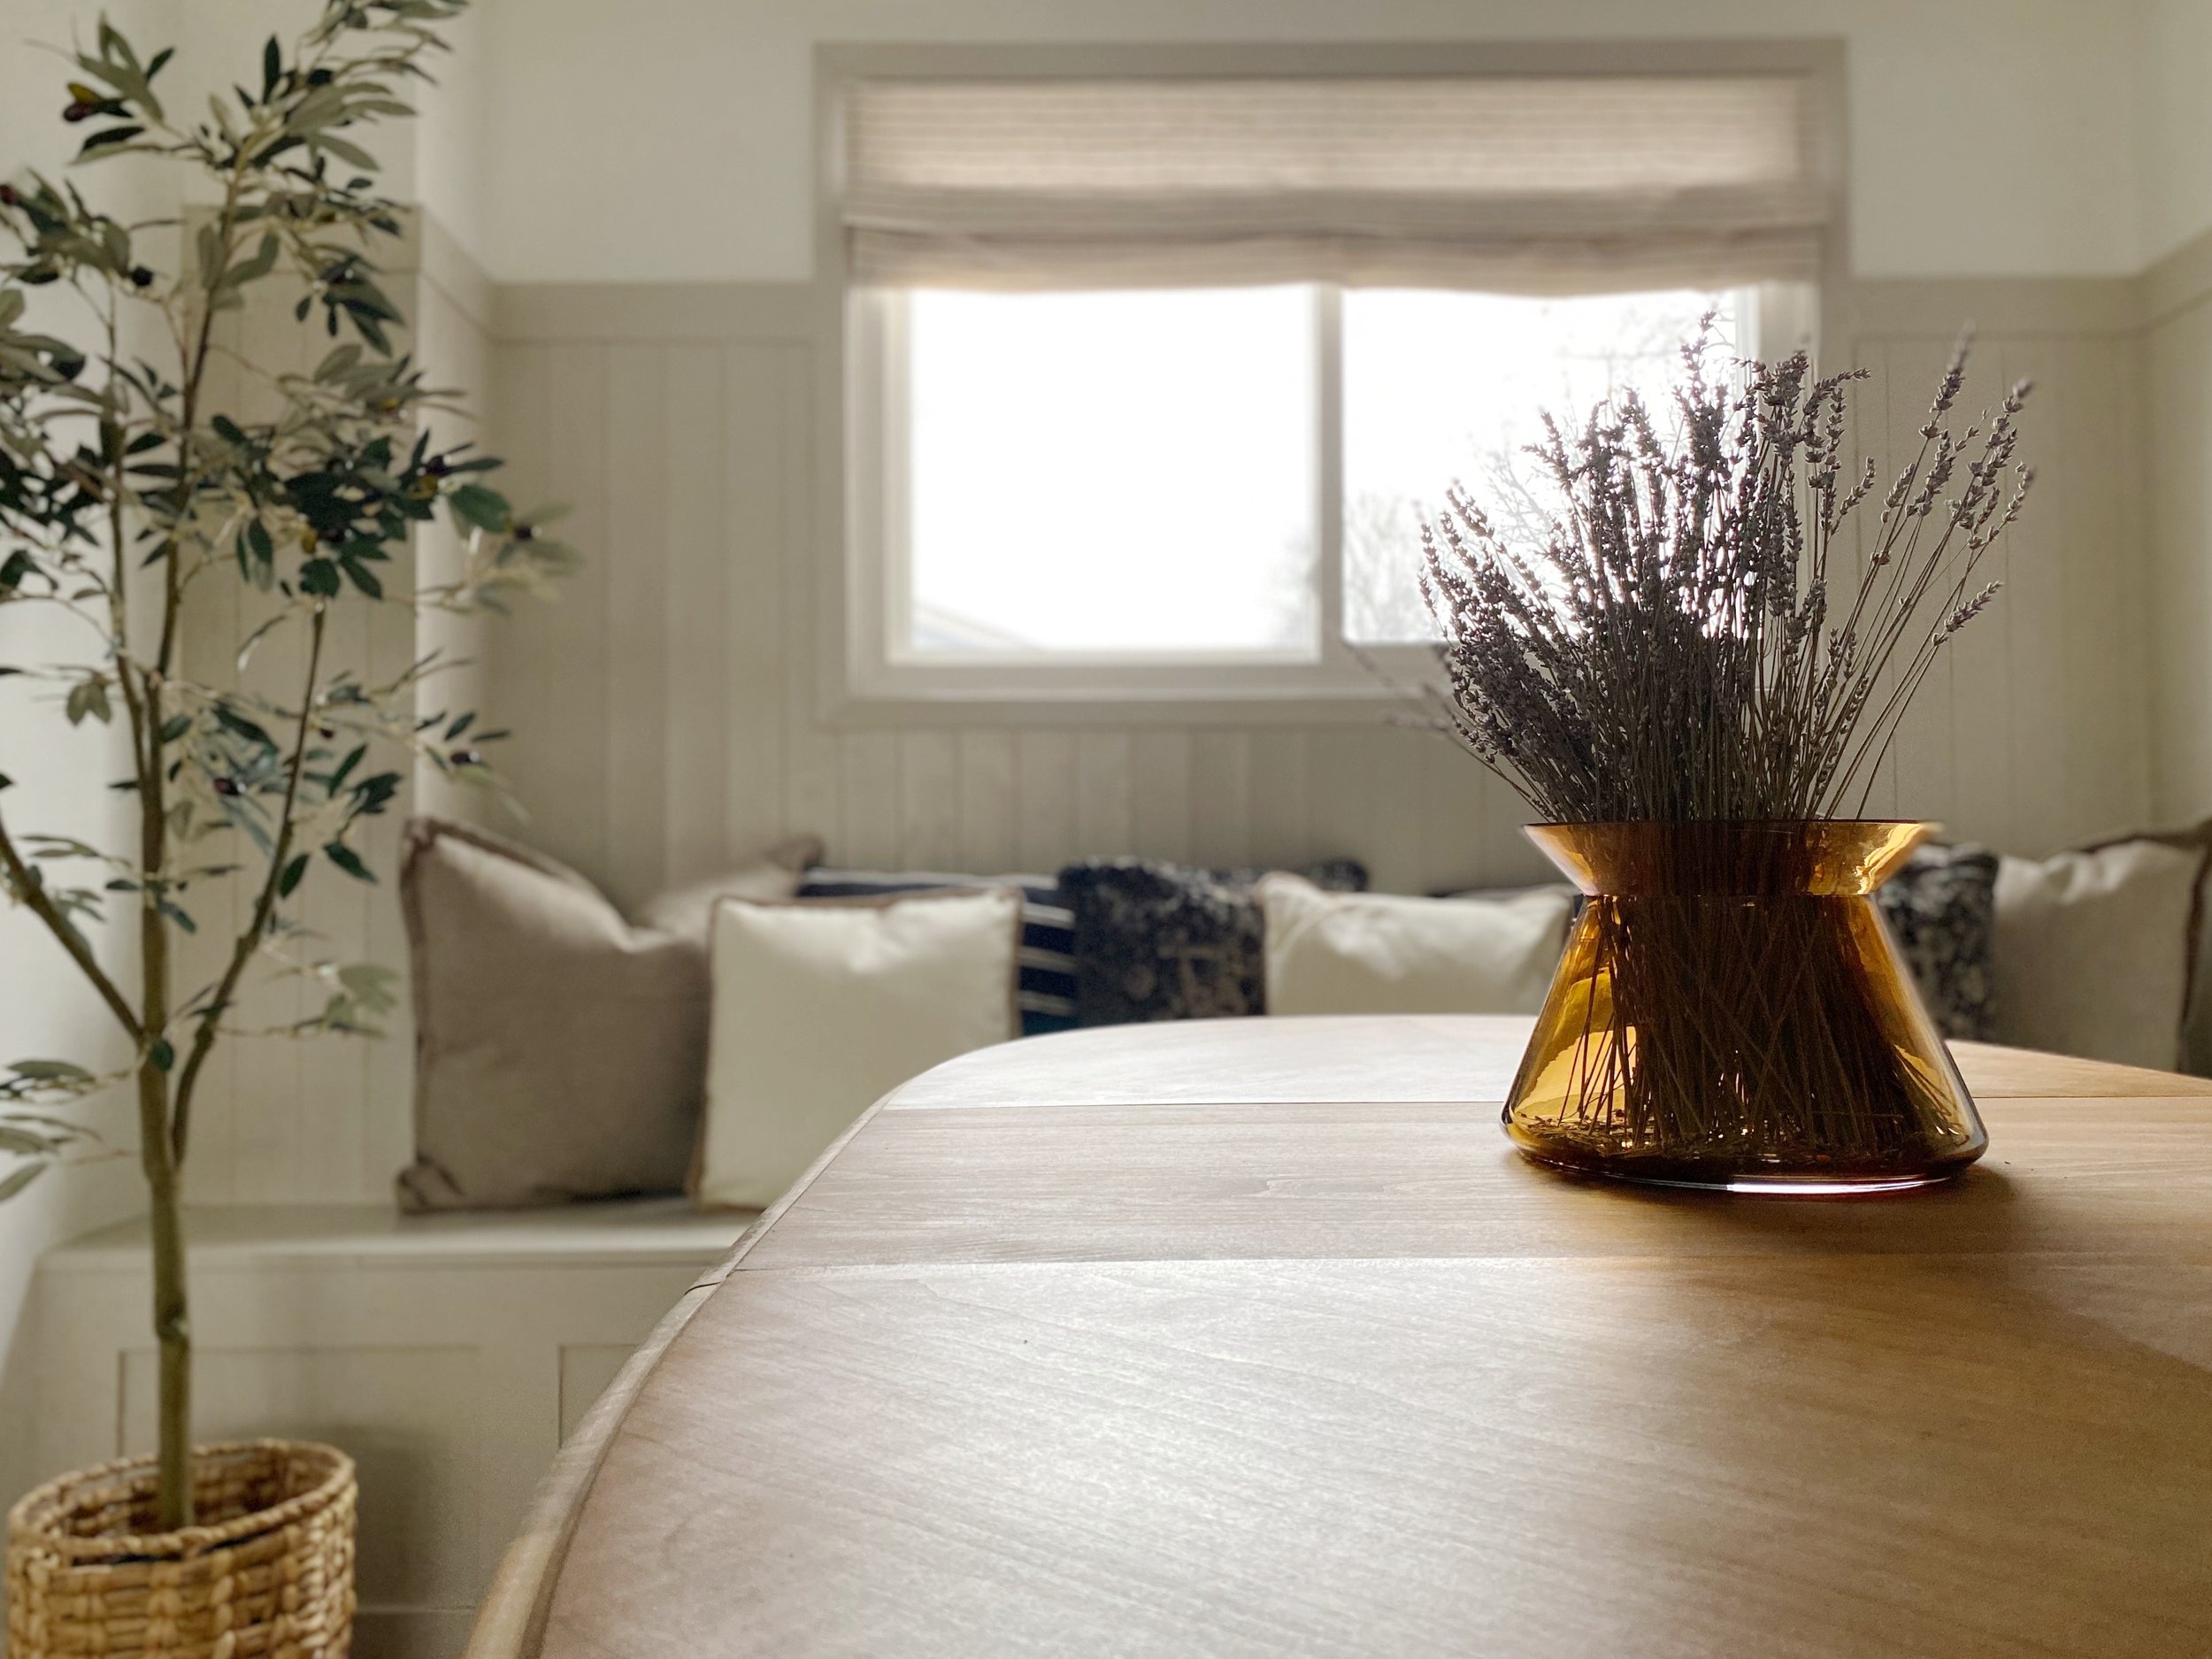


The biggest transformation in this room was the built-in storage bench and surrounding wall feature. This back window wall had a strange bulkhead and column combination happening that felt dated and dingy. We weren’t about to embark on a full renovation to remove it this time around, so I wanted to find a way to work with it rather than trying to conceal it. I loved the idea of a big built-in bench stretching wall to wall because I love how many bodies you can pile on a bench. We’re in the small-kid phase of life and I know that we can cram lots of little ones on here for family meals during special occasions. I decided to add the panelled wall feature part way up the wall to bring a focal point to the space and to establish a connection with the adjoining living room. We have a big overgrouted stone fireplace in the living room with a mantle painted in this same colour, Revere Pewter by Benjamin Moore. The focal wall offered a great opportunity to draw the eye around the room and allowed us to dial up the cozy factor in the dining space. I shared exactly how I built the bench project in this video if you’d like to see more details about the build.
To decorate, I piled the bench full of throw cushions. I made sure to add a few inches of depth when I built the bench to account for them. If you’re going to be sitting on a hard bench, you definitely will want something soft behind your back. I love how the cushions give the bench such a strong personality through the mixing of pattern and texture, but they can so easily be changed out down the road if we take this room in a new direction. It’s also worth mentioning that these throw cushions all have removable covers for easy washing - a must with small kiddos around food.
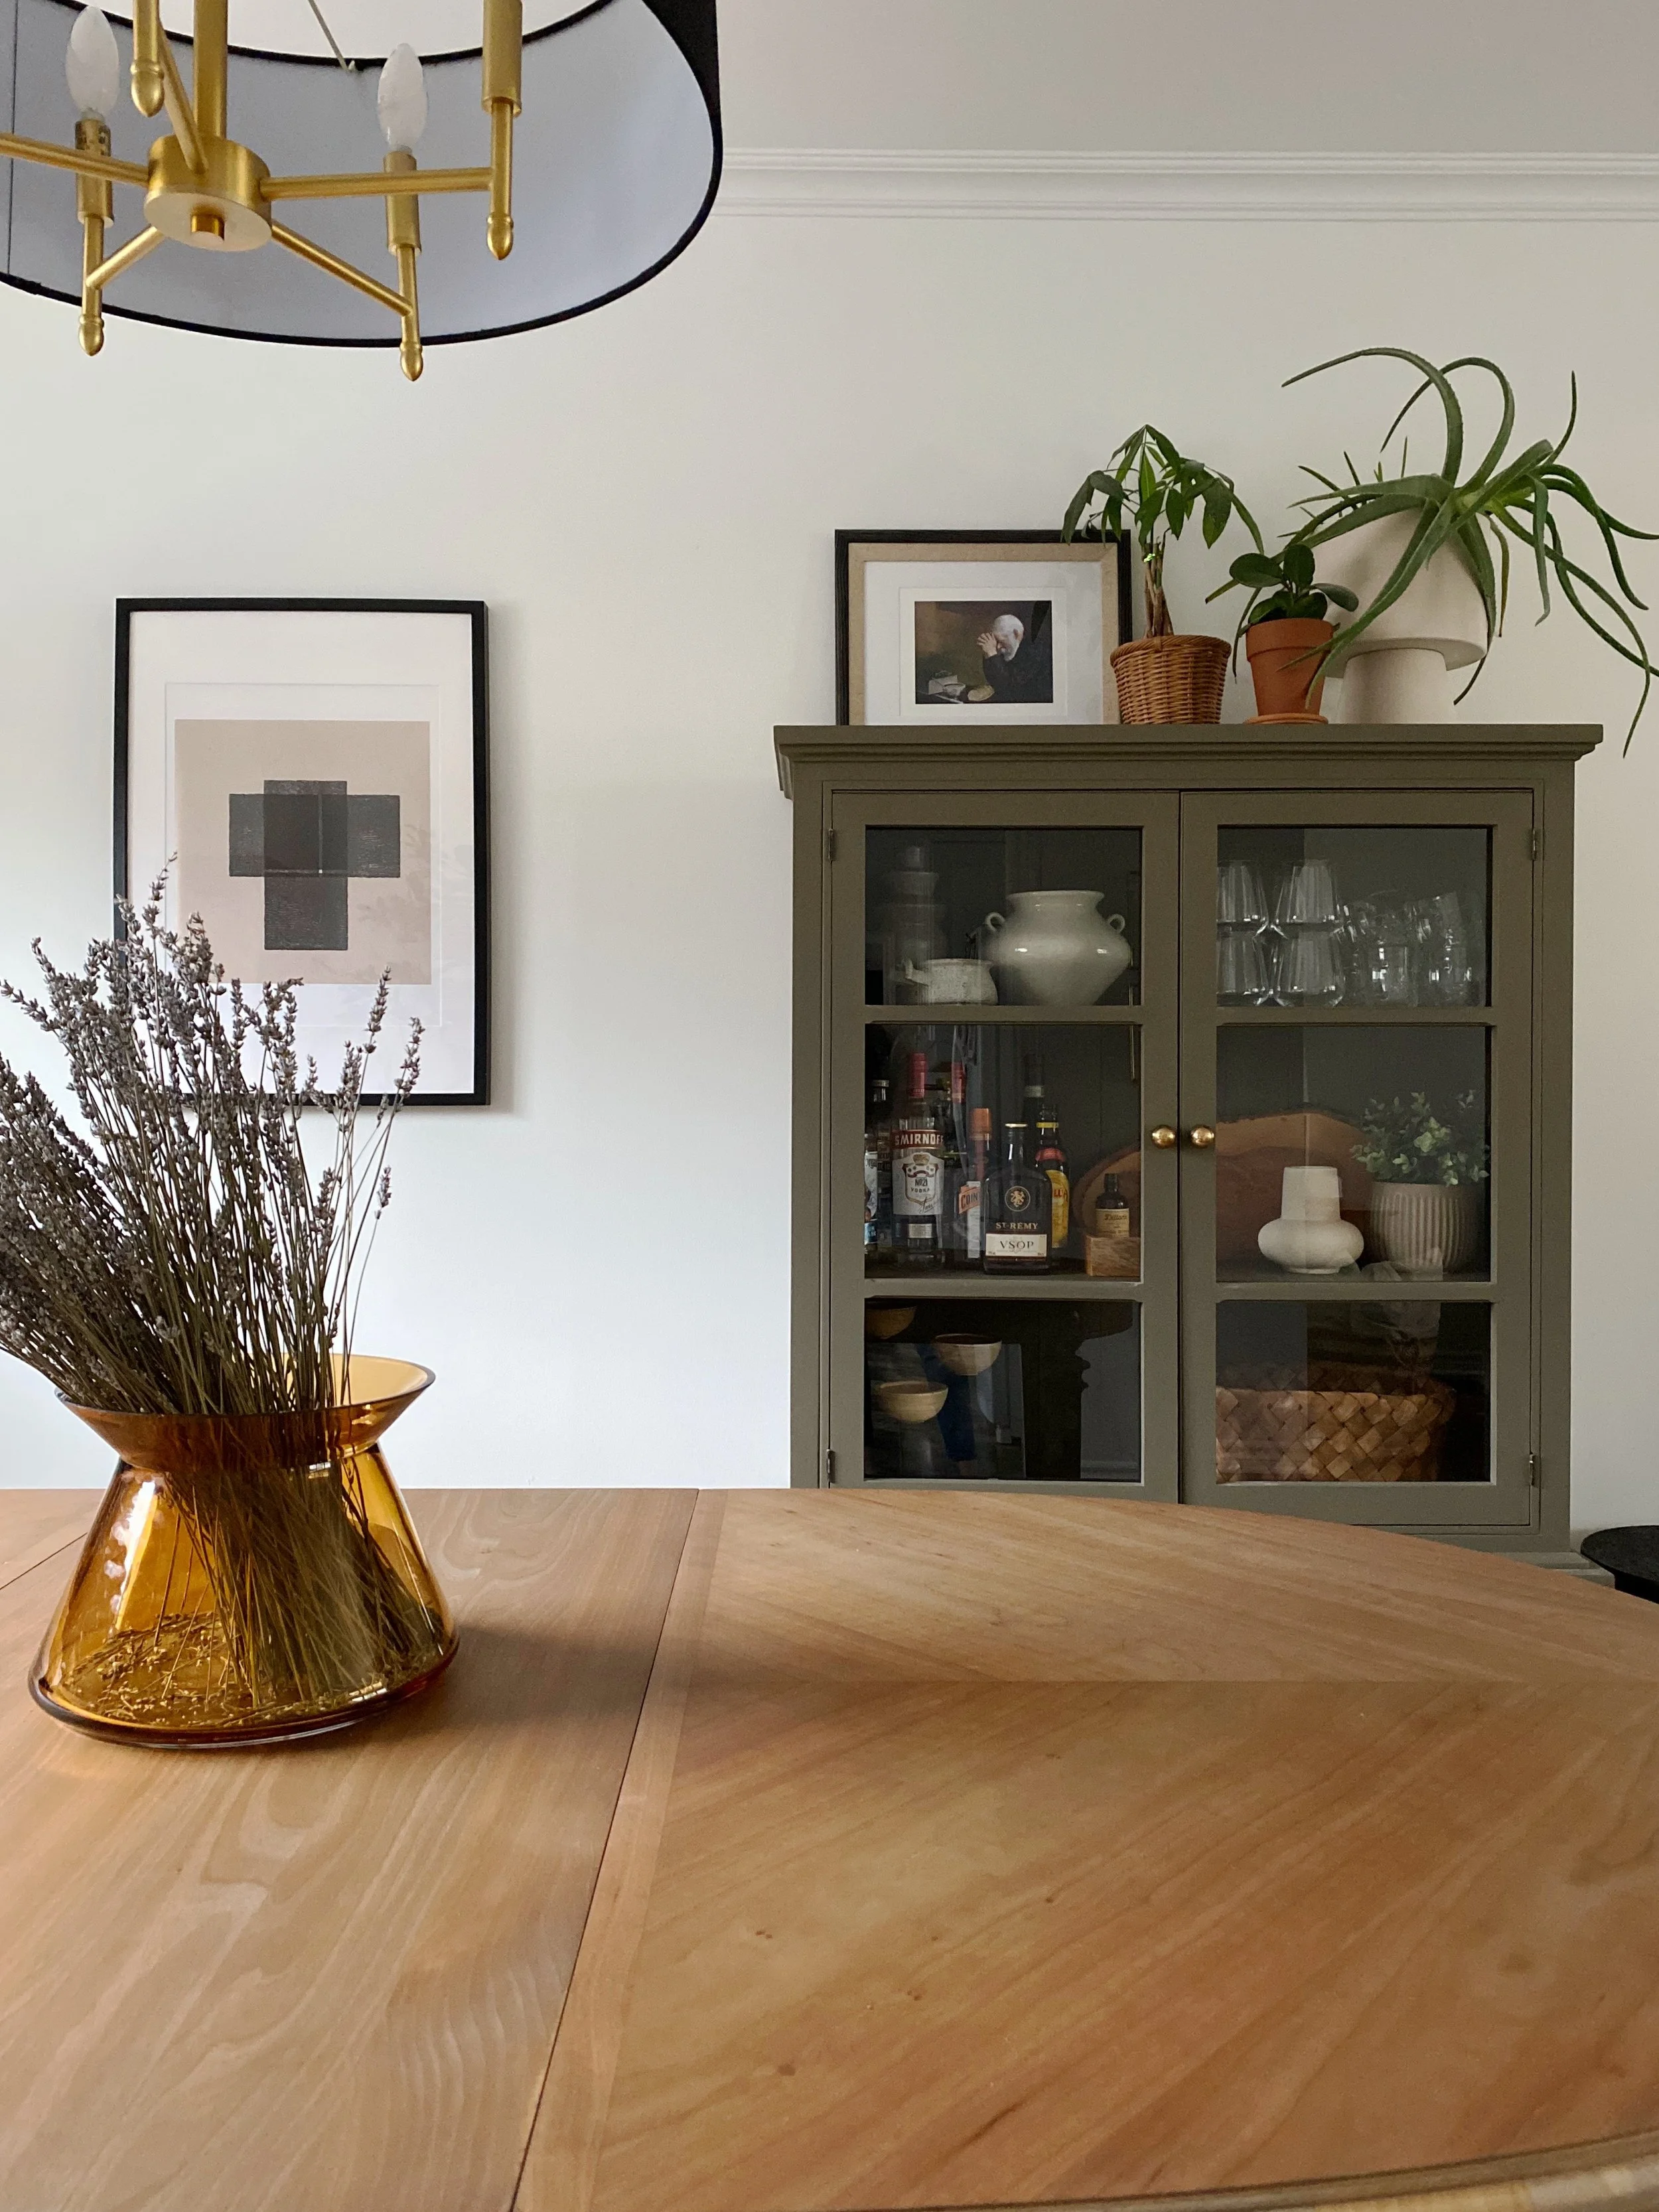
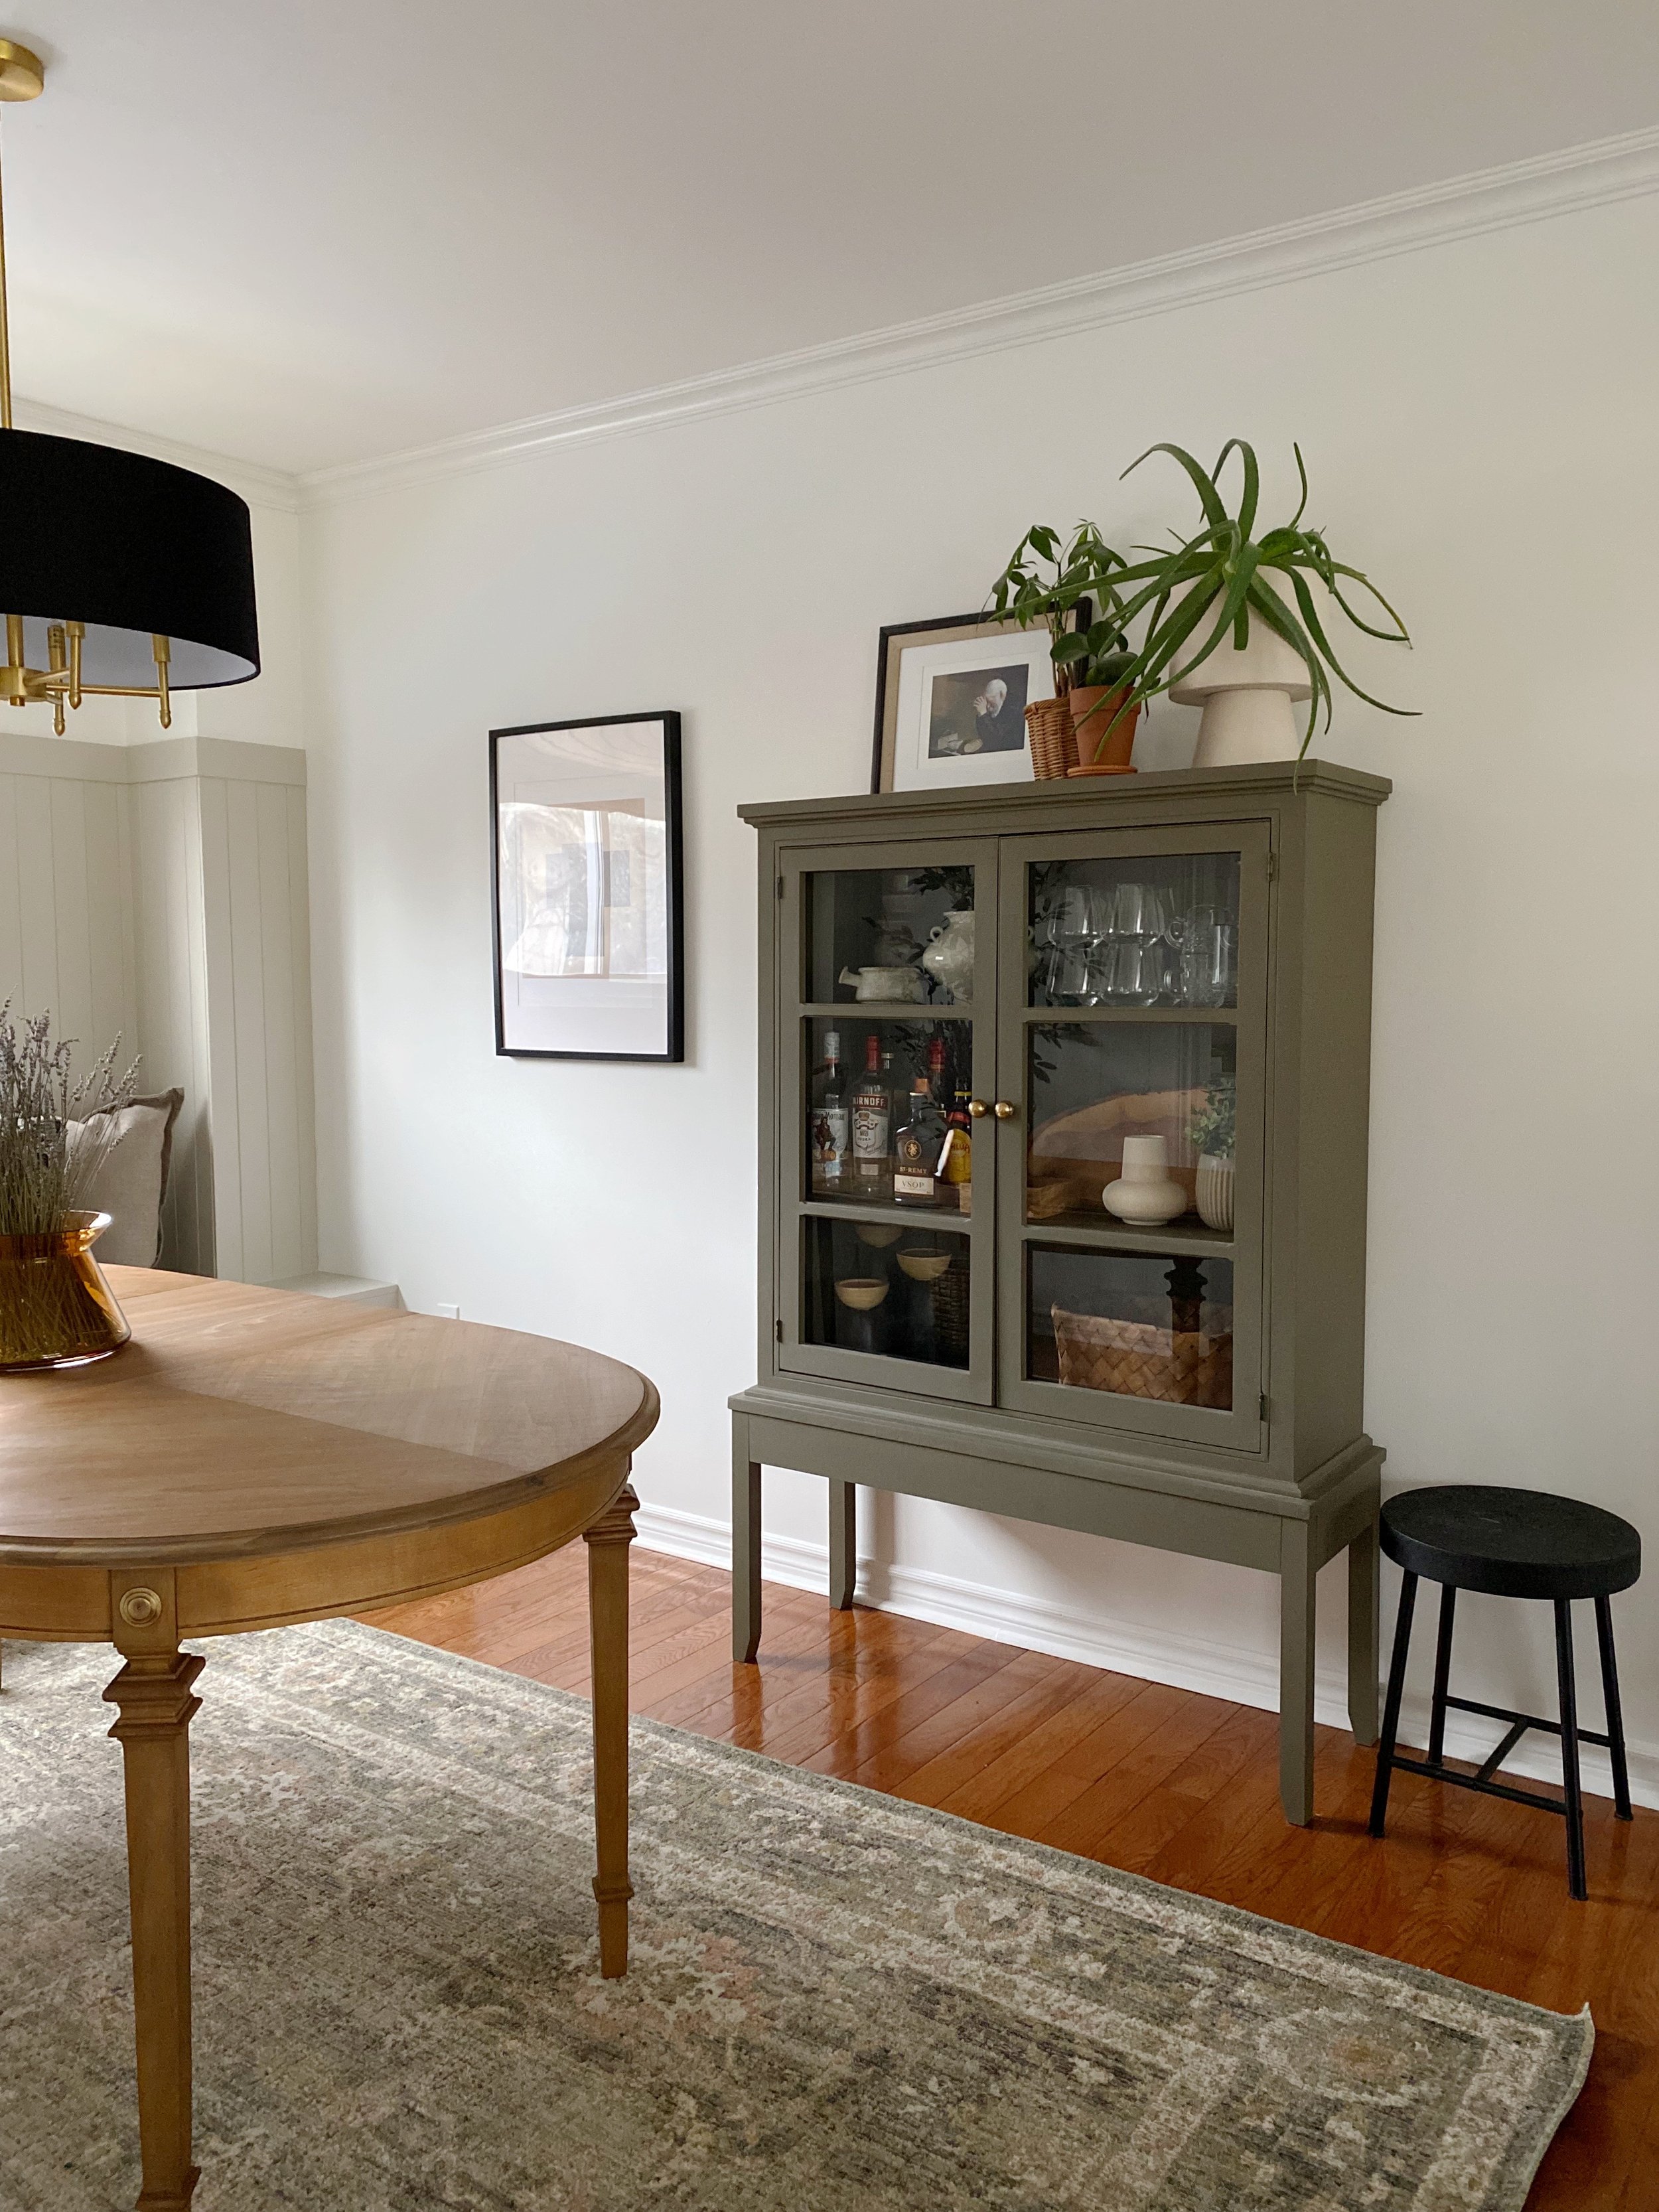

The built-in is obviously the focal point of this room, but possibly my favourite part of the space is the thrifted china cabinet project. I found an old pine china cabinet (you know, the kind with the clunky bottom and glass-doored top) on our local buy-and-sell for a steal and I immediately saw the potential to turn it into a stand-alone glass cabinet. I loved how the top portion had really clean square lines and the interior was panelled, subtly echoing the vertical panelling of the feature wall. I built a base to add some height and painted the entire thing in a deep olive tone to establish some contrast in the room. I always love a moody colour and this one, Underground by House & Canvas, definitely brings something special to this otherwise quite traditional style cabinet. I shared the entire cabinet transformation in this video and you’ll definitely want to check that out to see where it started.
The motivation for the cabinet project was to display some of my barware collection, but I was eager to style a few other decor pieces too. I can’t get enough of how pretty warm wood tones look against this olive green colour, so I chose to display a beautiful live-edge charcuterie board my parents made for us a few Christmases ago on one of the shelves. I also found space for my ever-growing vase collection - you never know when some fresh-cut flowers will make their way home with you! I included a deep woven basket in the bottom of the cabinet so we could easily grab our beautiful linen napkins and styled the top (out of reach of our kitties) with the few real plants we have in our home and a classic Eric Enstrom print.


The dining table was a labour of love. I purchased it secondhand nearly two years ago thinking that I would try to refinish it one day, but it wasn’t until I set out on this challenge that I finally felt the motivation to make it happen. It took a lot of effort to strip it down, sand it smooth, and pin down a new finish for it, but I am so glad that I went to the trouble. I love the simplicity of its oval shape and the subtle tapered details of the legs, not to mention the unexpected brass emblems at the top of each leg. As I sanded down the existing yellowed-finish, I thought I may keep the new finish pretty blonde. But I unexpectedly ended up settling on a beautiful mid-tone finish with subtle grey undertones and I couldn’t have picked a better tone to bring the warmth this beautiful wood piece establishes in the room. The table has actually been disassembled since the moment I picked it up from the seller, so it wasn’t until I reassembled it in this final form that I have ever even seen what it looks like as one solid piece. I love it even more than I thought I would. I didn’t get the refinishing video edited before this reveal, but if you’re interested in that, be sure to subscribe to our YouTube channel to be notified once the full video is released.
Let’s talk about the elephant in the (dining) room. Where are the chairs? Despite my best efforts to be ahead of the game, the chairs I ordered back on September 1st have repeatedly been back-ordered further and further. I considered finding a different solution, but I decided to stick with my gut about what I originally envisioned for this space and wait it out. It’s disappointing not to have them in time for this reveal post, but such is life and there are way worse things happening out there than a late chair delivery. But for the purpose of painting the big picture, I have ordered six simple black windsor-style chairs, five of which will easily fit around the table and for an extra layer of comfort, I also purchased six beige seat cushions, one to sit on each.


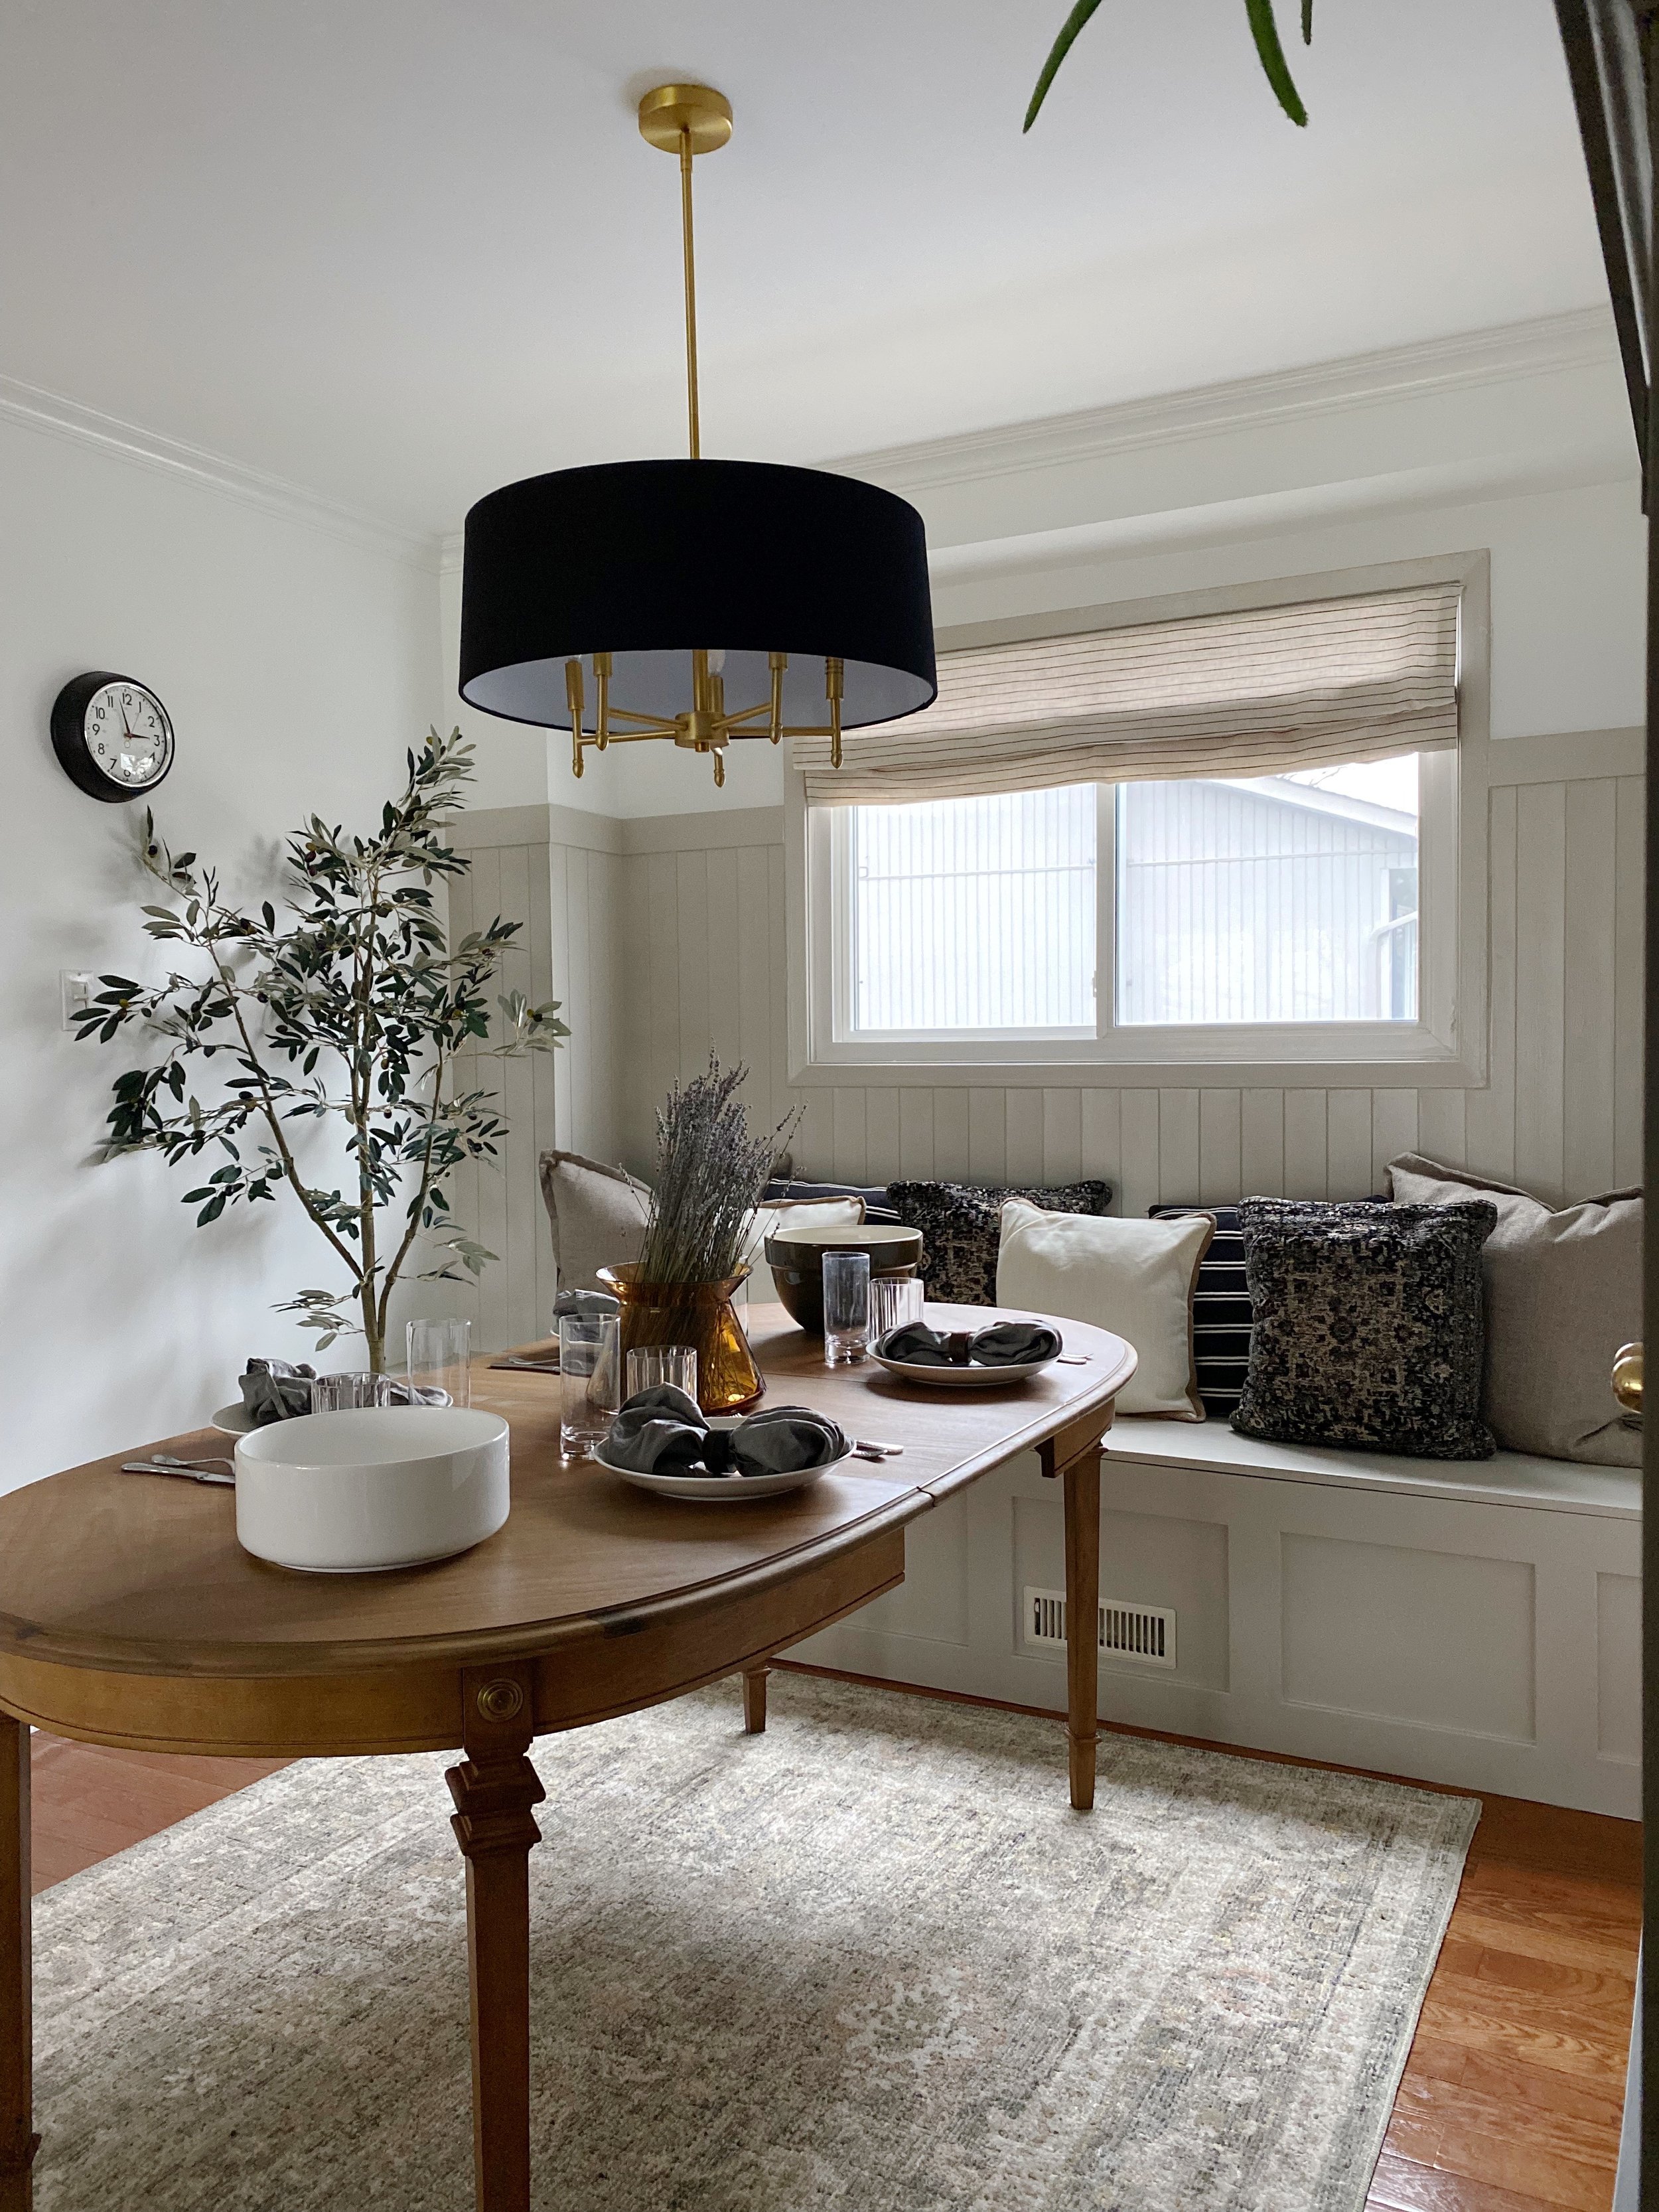
When it came to decorating the space, I had a very clear vision in mind. I decided to keep the walls and trim colour what they already were, Falling Snow by Behr, since this room is open with the living room. But I really didn’t want it to feel cold. I tried to very intentionally layer in warmer tones and textures through the textiles and decor accents. I (very imperfectly) sewed a custom roman shade using a simple striped linen tablecloth and that immediately brought a softness to the window without adding the visual weight of traditional curtains. The colour inspiration for the room came from the beautiful sage and blush area rug. I wanted to very subtly highlight the green tones in the rug with some of the decor choices, but I love that it all still reads very neutral. Many of the throw cushions were chosen based on the rug colours, but I tried to not get too matchy and opted to incorporate some different patterns to break up the monotony that can easily happen in a fairly neutral space.
I personally believe that every room needs some black in it, so I opted for a black shade on the chandelier rather than the original white I was leaning towards. I love this light. The shade adds some visual weight and completely grounds the table - something I deem essential in a space where you gather with others. I was channelling the feeling of growing up around my grandparent’s massive, low-lit dining table and I think I achieved it. This dimmable light gives off such a soft glow in the evening and I know that good conversations are going to happen here.

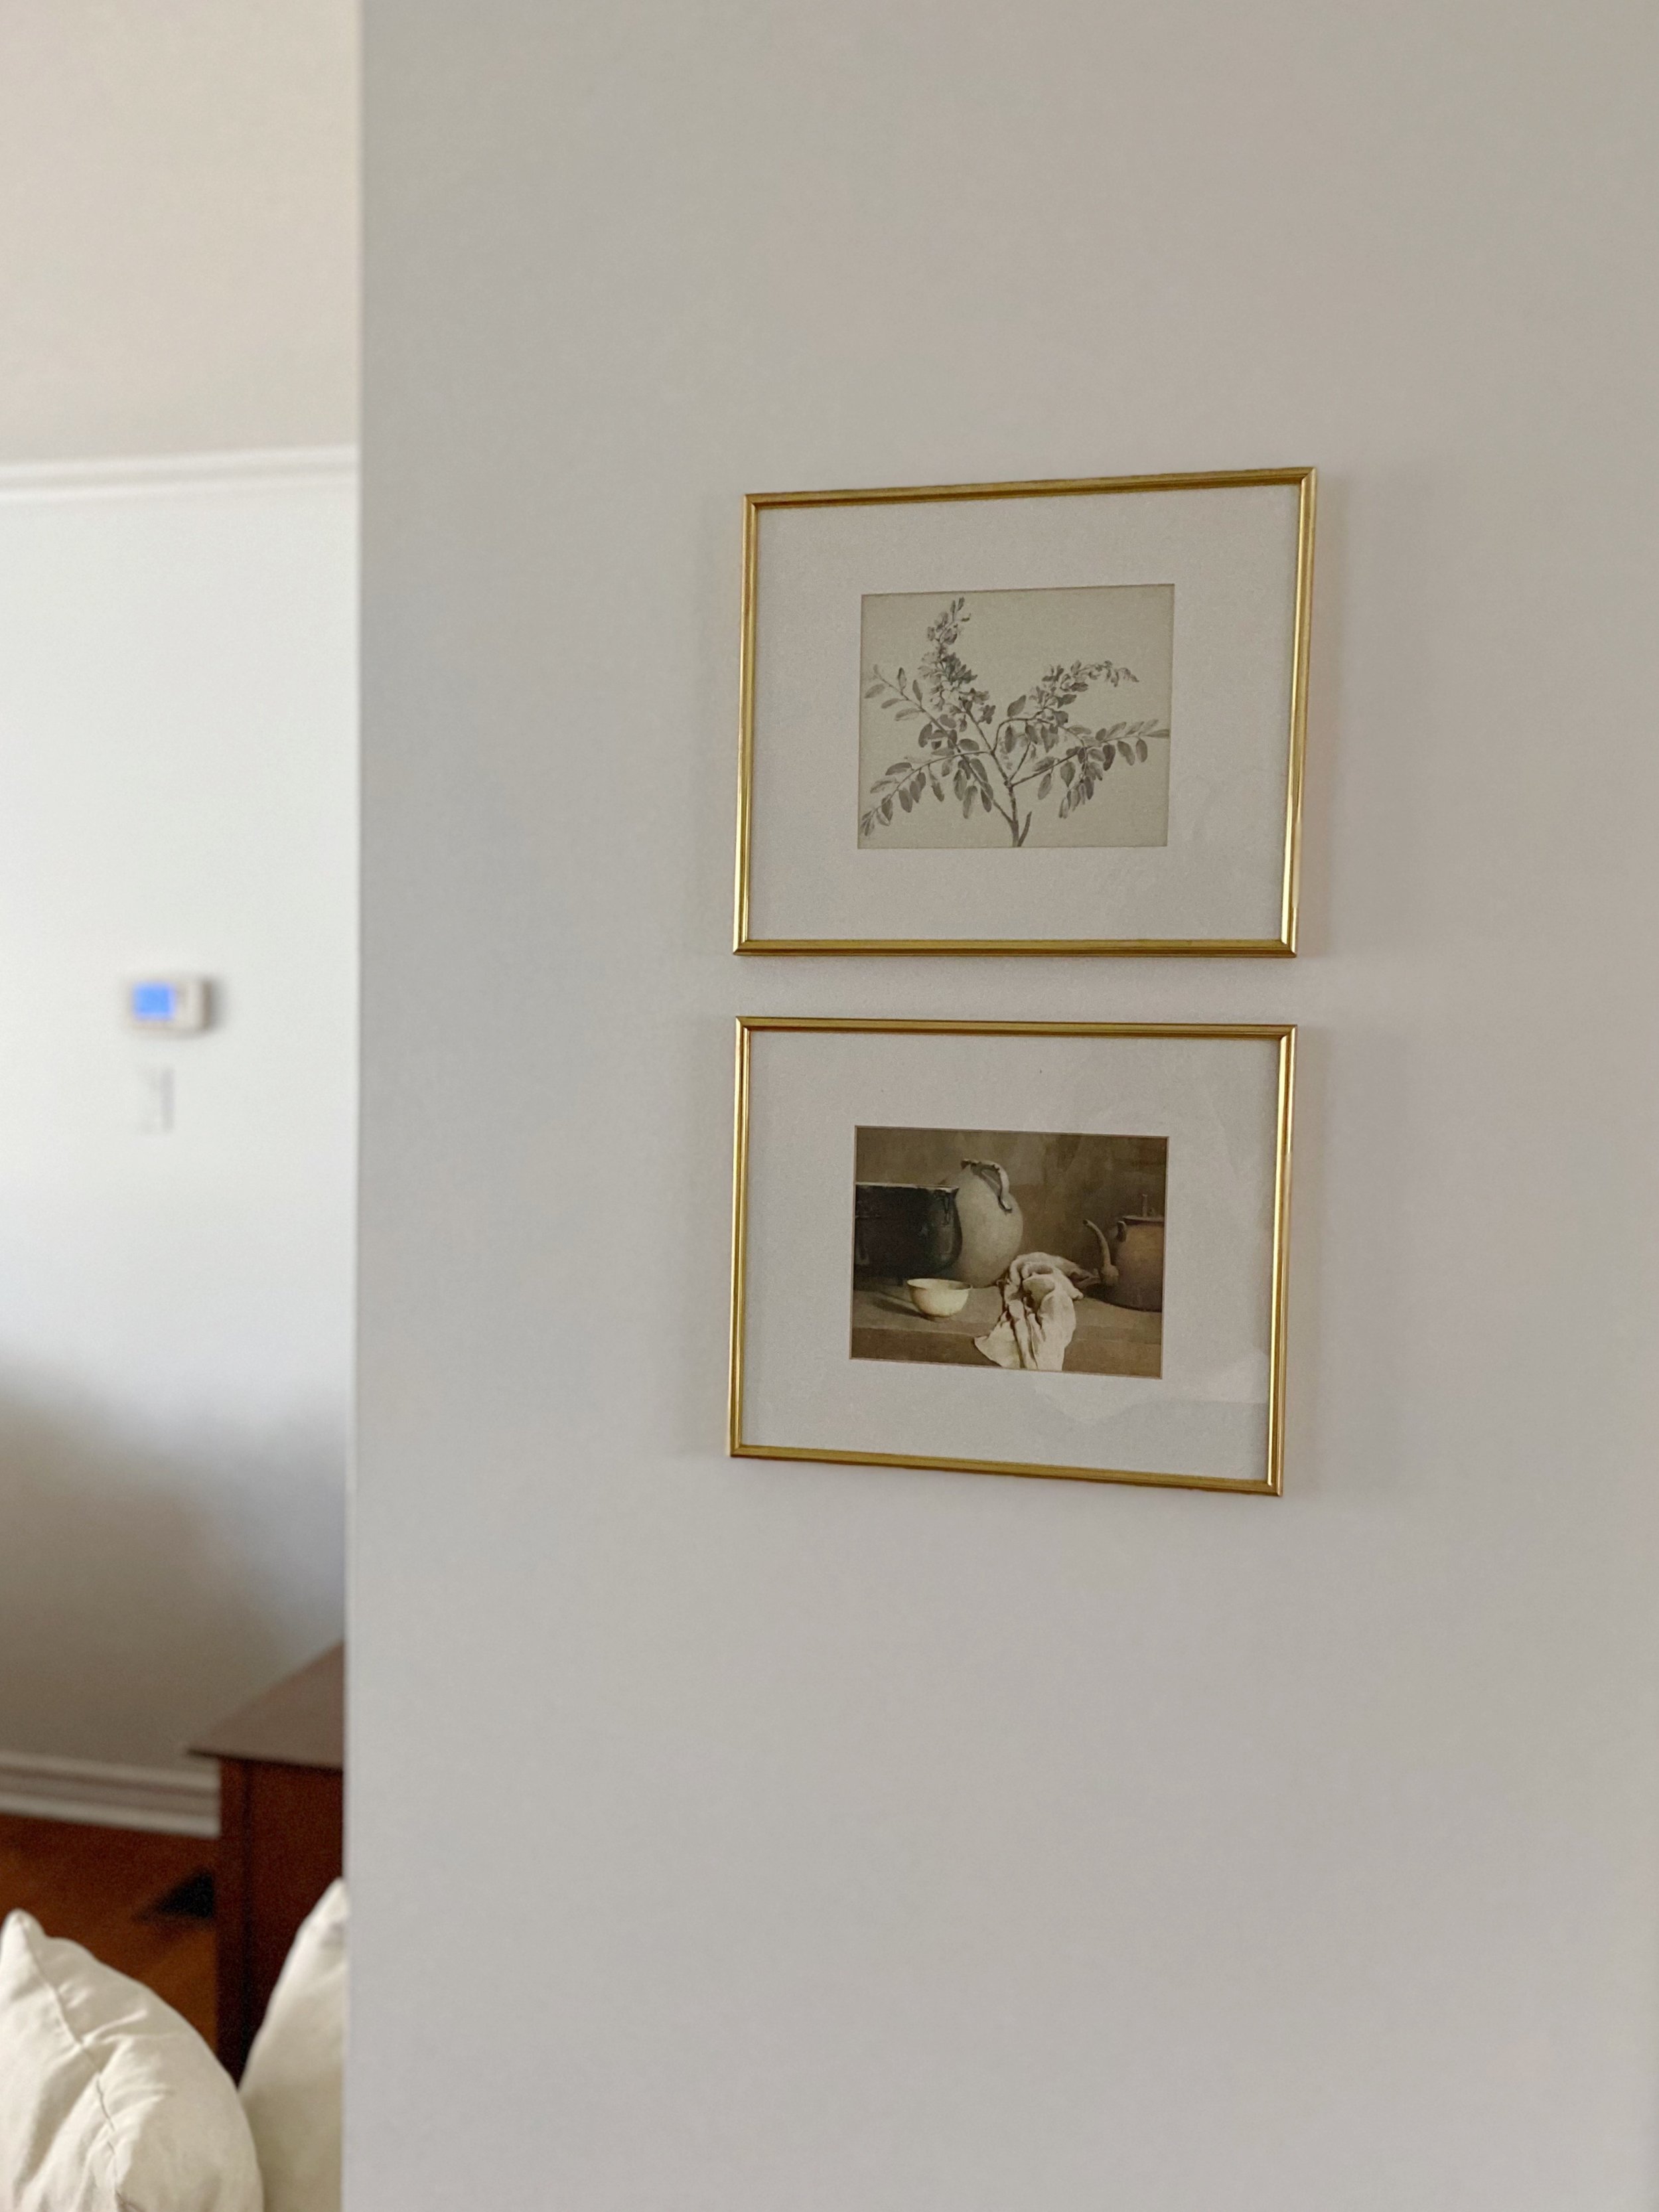

The art in a space completely sets the tone. I was pretty careful in selecting the artwork for our dining room, but all of my selections ended up being pretty affordable print-at-home pieces. I love going this route because you can easily change it out without any guilt. The only piece I knew we needed (at the request of my husband) was a copy of the sentimental Grace print by Eric Enstrom. Other than that, I spent an evening browsing downloadable options on Etsy. I wanted to use simple pieces that added to the cozy and inviting mood of the space. I chose one that was a more understated line drawing and paired it with a painted still-life full of depth. The biggest art piece in the space is a copy of a layered woodblock print - a piece that appears simple and minimal at first glance, but nods to the layered, relaxed mood I was going for with the room design. I framed all of the artwork with thrifted or already-owned frames.
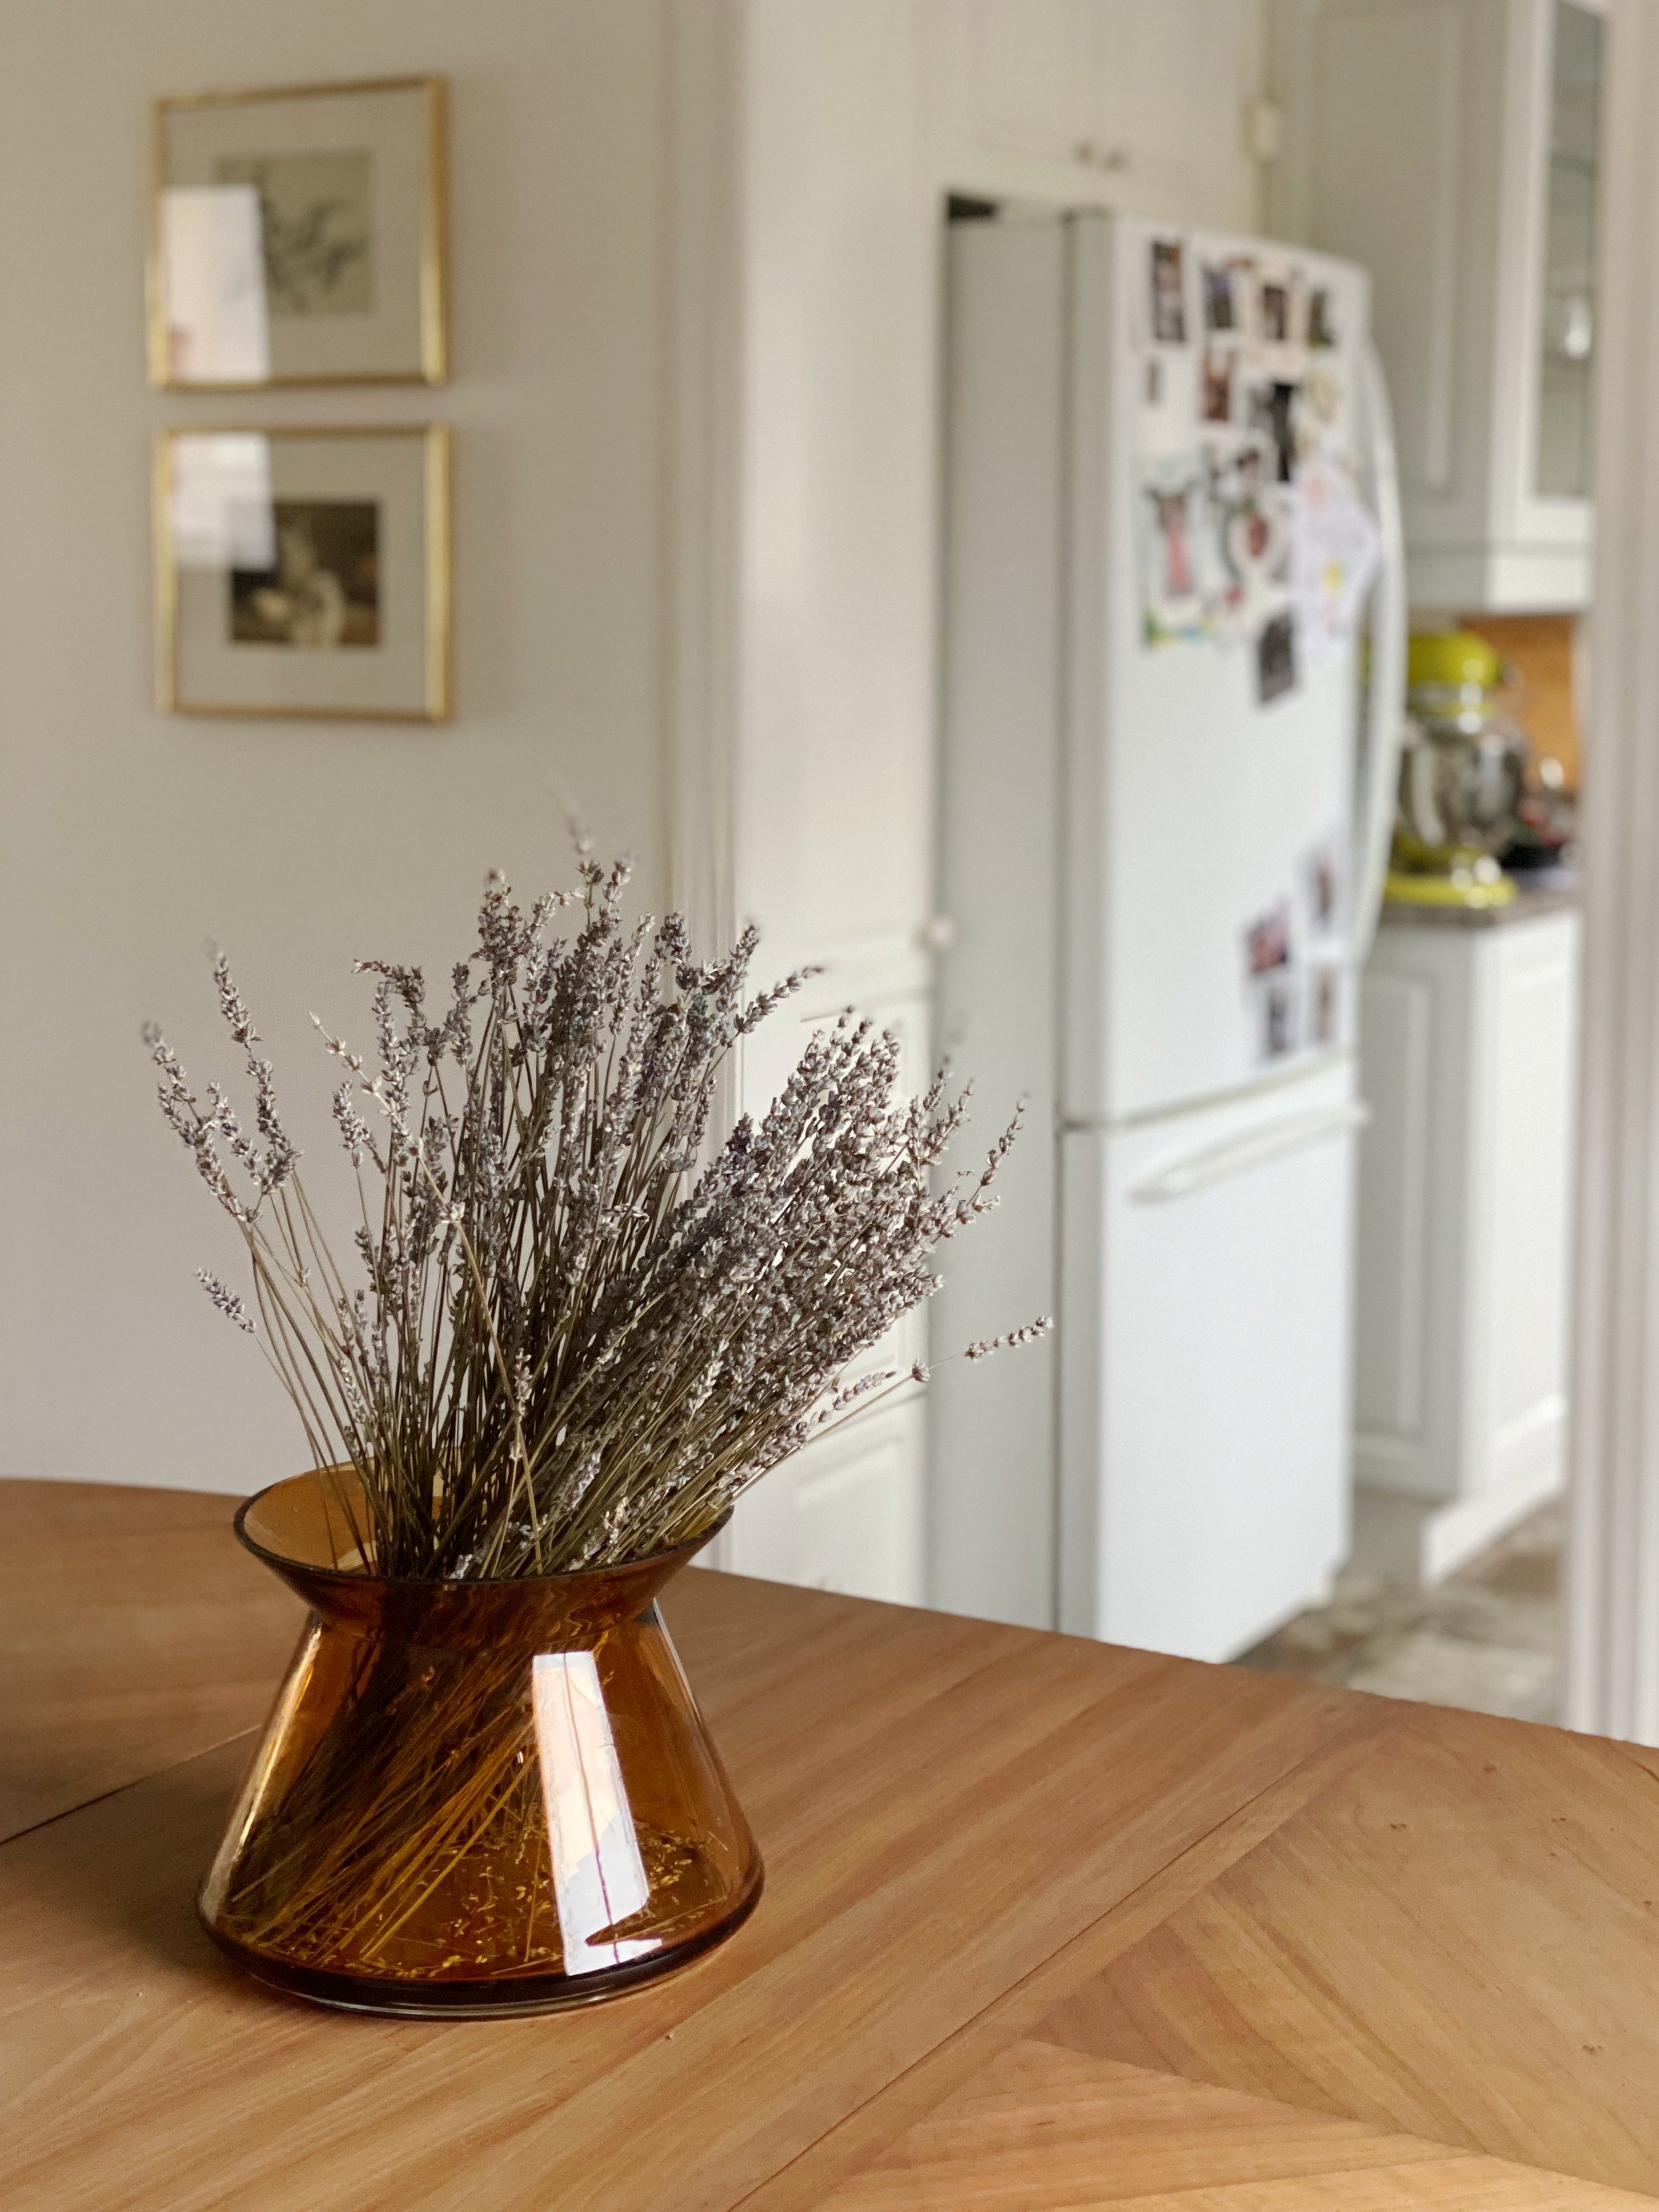
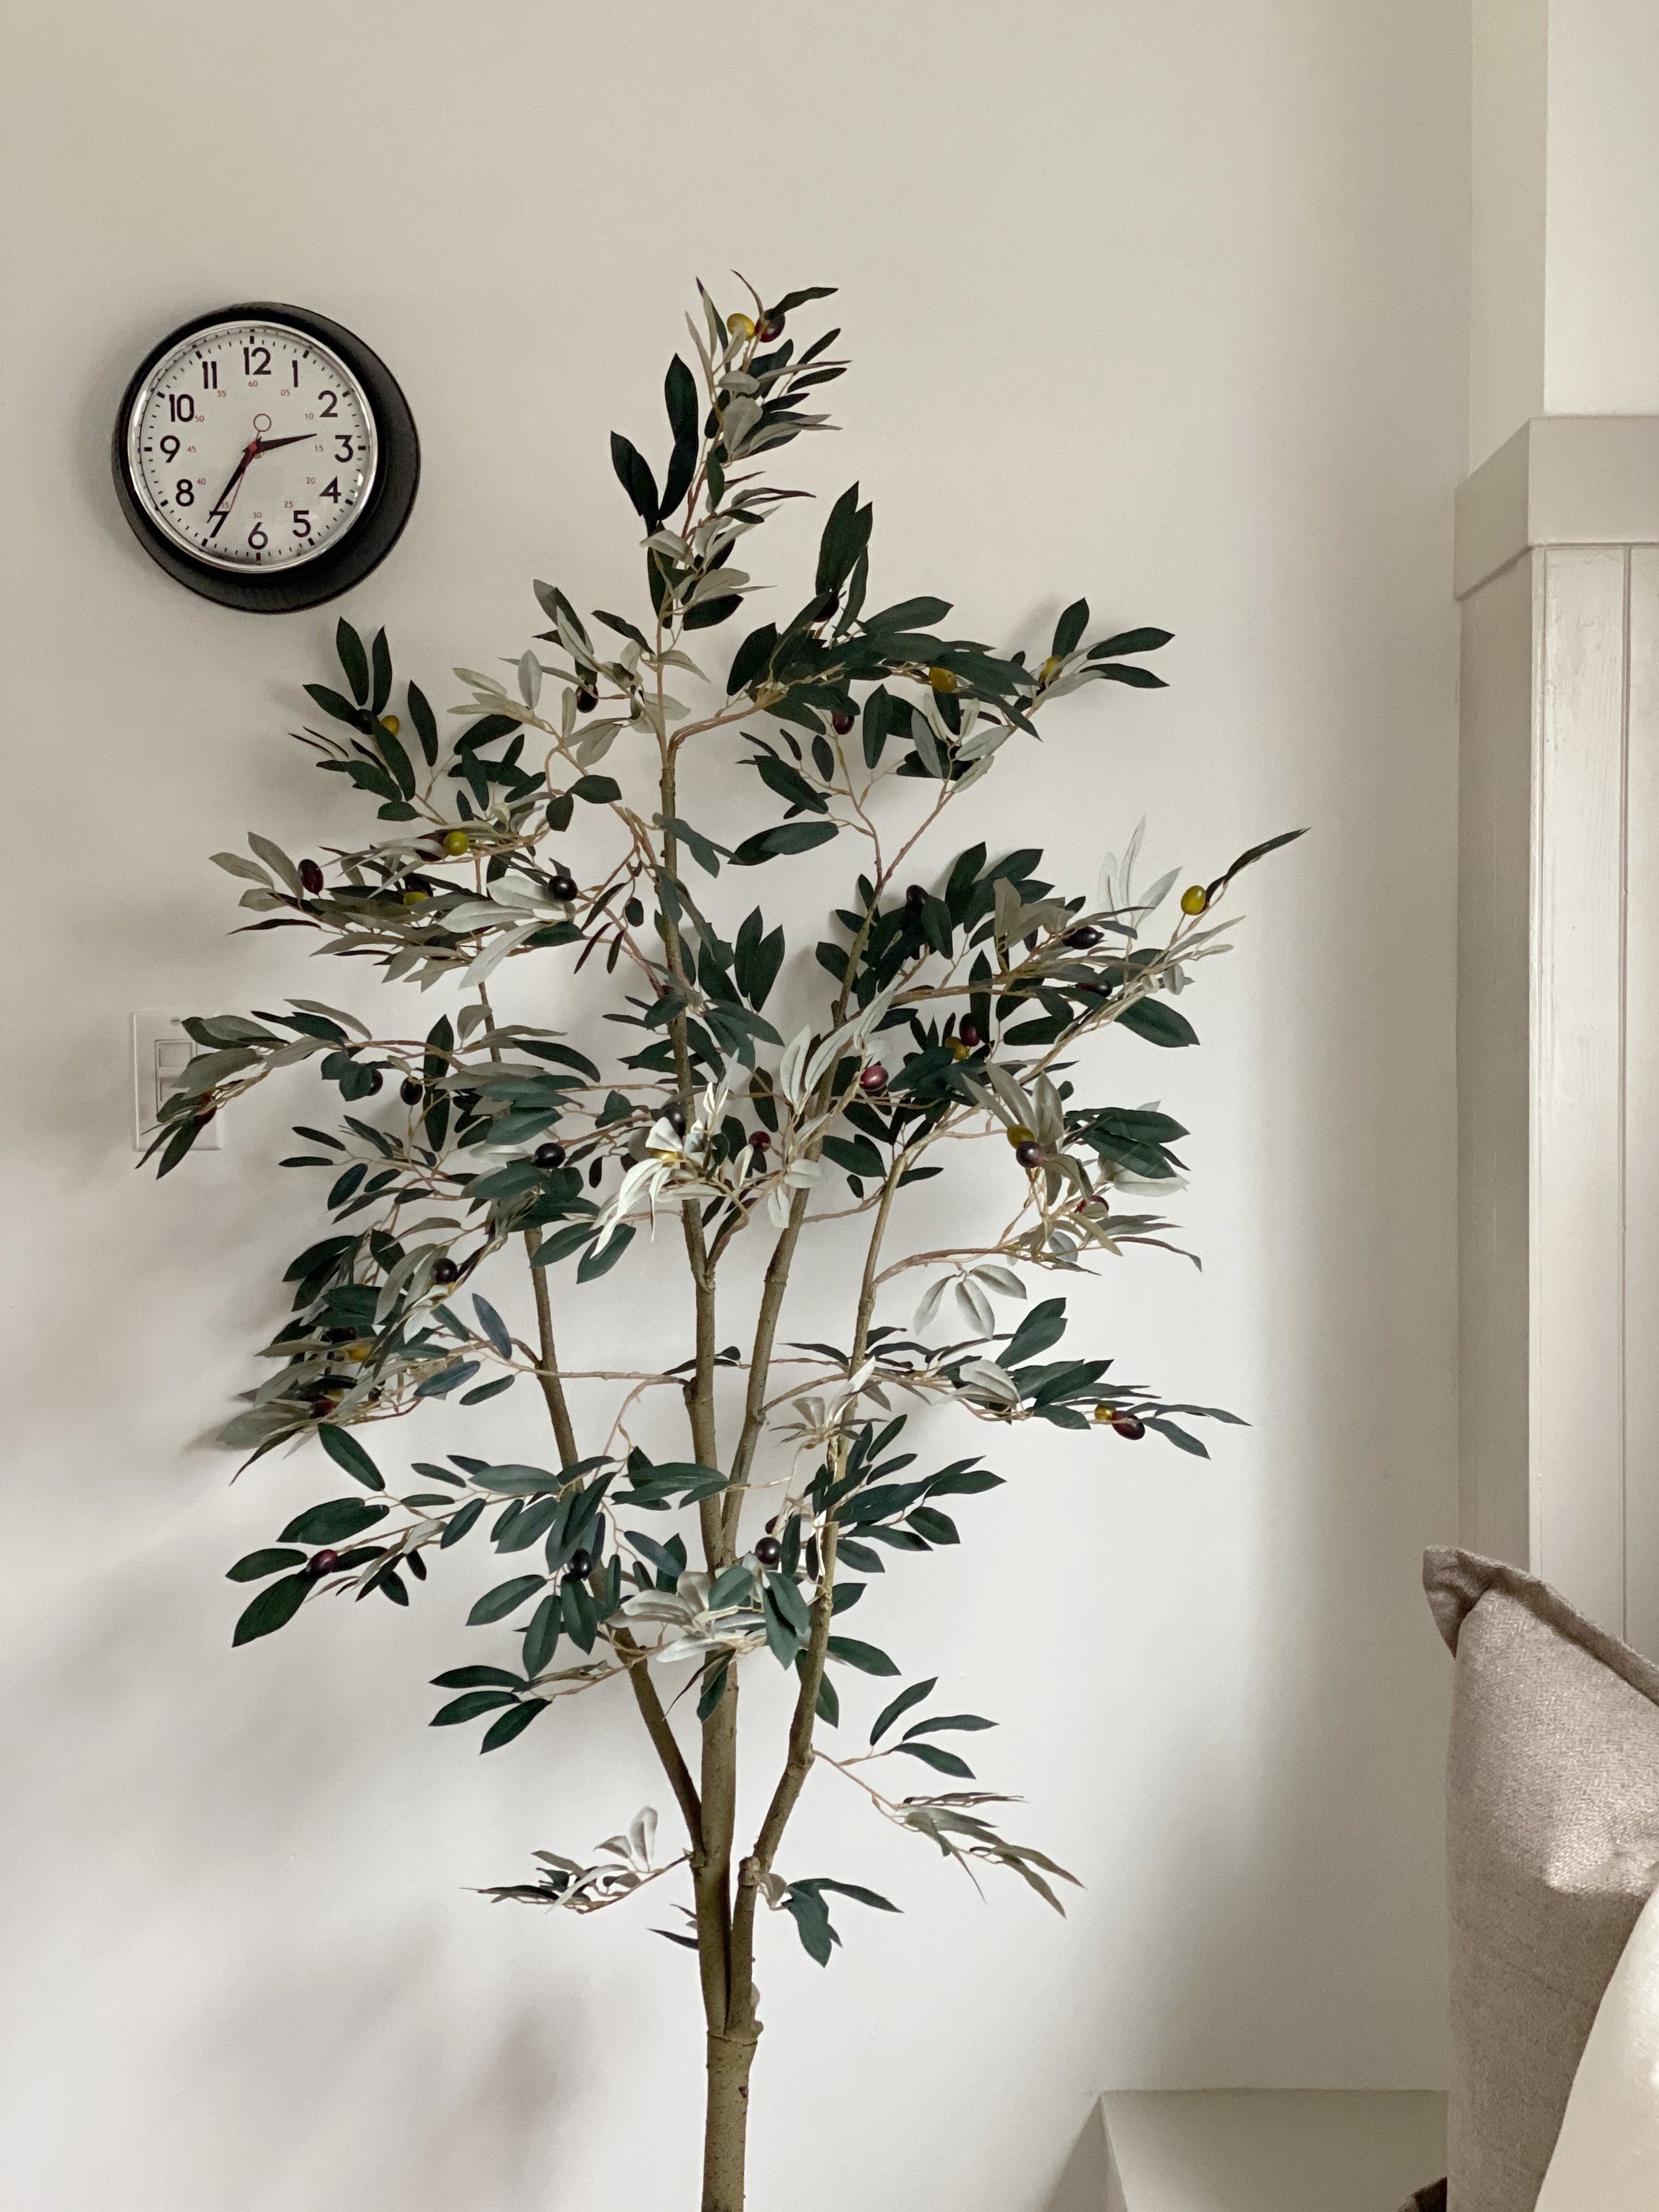
I opted to add a faux olive tree that sits in a woven basket to the corner of the space. Although this is definitely very trendy at the moment, I genuinely love the life-giving feeling that plants, whether real or faux, add to a room. An olive tree is just so beautifully symbolic of a dining space - a place where people are gathered and conversations are had - so I had to include it. I dressed the table with a big angular amber glass vase filled with dried lavender to bring a pop of colour to the room and decided to style the table with some of our dinnerware and napkins, just to get the full vision. I cannot wait to gather around a big meal here with the people that I love.
I can’t believe this room is complete (other than the chairs, of course). Participating in this challenge for the first time has been such a whirlwind of excitement. Although eight weeks seems like a long time to pull a space together, it was definitely a lot of work. I learned so much in the process and am proud of the outcome. I tend to bounce around my home, working on different projects as they arise, but it was fun to totally focus on one space. It gave me permission to dig in deep to what our needs were for this room and how I could make my dreams for it come to fruition. I will definitely be participating in the One Room Challenge again, but for now, I’m ready to cook a big meal, pour a glass of wine, and enjoy this room. Because it’s done.

I hope you enjoyed following along with me on this process of taking our dining room from near-empty to usable and complete. I really appreciate you being here and encouraging me along the way. If you enjoyed our reveal and want to see what the other participants achieved in their own spaces, be sure to check out what some of the other guest participants of the ORC shared this week. I cannot even believe some of these room transformations.
Until next time!


Dining Room Source Guide
Paint: Wall + Trim Colour // Built-In Bench + Wall Feature Colour // Display Cabinet Colour (Underground)
Furniture: Dining Table, thrifted // Display Cabinet, DIY // Chairs, Wayfair
Decor: Area Rug, Wayfair // Chandelier, Wayfair // Faux Olive Tree, Wayfair // Woven Basket Pot (for tree), Homesense // Roman Blind Fabric, H&M Home // Woodblock Art Print, The Printable Studio // Vintage Botanical Sketch, Olive & Oak Collective // Vintage Kitchen Still-Life Print, North Prints // Artwork Frames, thrifted // Wall Clock, Homesense // White Throw Cushions, Simons // Green-Grey Throw Cushions, Homesense // Black Striped Throw Cushions, Homesense // Multi-Toned Throw Cushions, Homesense // Chair Cushions, Ikea
// Amber Glass Vase, Homesense
Cabinet Contents: Grace Print, Society6 // Aloe Pot, Indigo // Money Tree Woven Pot, Ikea // Modern Grey Terracotta Vase, Indigo // Stoneware Vase, H&M Home // Small Glazed Ceramic Vase, H&M Home // Small Wooden Square Tray, H&M Home // Barware/Glasses, collected over time // Ribbed Plant Pot, Home Depot // Woven Basket, Simons
Styling: Dinnerware, Bed Bath & Beyond // Linen Napkins, H&M Home // Wooden Napkin Rings, Homesense