A Handful of Half-Done Projects | ORC, Week 06

Welcome back for another progress update on our dining room! I have been working on our dining room as part of the One Room Challenge over the past six weeks and I’ve certainly been riding the project roller coaster of highs and lows. You know when you take on a project and you feel excited and inspired, but as you get going you constantly teeter between “I’ve got this!” and “I’ve lost my mind!”? This week, I’m definitely sitting on the “I’ve lost my mind!” side of things. We have two weeks - I repeat, two weeks - left to wrap this thing up and it feels like my to-do list is only growing at this point. This week’s progress didn’t contribute to my peace of mind.
Because this week I barely made a dent on my to-do’s. I wrapped up last week’s update on a real high after tackling a big portion of the built-in bench. I felt inspired and excited to get to the fun part of the project: the wall feature, paint, wrapping up the table project, and final touches. I’ve got this! But then my kid came home from daycare with an ear infection, I caught laryngitis, the temperature dropped enough to limit my ability to work outdoors, and my husband went out of town for work leaving me to solo parent a sick kid while sick myself. I’ve lost my mind! I did manage to squeeze in a few projects over the past week during the odd nap time, but nothing substantial enough to feel like I’ve made a dent. I didn’t even feel inspired enough to want to write this update, but alas, there is value in documenting the lows too. Every project goes through this cycle. I need to remind myself that these demanding expectations for flashy progress are all ones I put on myself. Today I’m taking a deep breath, letting it go, and doing my best to appreciate what did get done.
As a reminder, this is where I left things last week.


The Wall Feature Plan
With the bench built, my next step was to surround it with a textured wall feature that went part way up the wall. My initial plan was to use beadboard, but as I started to source out material, the scale of the beadboard strips felt off and not quite what I was looking for. I wanted something that felt a little more substantial. I ended up finding packages of knotty V-grooved pine that perfectly fit the look and style I was after. I knew the vertical grooves would add some texture, but the overall look would still be fairly simple and clean.
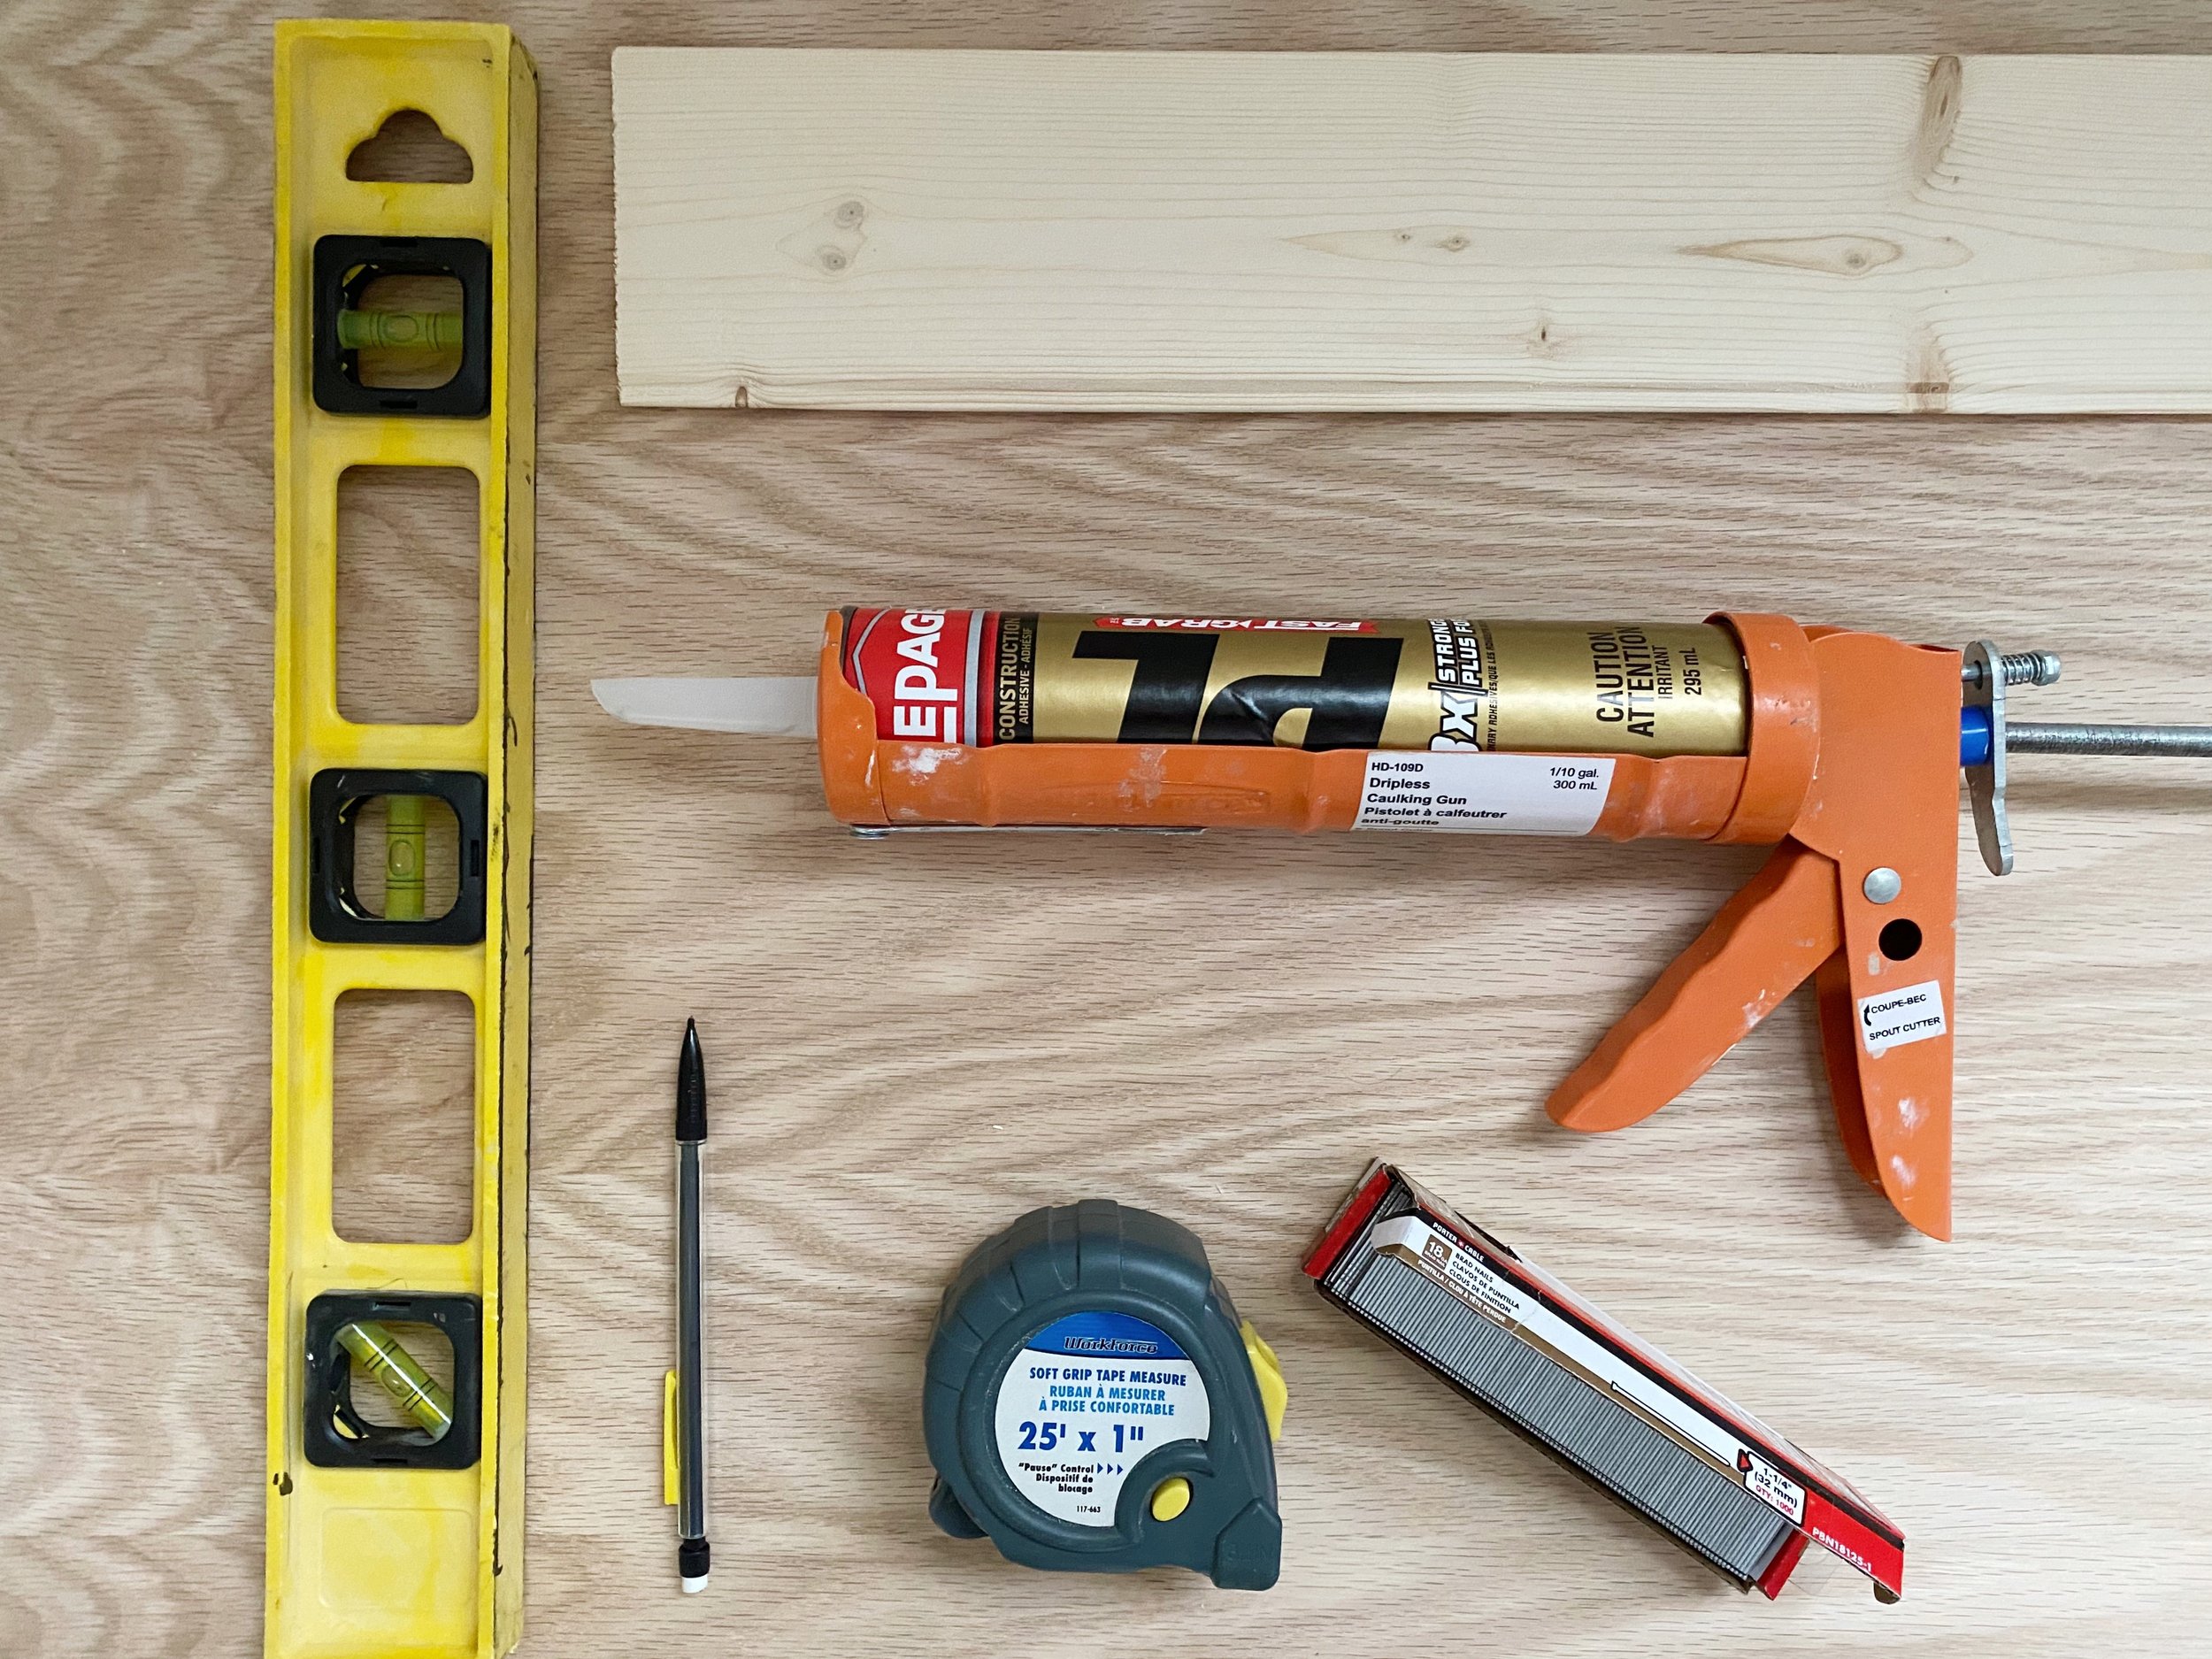
I decided I wanted to wrap the boards around each column in the bench nook and trim it out with the same 3 1/2” trim I used on the front of the bench. I’ve been trying to work with the weird bulkhead/column combo in this space and I felt like facing the columns would make this little bench area feel extra cozy. I calculated the material I would need and made a trip to Home Depot to pick up the boards, some brad nails, glue, and paintable caulk.

The Progress
The installation process was actually quite easy. The boards came with some instruction that I followed and once I got going, they went up pretty quickly. The most important part was to ensure the first piece was level and then I also checked with each new piece I installed to make sure I wasn’t getting off track. I had to make a few strange cuts to fit around the window frame, but I simply used my jigsaw on those pieces. Otherwise, I had to cut down the odd board to fit perfectly, but I used my circular saw to make the straight cuts (a table saw would have been even more straightforward). I added a little bit of glue to the back of each board, tapped it into place, and added a few brad nails at an angle to secure them to the wall.

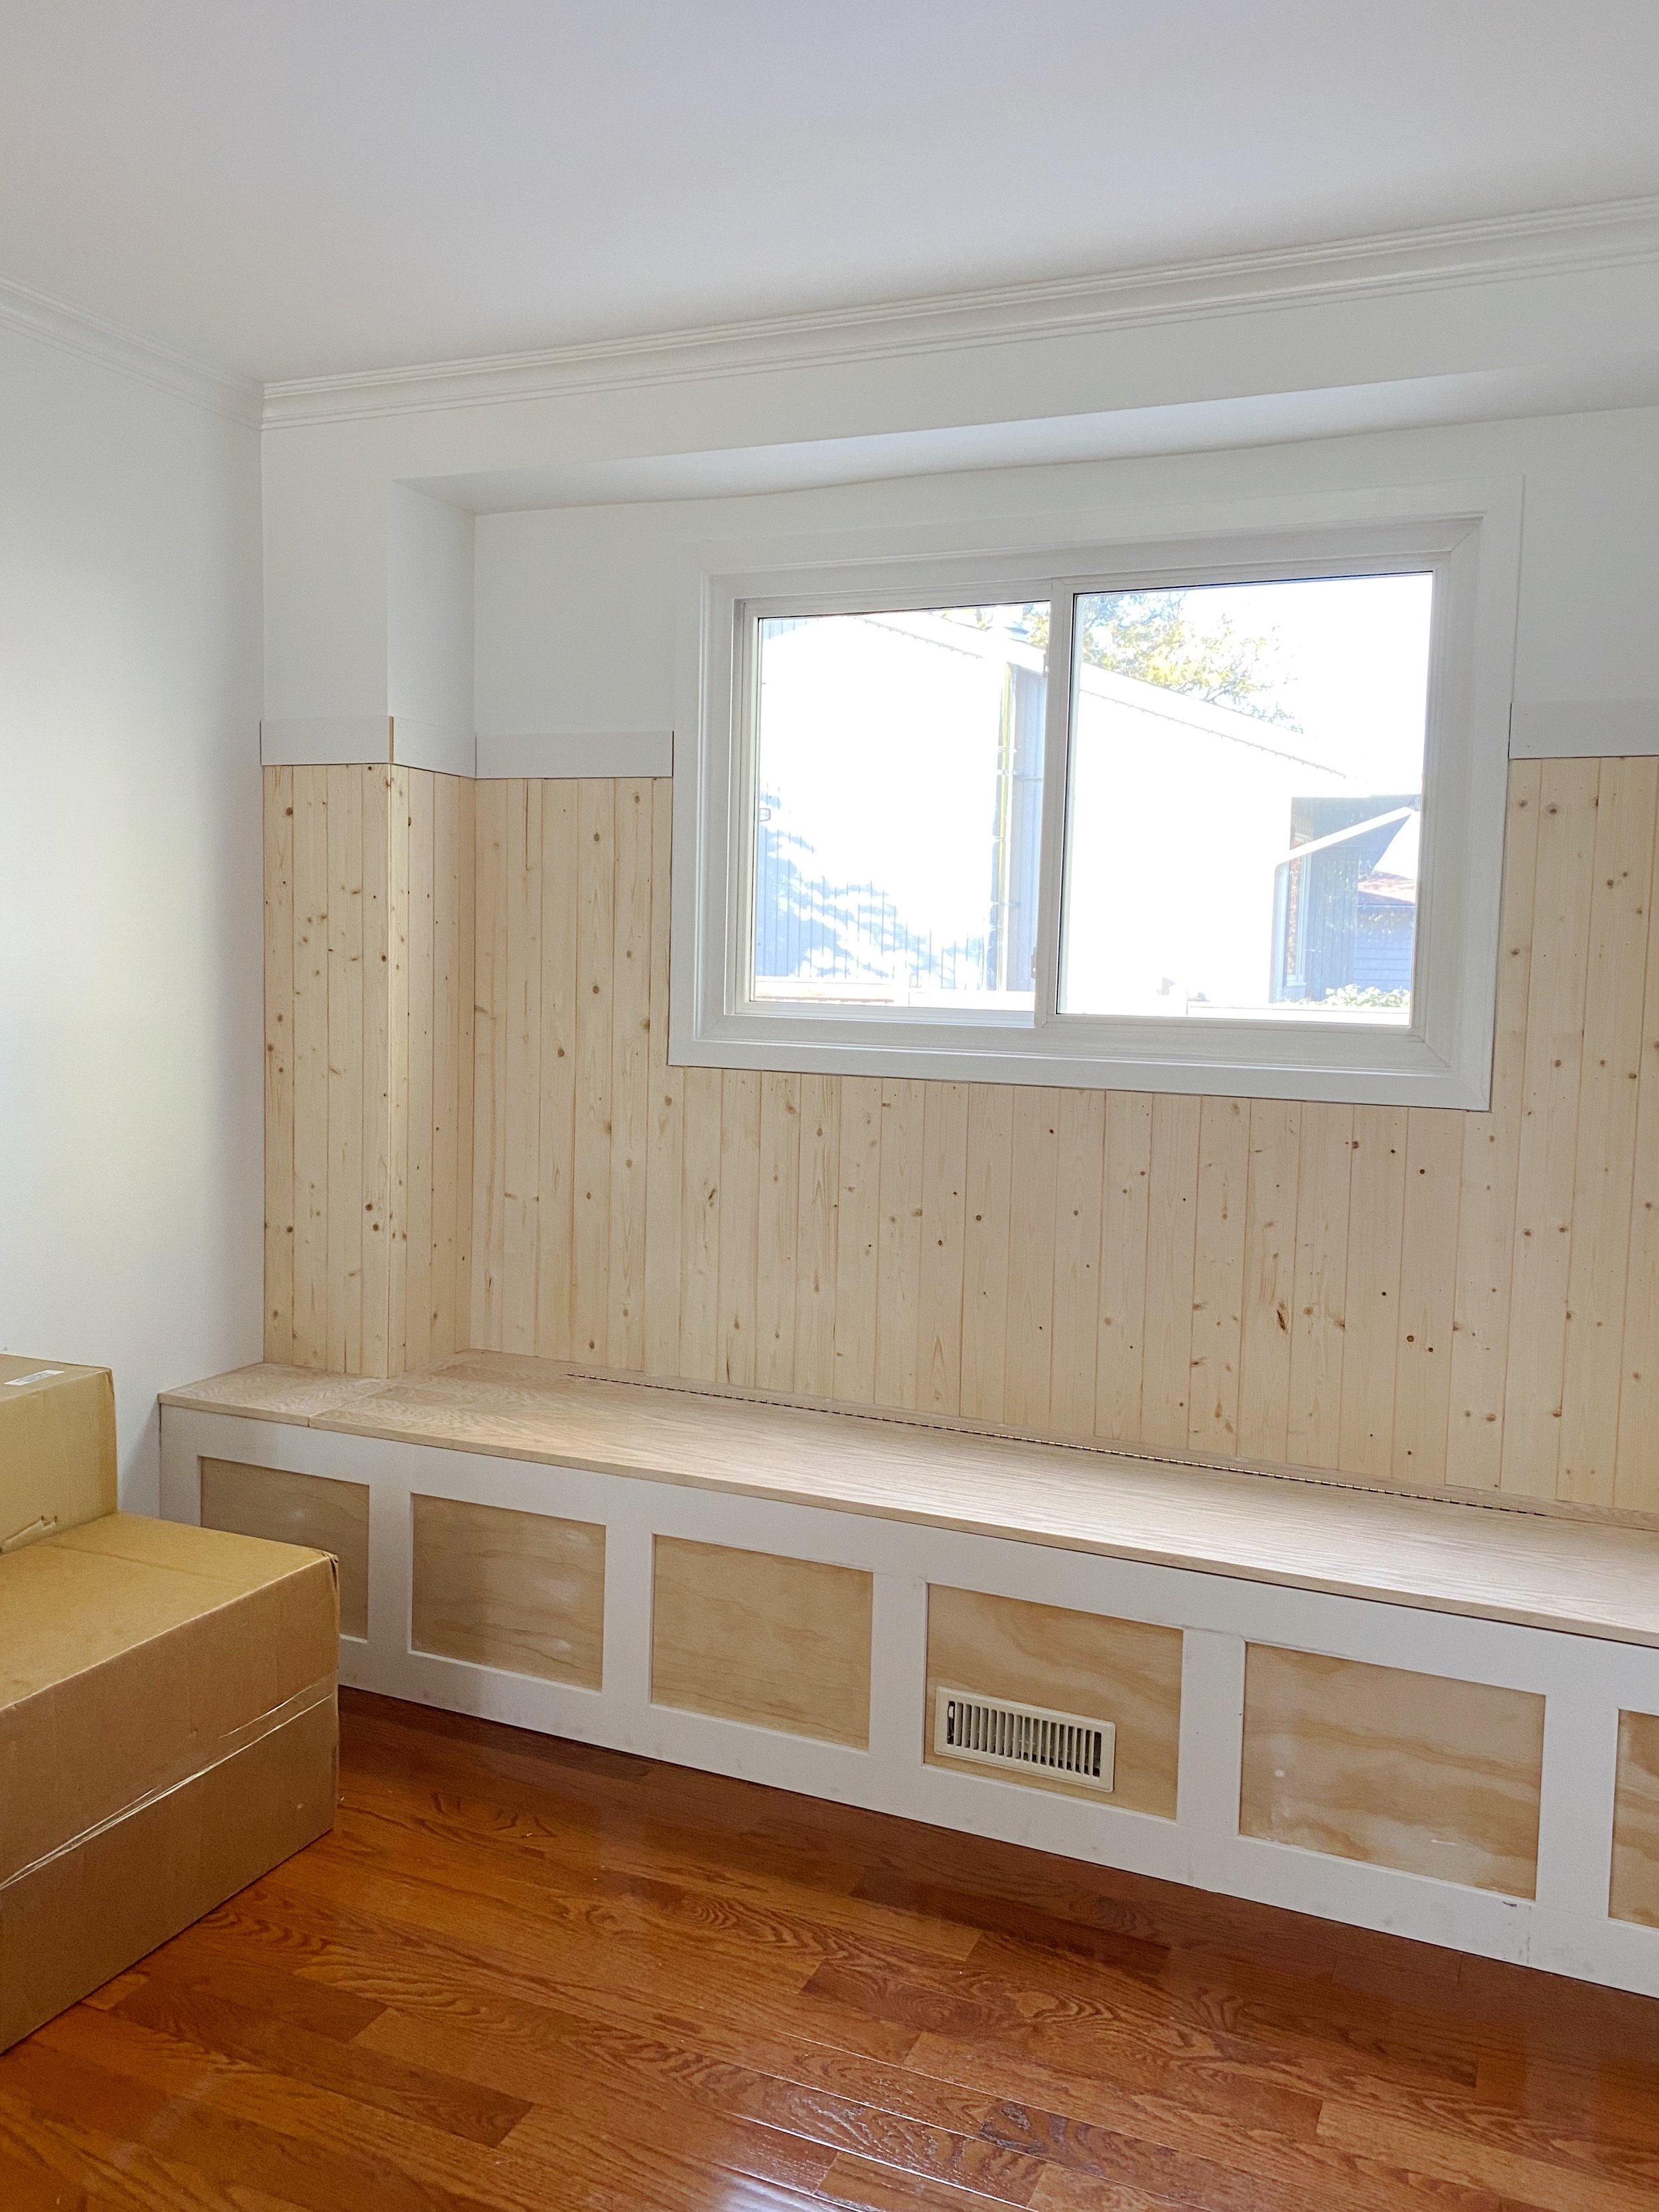
Once the boards were all in place, I cut down a few pieces of the 3 1/2” trim and installed them along the tops, making sure they were level horizontally. There are a few gaps between the tops of the pine boards and the trim pieces, but I’ll be able to fill those in with caulking. I didn’t photograph it, but I was also able to fill in all the nail holes with some filler (now that was a process!) and sand down the entire thing.
Where I left it, it’s ready for a coat of primer and then I will fill any holes I may have missed, caulk all the cracks and gaps, and finally paint this baby. I think I will feel so much more settled about the overall project once I completely wrap up this built-in bench project. It has taken most of my attention and time and has felt the most daunting. I know that having it finished will be such a huge weight off my shoulders.
The Dining Table
I’ve been saying for the past few weeks that I would share about the dining room table. I purchased a table secondhand on our local buy-and-sell that I was hoping to strip the finish off of to be able to refinish it in a tone that better matched our design style. I wanted to share it as it’s own weekly update, much like the display cabinet project, but it’s just been taking me so much longer than I expected. I am almost finished with it and the process of refinishing has definitely been a journey, so I do want to still share more in depth about that (fingers crossed for next week), but I figured that in the spirit of celebrating small wins this week, I’d just give a brief update now.

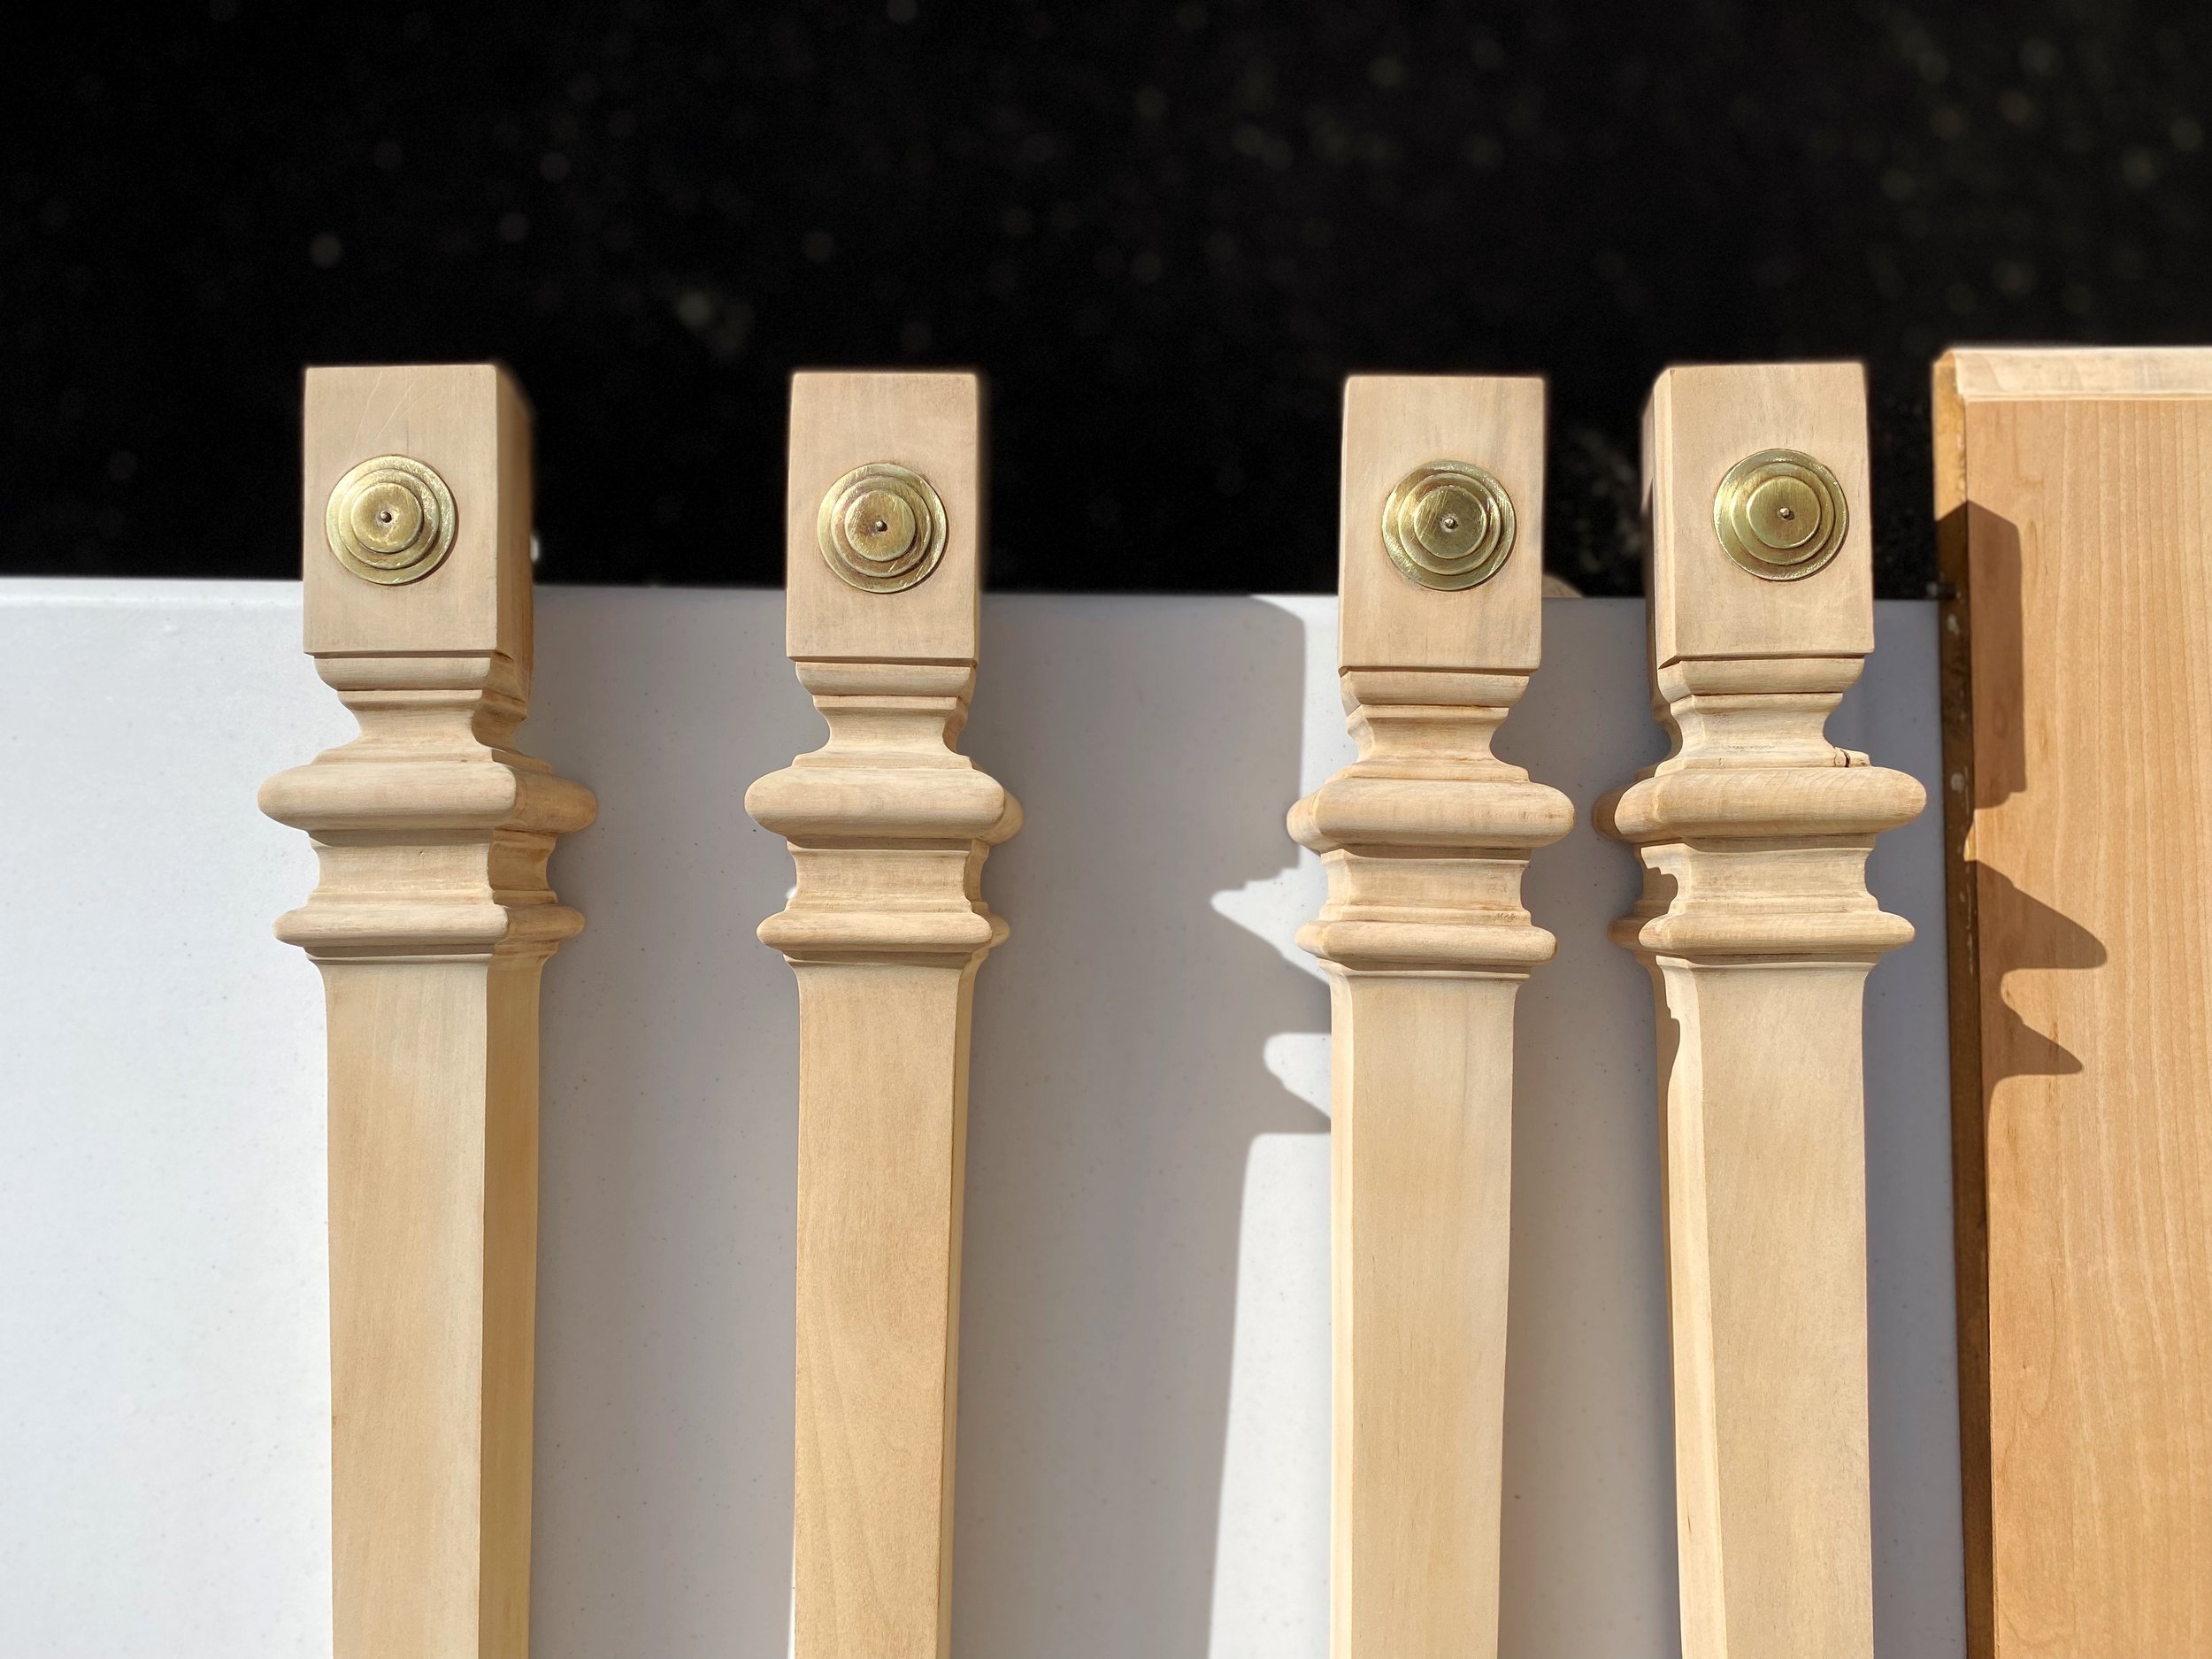
The table has such a beautiful shape, but the finish on it was really yellowed and had a strange speckling in it (as you can see in the before shot of the legs above). I wanted it to be finished in a tone that felt a little more natural. To save myself a lot of sanding, I decided to try using a chemical stripper. I had never used stripper before this table and it was definitely very intimidating to try, but it ended up being really easy and satisfying to watch the old finish almost melt away. It required a lot of prep and clean up though, so it wasn’t easy to just tackle a little bit of it here and there. I had to set up and devote at least a few hours to the process at a time to make it worth my while.
Once I used the chemical stripper and the table had dried out, I still had to do some sanding. You can see in the photo below the state of the table after only using the stripper (on the left) and the state of the table after using the stripper and sanding with a 150 and 220 grit sandpaper (on the right). With most of the work done for me through the stripper, the sanding step took very little elbow grease and minimal time. I love the natural look of the stripped and sanded wood.

I have already started applying the new finish to the table. I’m going to save the reveal of that for when I share more extensively about this project. But so far, I will say that applying it has taken me longer than I expected thanks to the cooler weather. I don’t want to apply it inside the house (because of the fumes), but the temperatures outdoors are a little too cool for the stain to properly cure. It’s been a struggle. But I noticed that we have a few nice days in our forecast this weekend so I’m going to do everything in my power to take advantage of them.

In writing this, I actually do feel a little better about what I was able to accomplish this week. I’m an all-in kind of person and like to devote a substantial amount of time to one thing so I can feel the satisfaction of checking it off my list. But life usually doesn’t work that way and projects don’t usually either. I may only have a handful of half-done projects in my hands at the end of this week, but I have still been moving forward and I’m grateful for that. These next two weeks are going to be good - I’m calling it now!
The Next Steps
Prime the entire bench and wall feature
Caulk all the cracks and fill all the extra holes I missed initially
Paint the entire bench and wall feature
Add more coats of stain to the table
Put a protective coat on the table
Sew a DIY roman shade for the window
Decorate the crap out of this space! (install the light, roll out the rug, find/make pillows for the bench, hang art)

Here’s to hoping this next week will feel like more of an I’ve got this! kind of week. If you enjoyed this update and want to be inspired by what other people are doing in their spaces for this challenge, be sure to check out what some of the other guest participants of the ORC are up to this week. The finishing touches are starting to happen and these spaces are looking too good.