The Plan For Our Multi-Purpose Laundry Room
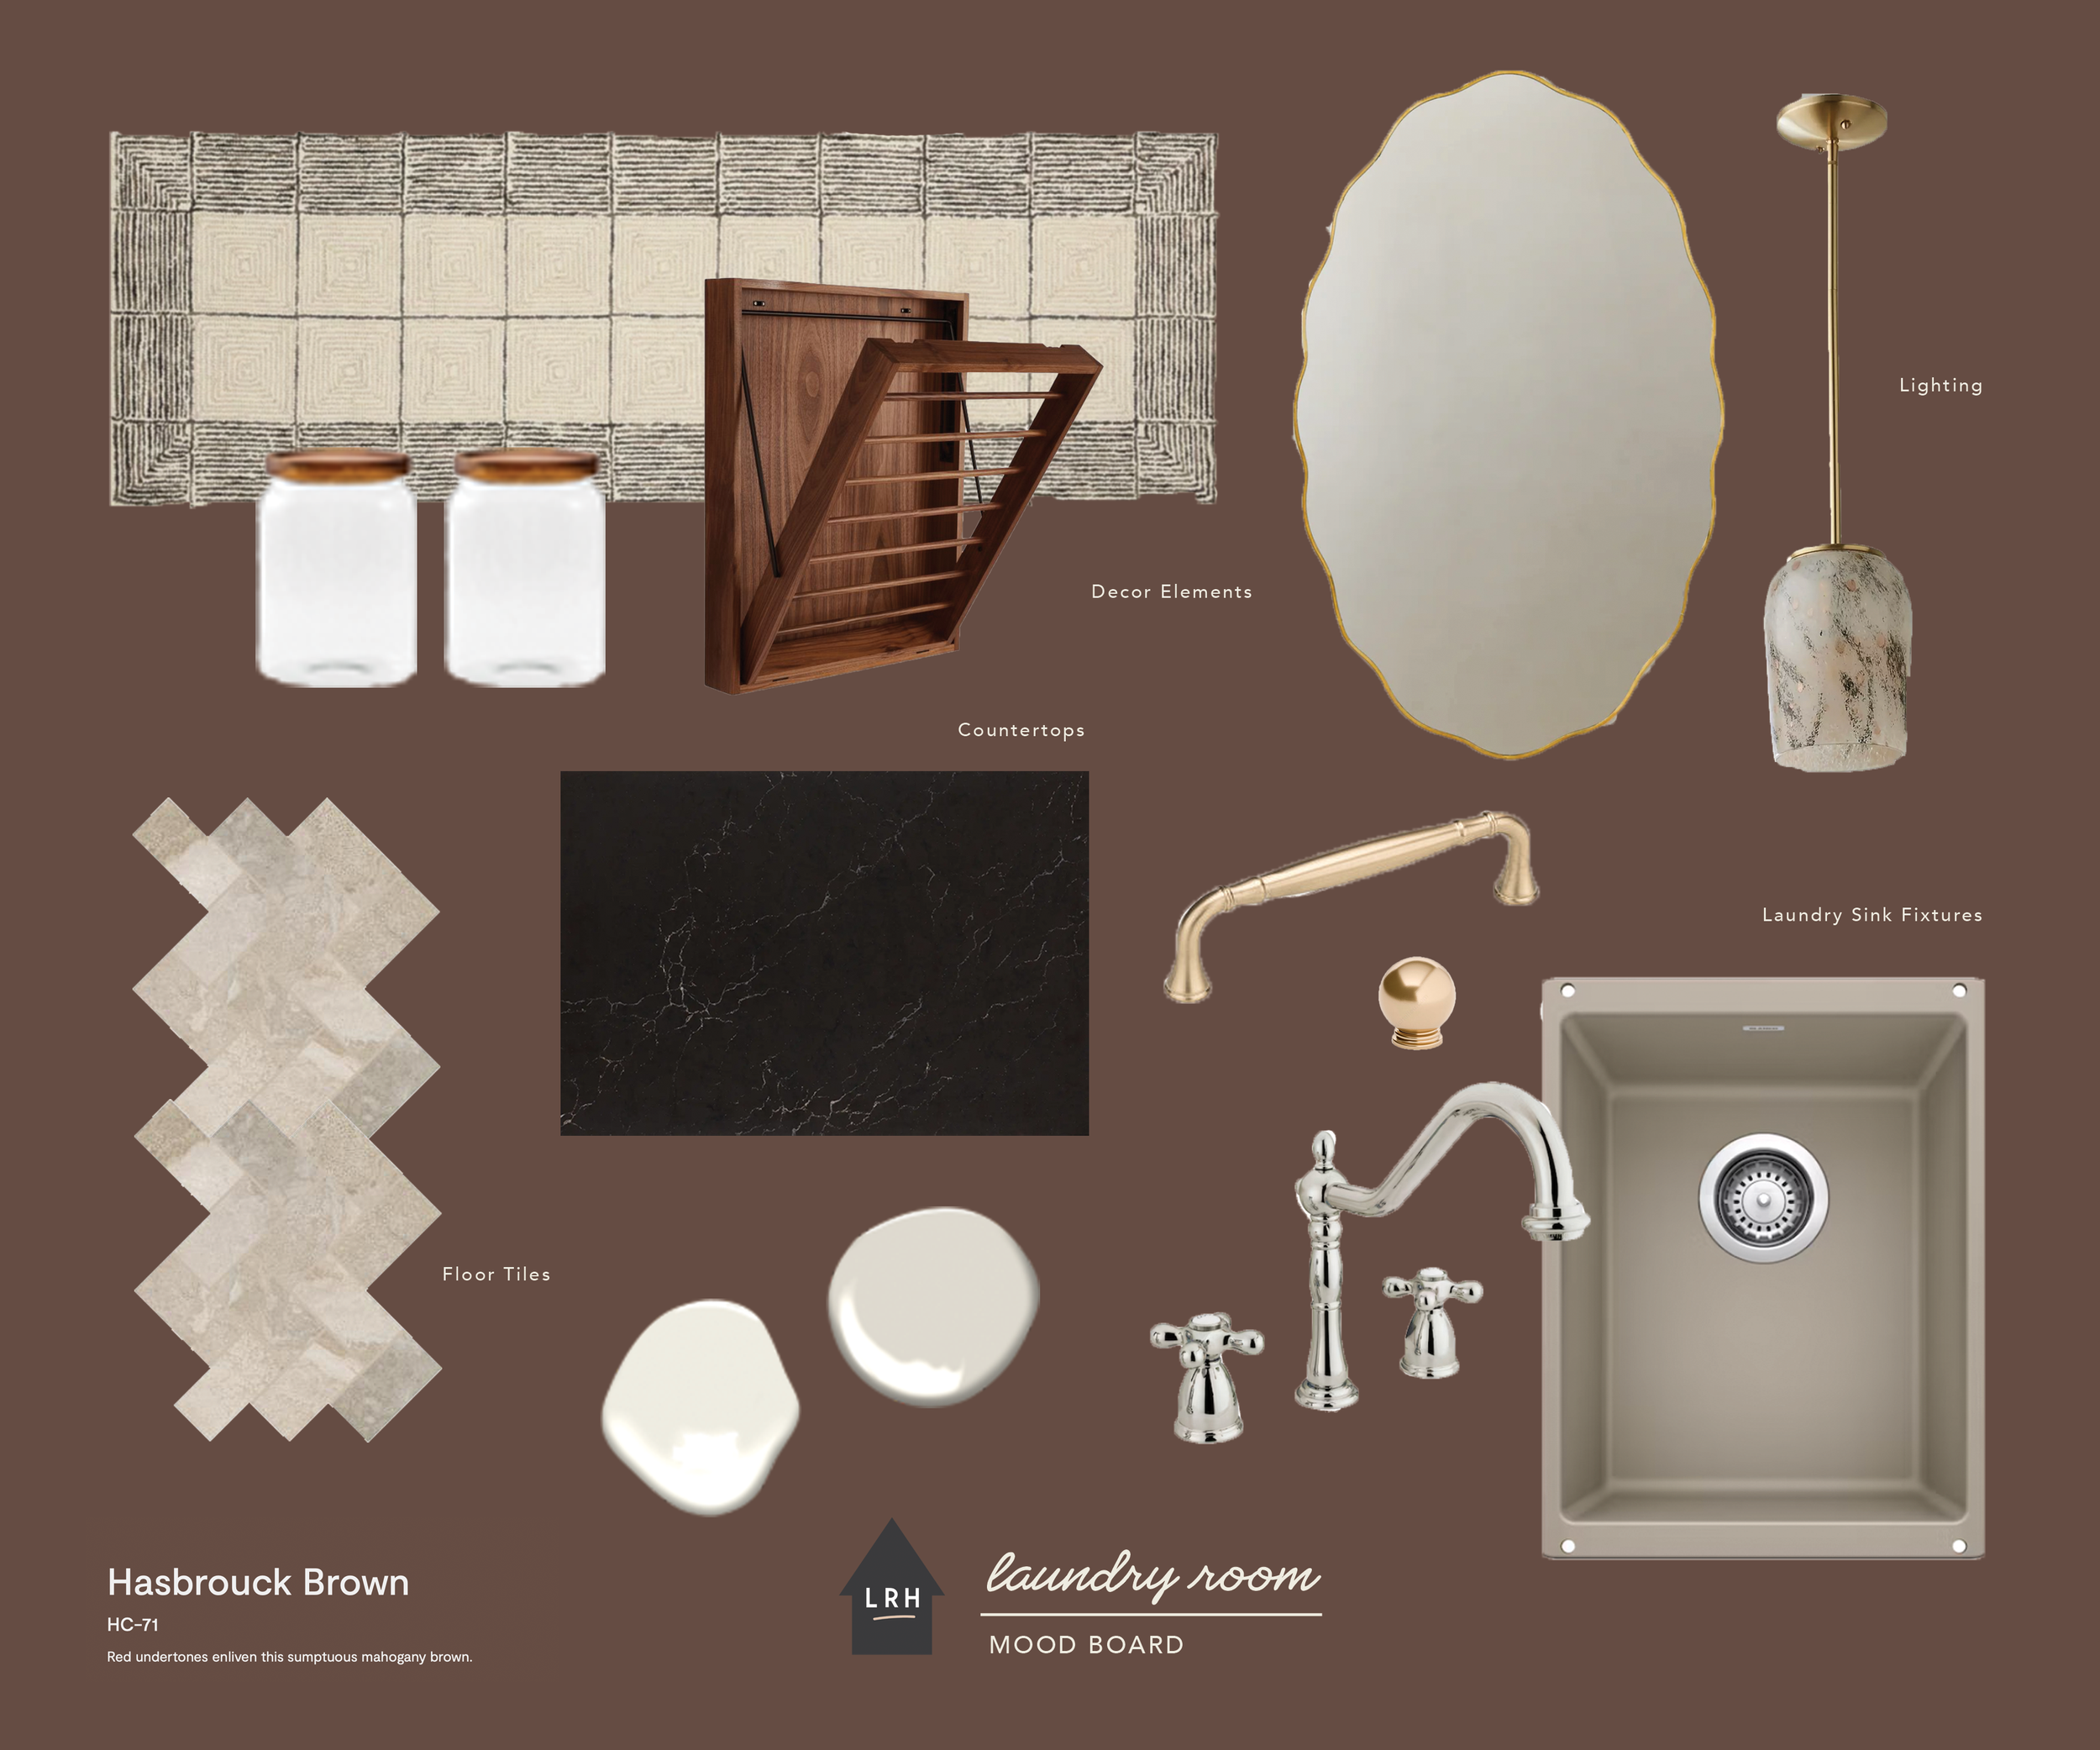
Runner Rug // Storage Jars // Drying Rack // Oval Mirror // Pendant // Herringbone Tile // Faucet // Sink
We outsourced the majority of our current renovation project and it has been fun to watch the professionals expertly do their part. I have already learned so much about the management of a large project and appreciate what can be accomplished when you allow people who are really good at their craft do what they do best. Yet I’ve still been itching to get involved. It’s one thing to create the plan, but I believe it’s one of life’s greatest satisfactions to be involved in bringing it to life. Nothing can beat the feeling of having a physical hand in the creation of your home. The satisfaction of learning something new, trying something new, and pushing yourself to grow in what you’re capable of for the sole purpose of catering your space to your family’s values and needs is unmatched. It brings me joy just to think about it.
All to say, I wanted to get involved in this project in some way and the area it made most sense to do that was in the laundry room. The sunroom, living room, dining room, and kitchen all have soaring sloped ceilings and tall walls that made even painting nearly impossible for a couple of DIYers, but the laundry room is a small room off the kitchen with a lot of potential for improvement.
The Before Photos


The original laundry room was a small little throughway off the garage. It had a door straight ahead towards our living room, as well as a door right off the entrance into the kitchen. In the short time that we spent in the house before beginning the renovation, this tight space immediately became a pain point for our family. The room had a small sink and some upper storage, but no space for coat or shoe storage even though it was the main entrance we personally used. The limited floorspace was quickly cluttered with shoes and coats and bags billowed on top of the laundry machines. I knew we would need to include it in the renovation because the very limited space needed to be completely reimagined in order for it to serve us.
Right outside of the original laundry room was a closet that housed cleaning supplies. This made for a strange cluster of doors and an inefficient use of space. We asked our contractors to remove that closet and absorb the footprint into the laundry room, giving us some additional square footage to work with. In the planning process, we had our kitchen supplier quote us on custom cabinetry for this reimagined space that would turn this small room into a powerhouse as a laundry room, mudroom, and additional pantry. But as the numbers came in for the renovation as a whole, we had to start making decisions about where we should and shouldn’t use our budget. The custom cabinetry in the laundry room ended up getting cut.
What We Had The Professionals Do

As I mentioned, we had our contractors remove the existing closet outside of the laundry room and reframe the one wall to absorb the additional space into this room. This gave us some additional square footage. They also shifted the doorway between the laundry room and the kitchen down the wall to a new location to accommodate our new kitchen design and eliminate the bottleneck at the door from the garage. This process was part of our greater renovation project, so it was easy enough for them to do that work for us.

Looking into the laundry room from the kitchen
The professionals also adjusted some of the plumbing for the laundry sink, allowing us to center the sink on the door from the kitchen. Even though this was a very small change, the necessity of it will make more sense in the final design. The electrical work in here was also fairly minimal, but we did need to have some of the ceiling fixtures relocated and added a new junction box for the pendant I plan to hang over the laundry sink.
In addition to the plumbing and electrical, we had the professionals hang and finish the drywall and will have them tile the floors and paint the walls when they tackle the floors and paint in the rest of the renovation. We certainly could have done these two components ourselves, but the cost to have the professionals do it was very minimal since they were already doing these parts in the greater renovation. It just made sense to lump it in and save us the time of doing it ourselves.

The laundry room with drywall hung
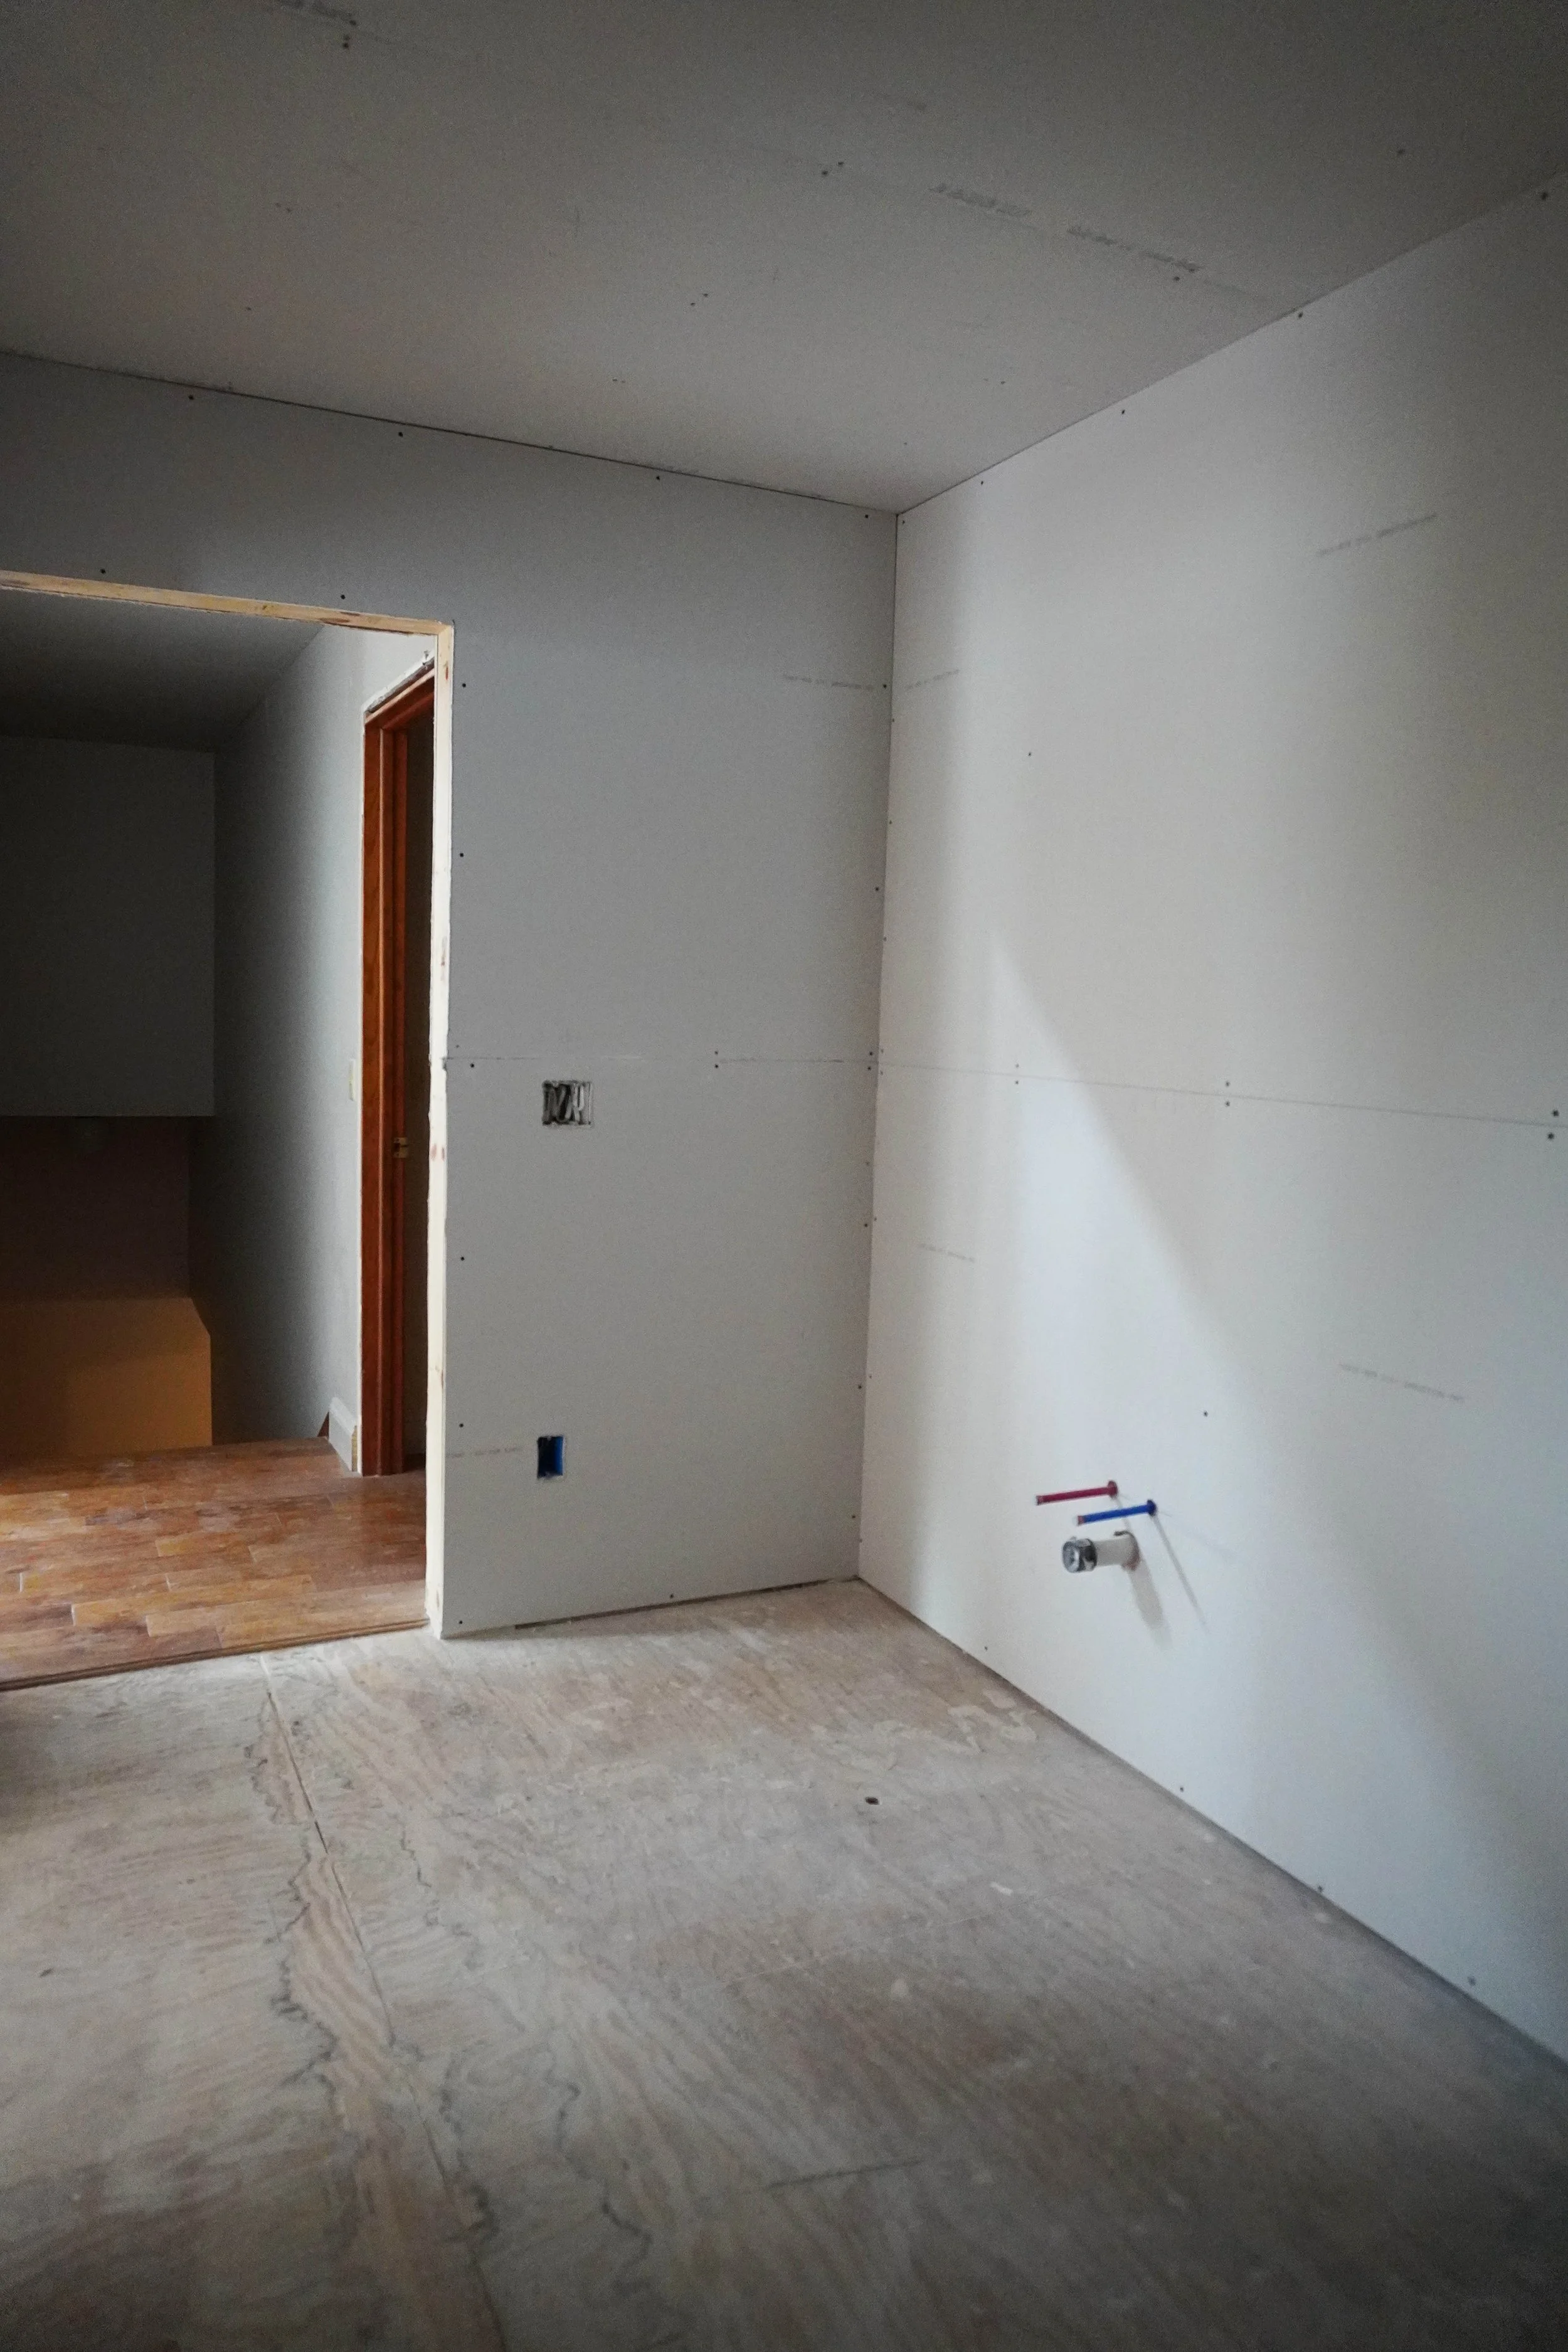
The laundry room with drywall hung
Our Design Plan
That leaves us with the finishing work. So what involvement will we have? Let me get into that!
We have decided to use IKEA cabinetry to customize this space for our needs. My hope is to build it in and paint it in a custom color to give the space as high-end of a look that we can get by doing it ourselves. IKEA has a fantastic kitchen planner that allows you to completely customize a design to fit the dimensions of your space. I input the dimensions of the wall I was working with (including the plumbing and door locations) and then could play around with their products to find a configuration that worked for our space.
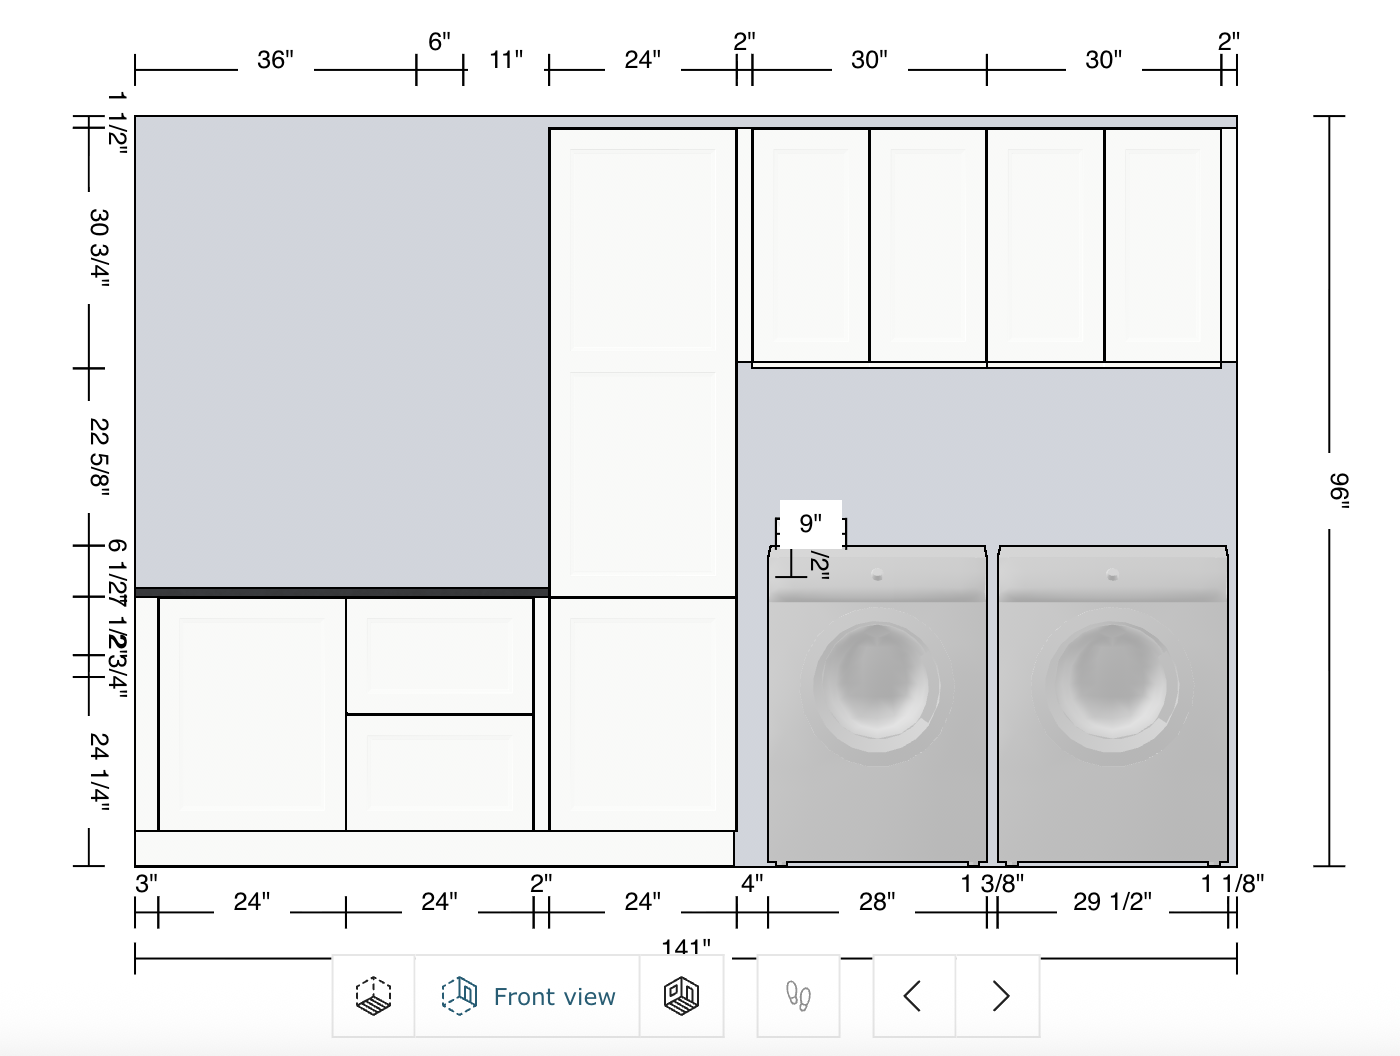
The IKEA cabinetry planner wall view
I played with the design for a long time before settling on a final configuration. In total, I came up with four different versions, exhausting all my options. I love their planner tool because you can see your choices in both 2D and 3D models, which is really helpful to give you a sense for how the space will feel. You can customize each piece of cabinetry with the interior design, the door model, the colors, countertops, and add-ons like integrated lighting and hardware (or you can completely remove all this and just use their cabinet bases). And once you’re finished, it automatically populates your cart with exactly what you need to make the plan come to life.

The IKEA cabinetry planner 3D view
I ended up settling on the third version of the design that I created, using a tall cabinet in the center of the room to act as a spot to hang coats and store shoes, hats, and kids’ backpacks for our everyday items. The upper cabinetry above the laundry machines will store laundry and miscellaneous items (like party supplies, spare batteries, flashlights, etc). The sink cabinet and additional lower cabinet will store cleaning supplies and overflow pantry items. The room will still have a small sink and a little bit of counter space too. With a little bit of customizing, I think it will make the most of our small laundry/mudroom/pantry space and it all clocked in around $2000.
The Finishes
This is the part that makes me feel most excited and where the majority of our efforts will come in. First and foremost, my plan is to build the cabinetry in and paint it a custom color. You may be wondering whether this is possible or even wise, but honestly, I think in a space like this, it’s going to be worth the risk. Would I do this in my kitchen? Probably not. But a laundry room feels like a pretty low-risk place to try.
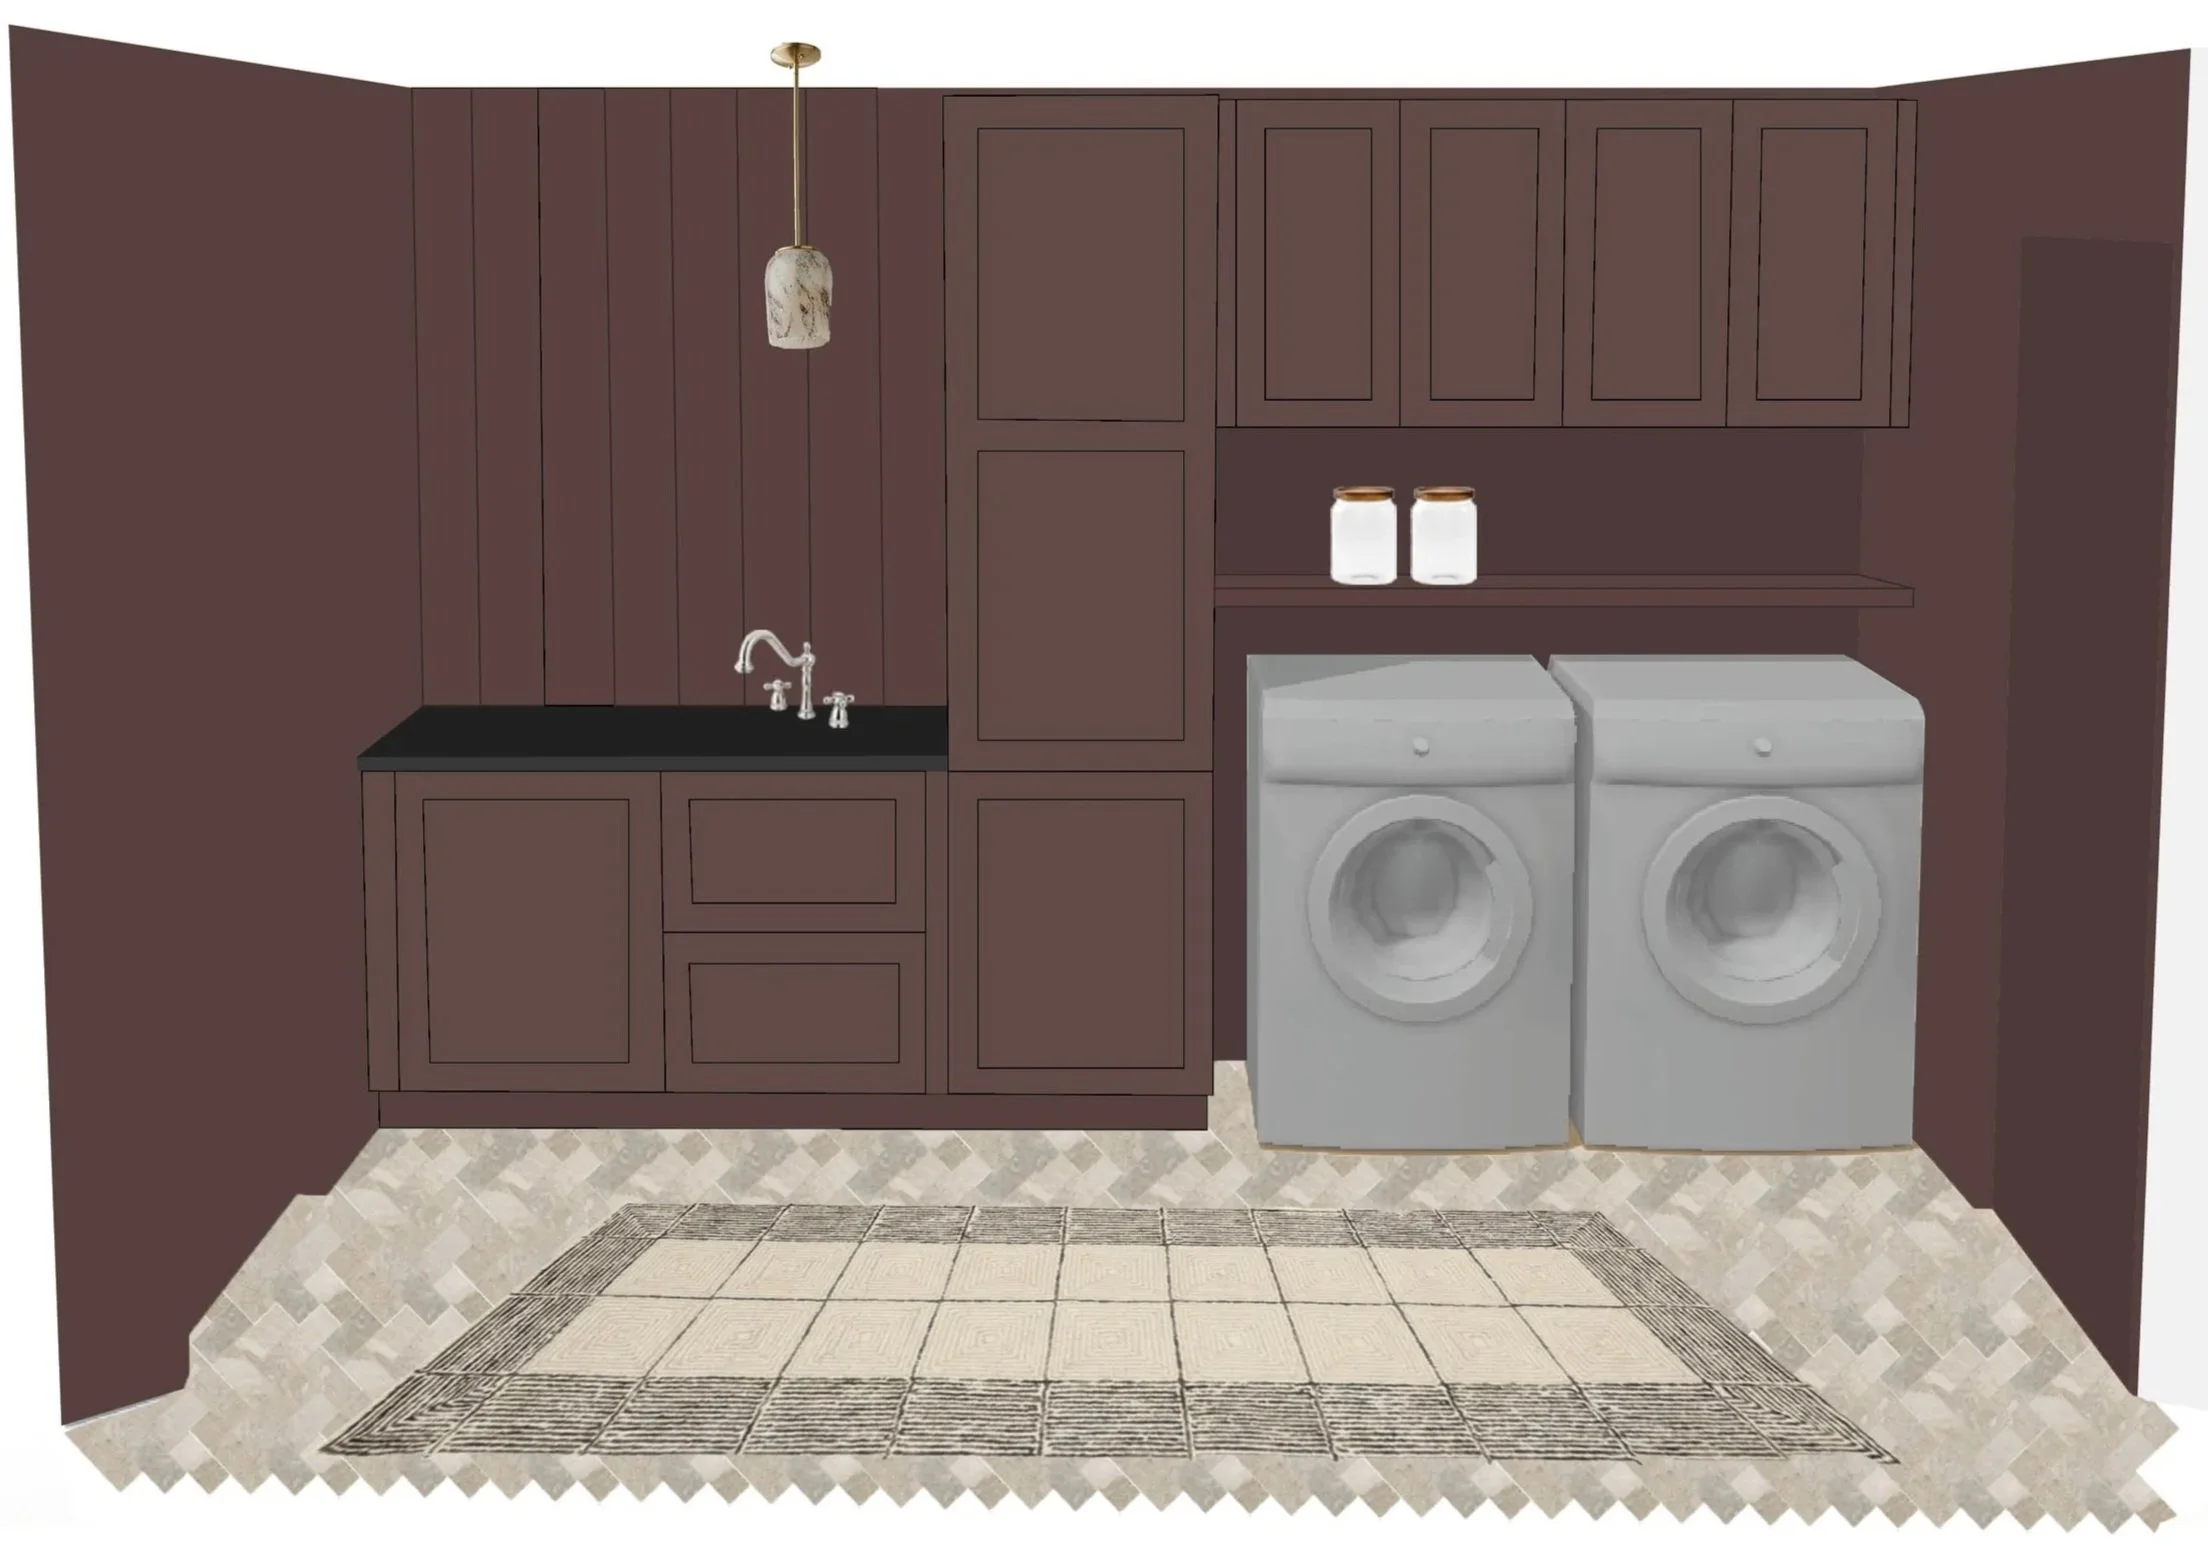
An imperfect mockup to help visualize the design
The key to painting IKEA furniture (or in this case cabinetry) is the prep. I am no stranger to painting furniture and even recently painted the kitchenette cabinetry in our guest suite and so I believe that a good finish is directly correlated to the effort you put in to laying the right foundation. If I give these cabinets a light sanding (called scuff sanding) and then apply a shellac-based high-bonding primer (like Zinnser BIN), I should be able to get a pretty durable finish. I also plan to use a good quality paint optimized for use on cabinets. My vision is to completely color drench this room in a dark moody color - walls, ceilings, trim, and cabinetry. Once I had a 3D model of the design, I drew on top of it to fully conceptualize my vision.

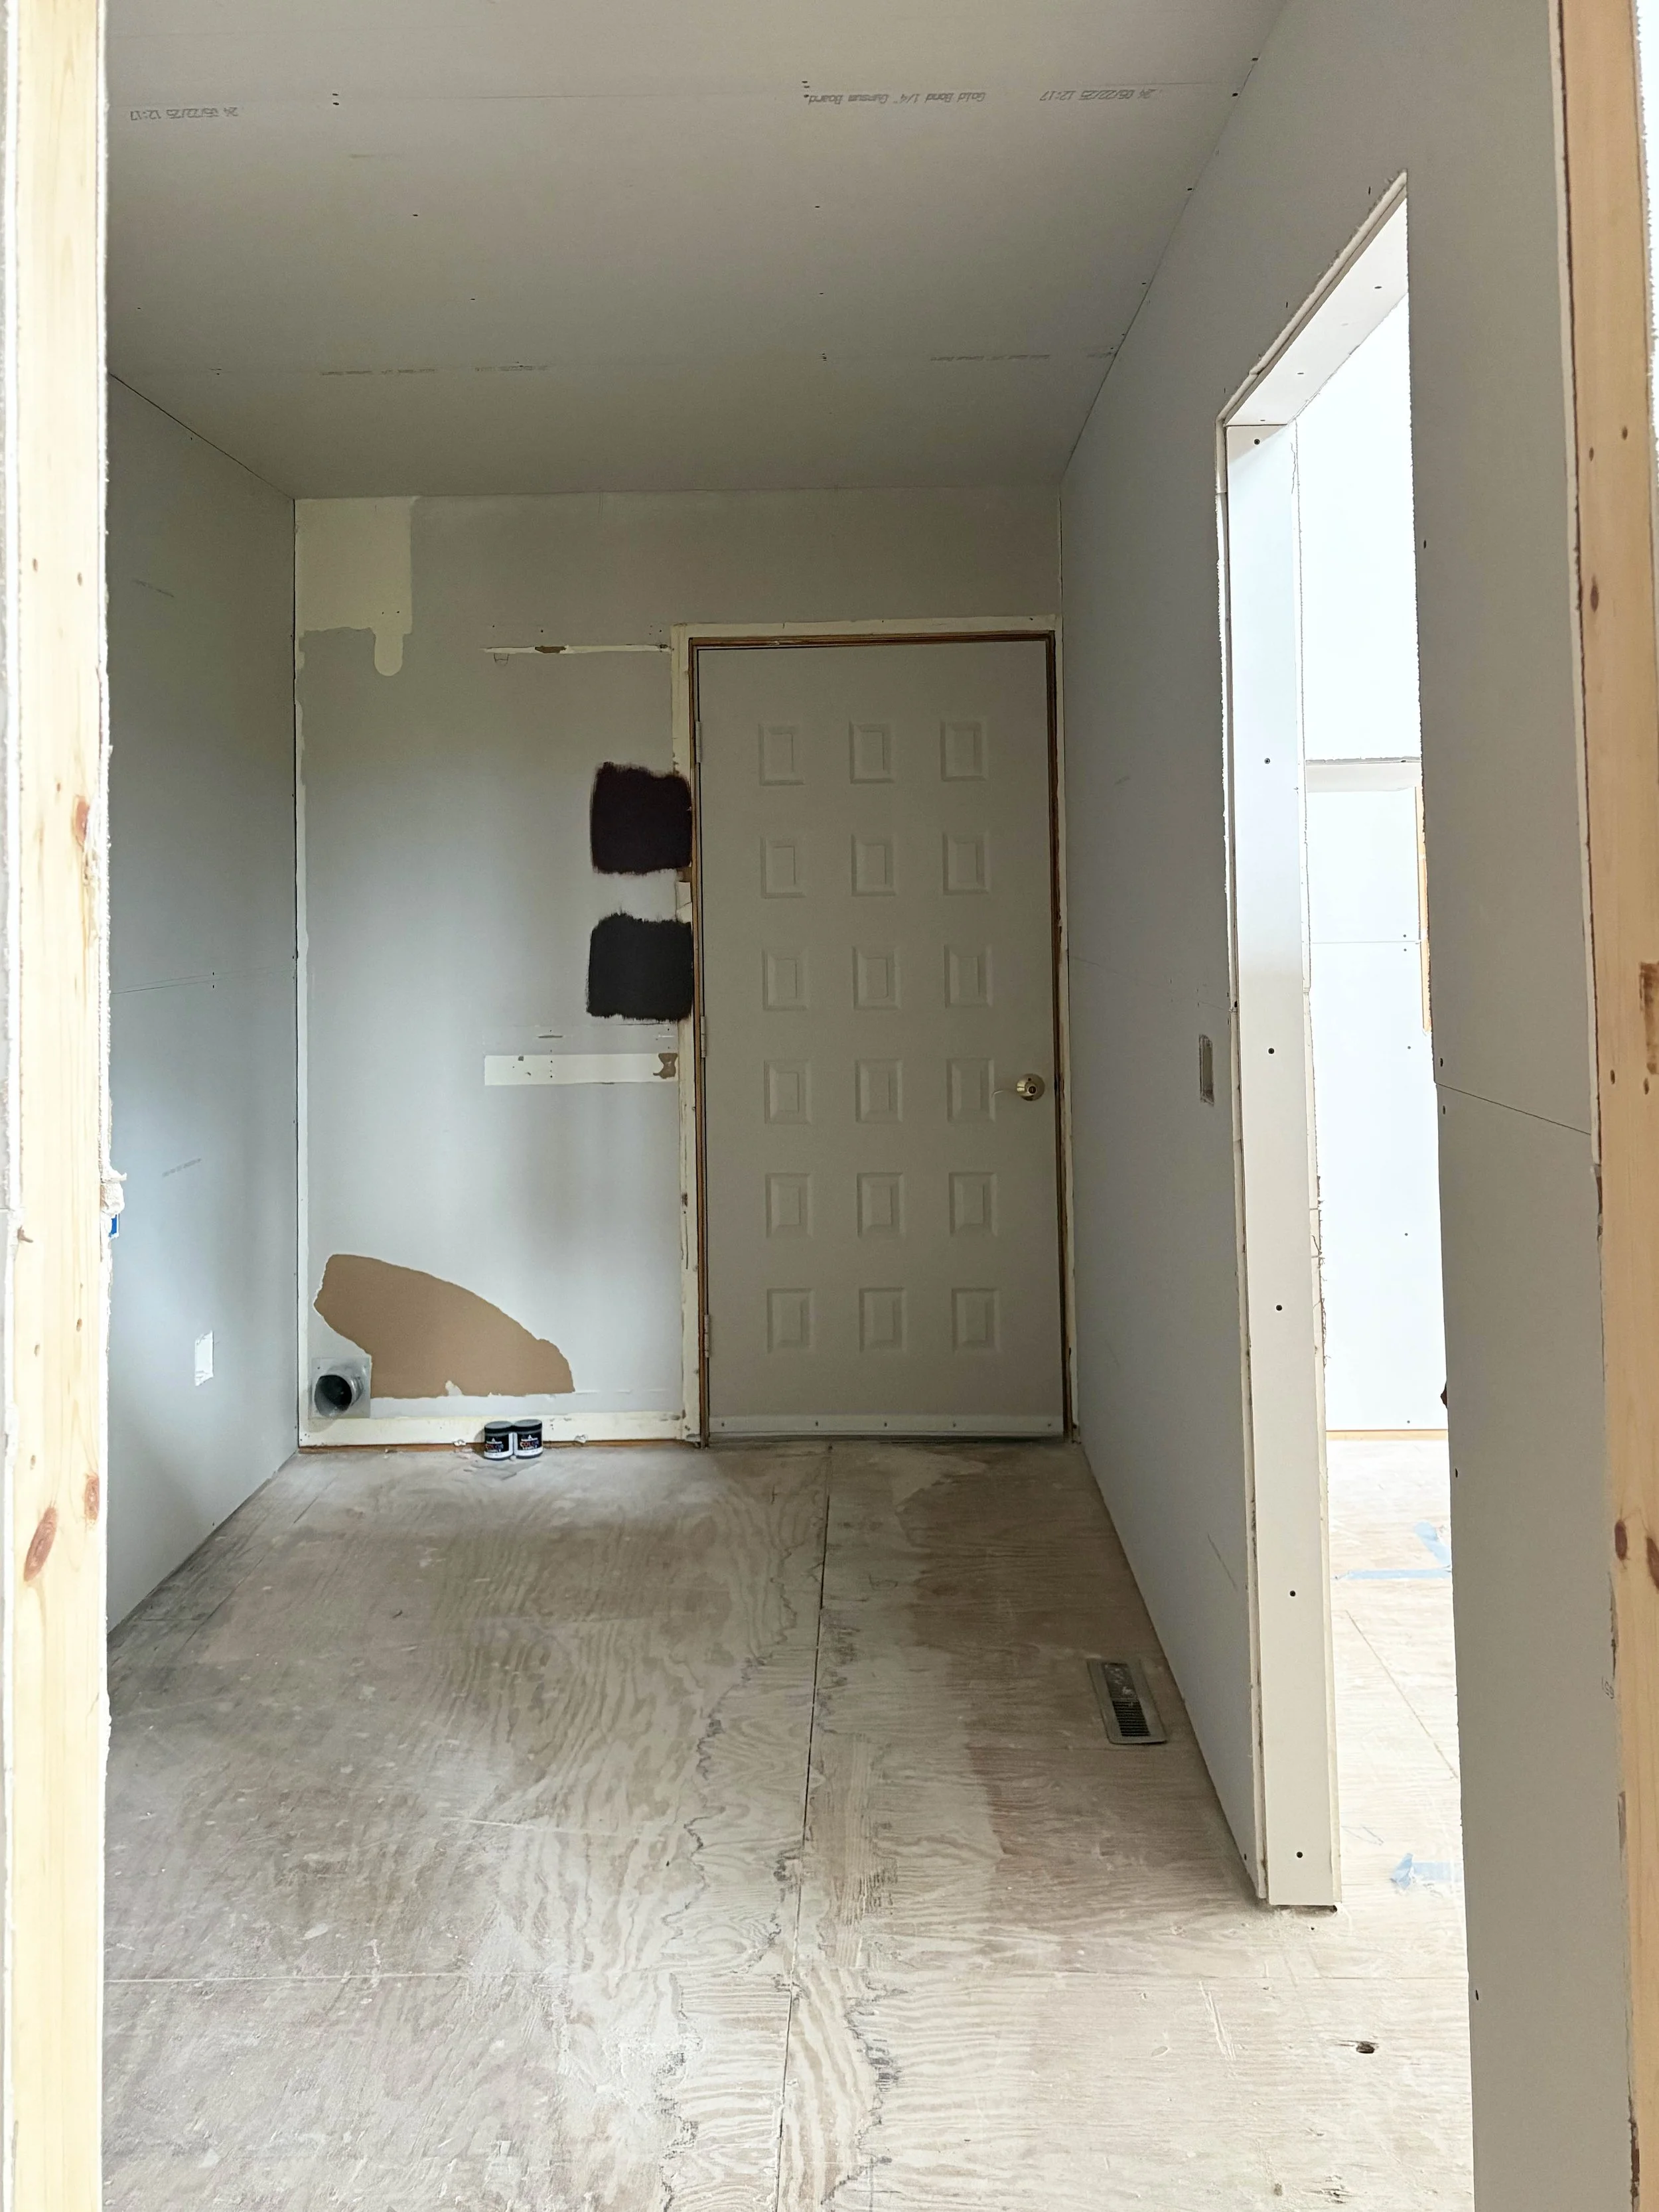
Swatching paint colors
I sampled so many different tile floor options for this room, but at the end of the day, I was limited to choosing a small-format tile available on a sheet. The subfloor in this space has some quirks and lumps and a small tile on a sheet is the best way to work with that. Any tiles in a larger size would carry a risk of cracking. I ended up settling on a small herringbone ceramic tile with a stone look. I think this solution will bring some texture to the floors and help disguise the inevitable dirt and grime that comes with the use of a functional mudroom.
I’m still swatching paint colors, but know I’d like to do something dark and dramatic. The main living space (kitchen, dining room, and living room) will be painted in a white tone and so I’d like to create some contrast in this little enclosed space. The sink and faucet will match our kitchen finishes (polished nickel), but I’d like to integrate some brass details into the room too through the hardware and decor.

Swatching paint colors
Swatching paint colors
I’m hoping to use the same countertops we are using in our kitchen to fill the small 48” counter area in here. I’d like to establish some consistency with our kitchen, but also allow this room to stand on its own. It has been a balance to find the right way to do that. Another idea I had was to apply some vertical panelling to the small area of wall space behind the sink area that would callback to the panelling on our ceilings in the main area of the home. I’ll make this call once we get to that part of the project and this room starts to take shape.
Shop Our Laundry Room Plan

I’m really excited to dive into this and bring all the little details together. The cabinetry has all been ordered and I’m hoping to get started on painting the pieces before assembling it all together early next week. We have plenty of time to get ready as we wait for the tiles to be installed in the coming weeks, but once I get the clearance, we’ll get right to it. My eager hands can hardly wait to dig in!
