The Lighting Plan For Our Main Floor Renovation

Let’s talk lighting today! I’ve heard it said that light fixtures can be thought of like the jewellery in a room design - it’s a finishing touch that can completely change the style and feeling of a space. I really like this analogy. While I’m not a fashion expert, I do appreciate a well-placed piece of jewellery in a final outfit to completely bring it all together. It’s a small detail with a big impact.
With that principle in mind, I spent a fair amount of time trying to narrow in on exactly what I was looking for when planning out the light fixtures in our main floor renovation. In many ways, light fixtures can easily be changed out and don’t necessarily dictate the greater design, but in other ways, I needed to know exactly what I wanted for the lights in order to best plan the electrical while the walls and ceilings were opened up. This turned out to be no small feat. I made mockup after mockup from various angles of our design plan in order to confidently choose the best lights for the job. I’m going to walk you through my process, selections, and tips in this post.

If you are like me and starting from ground zero, the following progression of steps is how I narrowed in on the light fixtures for our multi-room renovation. It took some time to find the right combination, but I’m really excited to see it all come together.
Step 01 // Narrow In On What You Like
The first thing I did was try to pinpoint some styles I really liked. It’s important to note that I had already made some of the bigger design decisions for our space (like the countertops and general color palette) before starting to shop for lights, but I also tried to keep an open mind when looking for inspiration. I started by looking at some of the inspiration images I had pulled for the overall design and specifically looked at the lights in them - did I like them? Did I notice any patterns across the images I gathered? Did I want to explore more images outside of my comfort zone to see if the lighting specifically spoke to me? This step of the process is strictly for trying to sort out what you actually like, not just what is readily available or particularly popular in the moment.


When I started to look at some of the images that were inspiring me, a few patterns started to develop. First of all, I noticed that I was most drawn to simple shapes and lines. I have always liked shaded fixtures because they ooze warmth (like a good table lamp) and am drawn to the cone and dome shapes that often come along with a shade. I also liked fixtures that combine materials, including metals, linens, and shaded glass, but didn’t want anything that felt too busy or glitzy. Knowing this immediately eliminated anything with clear glass or crystal. Like I mentioned in my overall house mood board post, I definitely prefer more natural looking materials and tones and loved the idea of exploring interesting materials like ceramic or fabrics. Making note of some of these preferences was useful for me to help narrow in on some potential filters when I actually started the online hunt.
In this first step of the process, I also had to weigh what I was drawn to in relation to the specifics of our space. For example, since our main dining space would be more integrated within the kitchen design rather than being it’s own separate space, I liked the idea of a large chandelier fixture with a lot of visual presence to distinguish the dining area from the rest of the kitchen. Having some of these physical preferences in mind was also helpful to establish upfront before I even started the hunt.
Step 02 // List Out What Fixtures You Need
The next step was to figure out exactly what I needed to look for. I knew that I wanted a few layers of lighting in our home and was already working with some existing fixtures in the space. So first, I had to consider the various rooms we were renovating and whether it was possible for the electrical to change in those spaces. For example, our existing sunroom had a chandelier fixture over the entry area and a track lighting fixture to light up the other section of the room. We were planning to add a ceiling feature in this room, which made it possible to change the location of the existing fixtures. So I decided to keep the existing junction box over the entry area of the room, but replace the track light with a handful of can lights integrated into the ceiling instead of the track light. On the other hand, our living room already had a series of can lights as the primary light source and I had to decide if I was ok with that or whether we wanted some additional hardwired fixtures roughed in.
In considering what the renovation entailed for each room, I made a list of what I was looking for. I knew I needed to shop for:
An entryway (the sunroom) chandelier or pendant fixture
A dining room chandelier
Kitchen pendants
A kitchen sconce
Laundry room flush mounts
We decided that we wanted to add can lights to some of the workhorse areas (like the kitchen), but also layer in other light sources for specific task lighting (like the island pendants and sconce above the kitchen sink). The can lights would be standard across the entire renovation, but the other fixtures could be varied and add personality and character to each individual space.
Another need to consider is finishes. With some of the other design elements in place, I was able to narrow in on the fact that since I was mixing some metals in the overall design, I could explore lighting options in brass or polished nickel. Black was also an option (but not necessarily a preference). It was really helpful to know this upfront so I could skip entire sections of some online retailers’ listings that wouldn’t work with the other design elements.
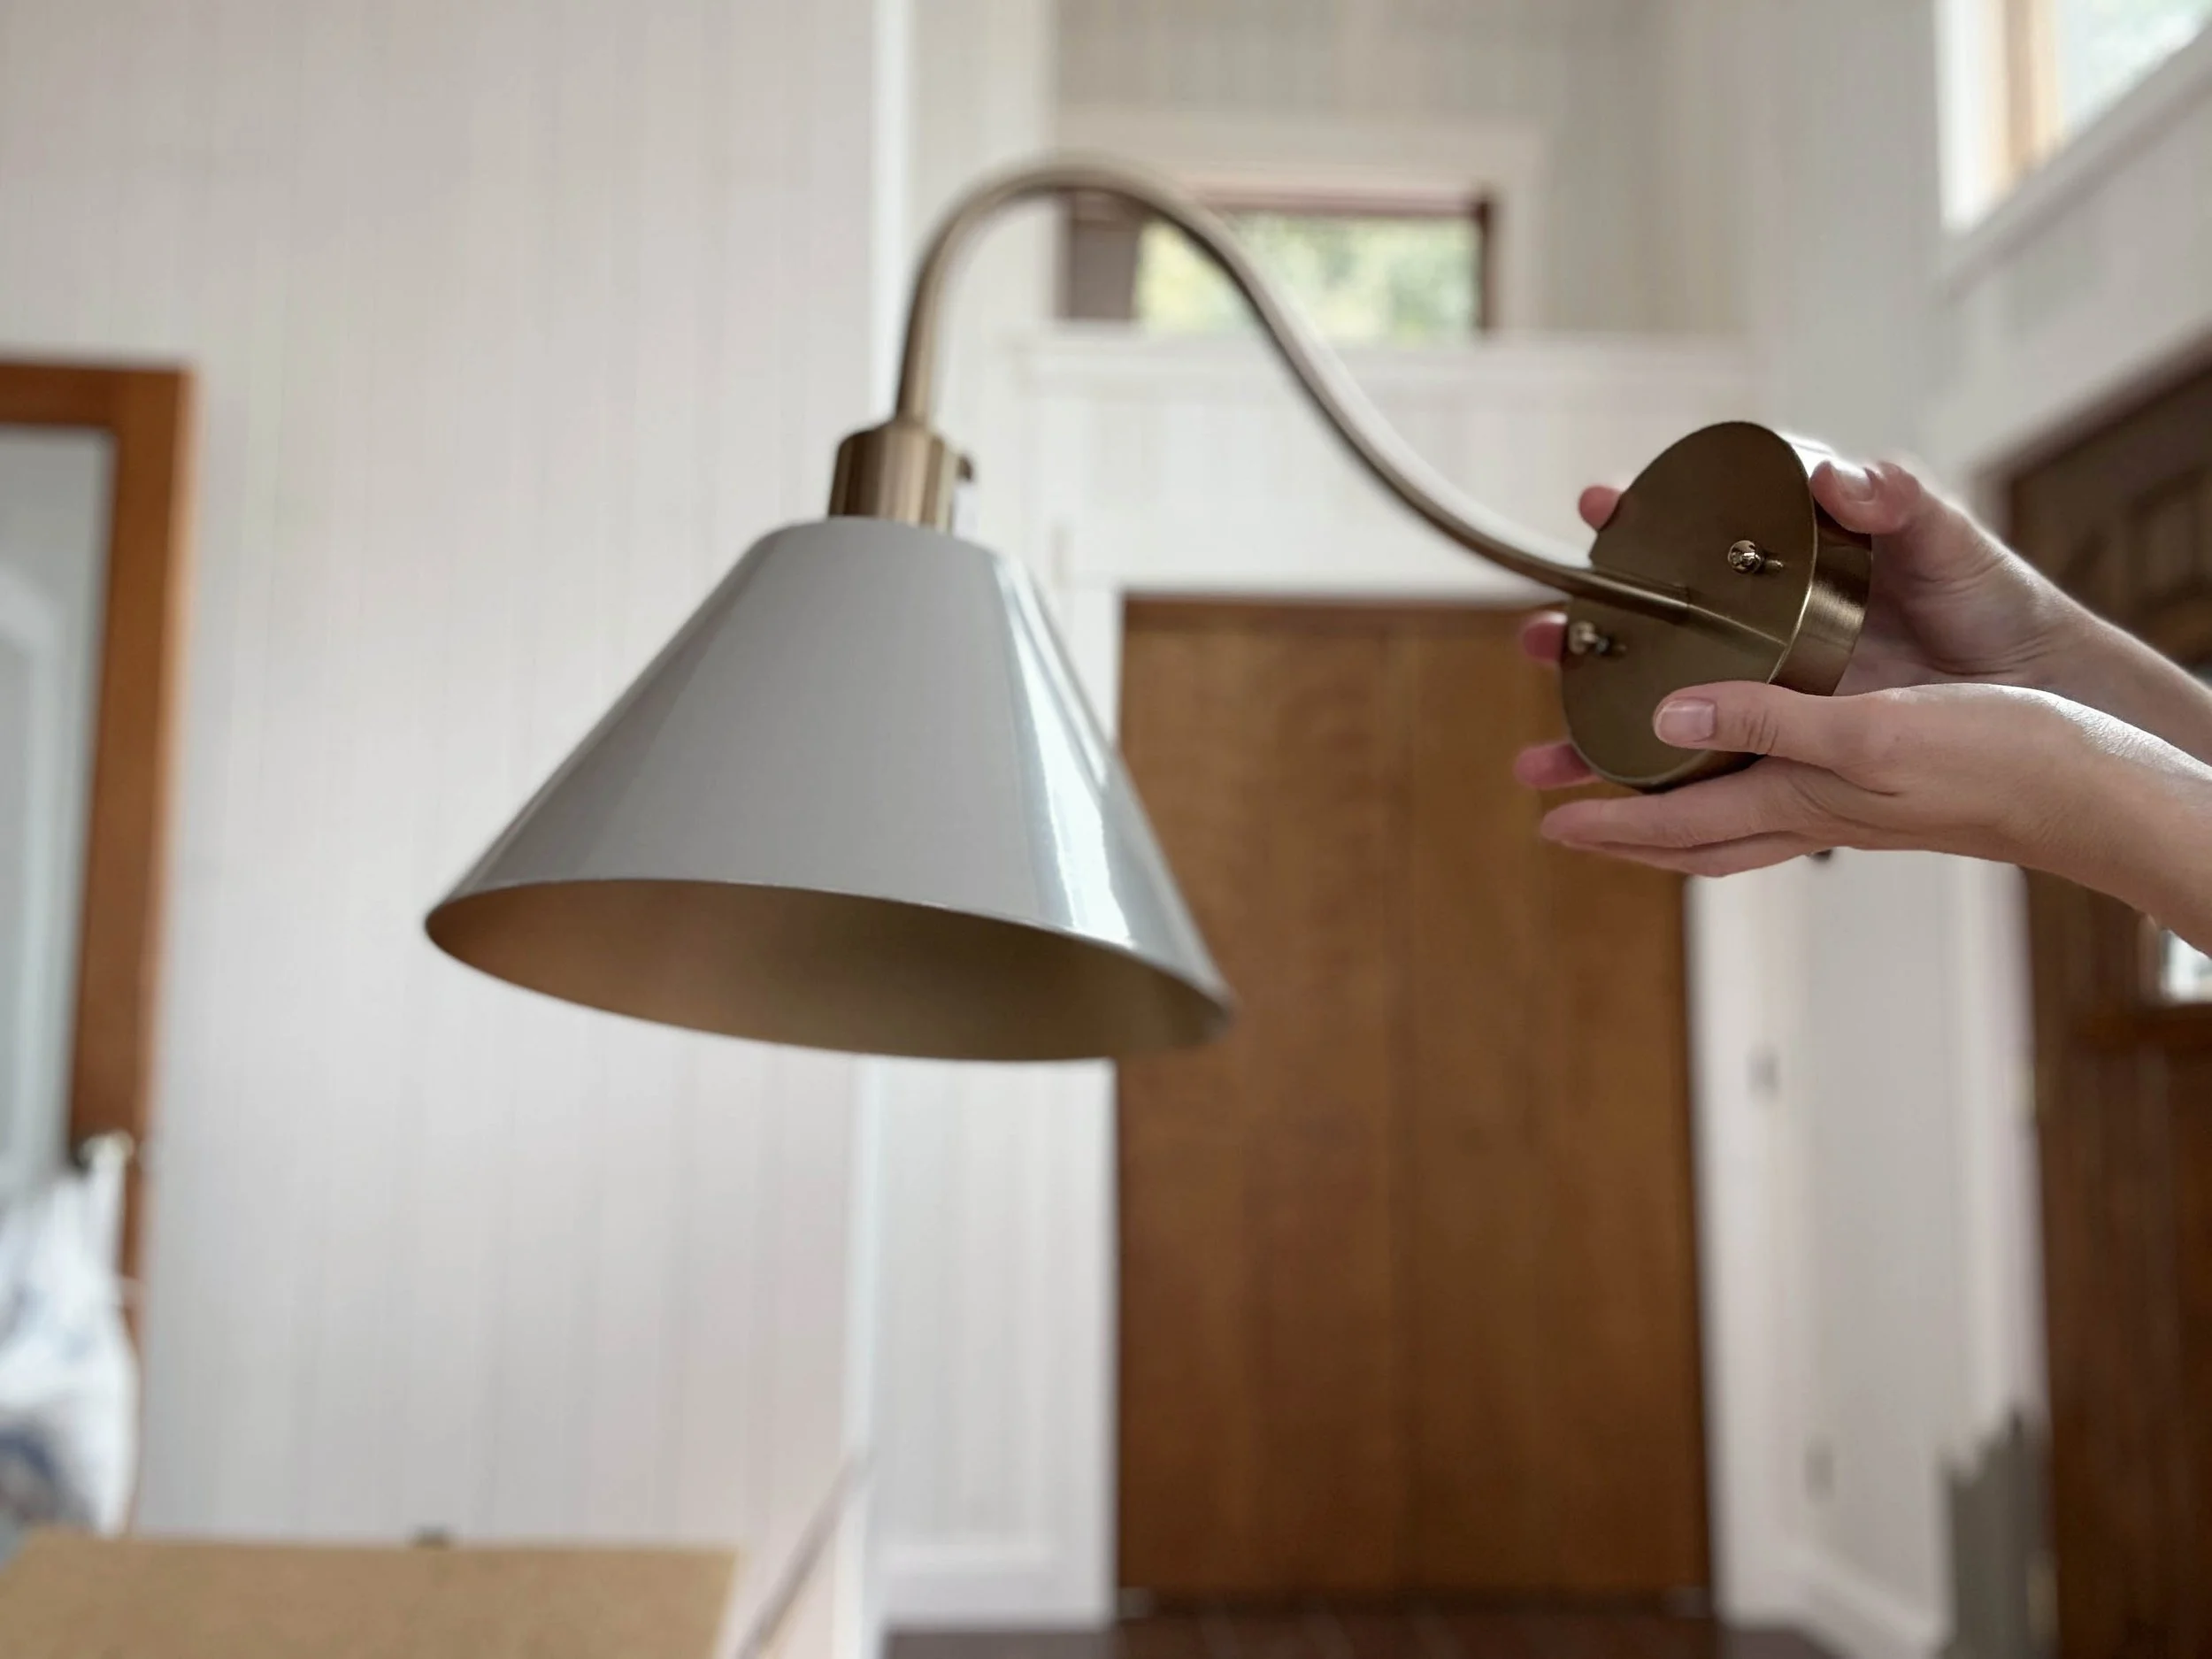
The arched arm sconce for over the kitchen sink
Step 03 // Pick A Few Leading Ladies (And Then Fill In With A Supporting Cast)
At this point, I could actually start my hunt. This was overwhelming in many ways, but my approach was to just dive into a website and start to click on fixtures that caught my attention. Since I had taken the time to think through my preferences upfront, some pretty natural patterns began to emerge in the fixtures I was selecting. I began playing with how different choices interacted with each other by pulling the images together in a mood board. I also plopped them into some of our reno mockups and this really began to give me a visual.
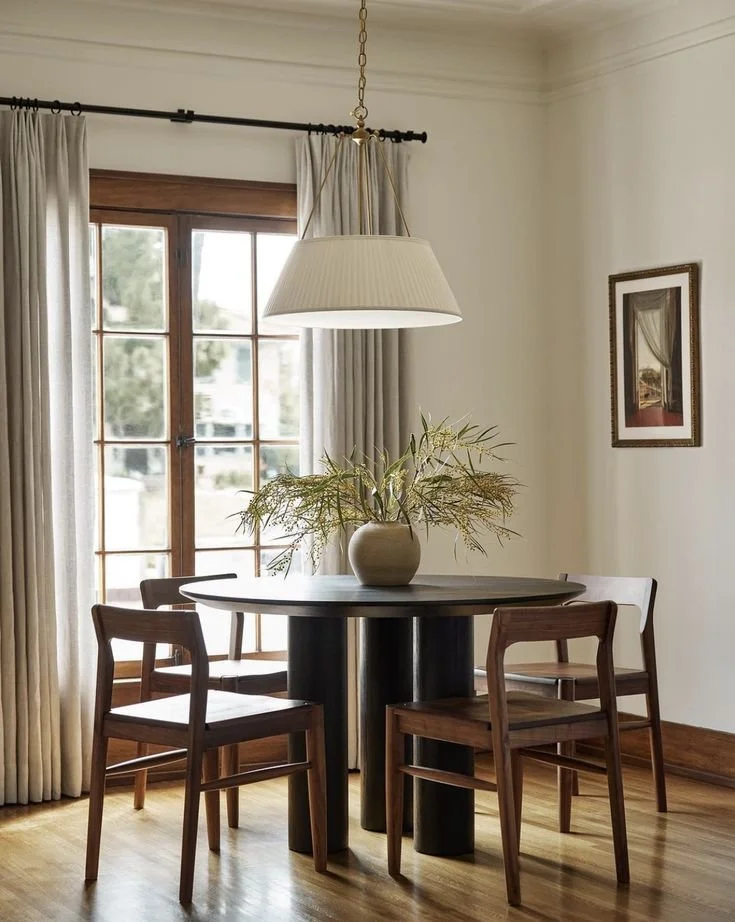
It’s important to choose which fixtures you’d like to stand out and which will play a supporting role. Not everyone can be the star! I knew I wanted a large dining room chandelier with some visual weight, so I ultimately started there. As I let myself browse and explore, I caught sight of the Kalini Double Drum Chandelier from Shades of Light and it stole my heart. It was the fixture with the highest price tag out of all the options I pulled, so I had some hesitation. But at the end of the day, I kept coming back to it and couldn’t let it go. The rounded shape and shades of a drum chandelier scream “warm, intimate dining” to me and so it felt like a perfect choice. I really love the subtle natural texture on this fixture and knew it would make a statement without feeling too heavy or distracting.
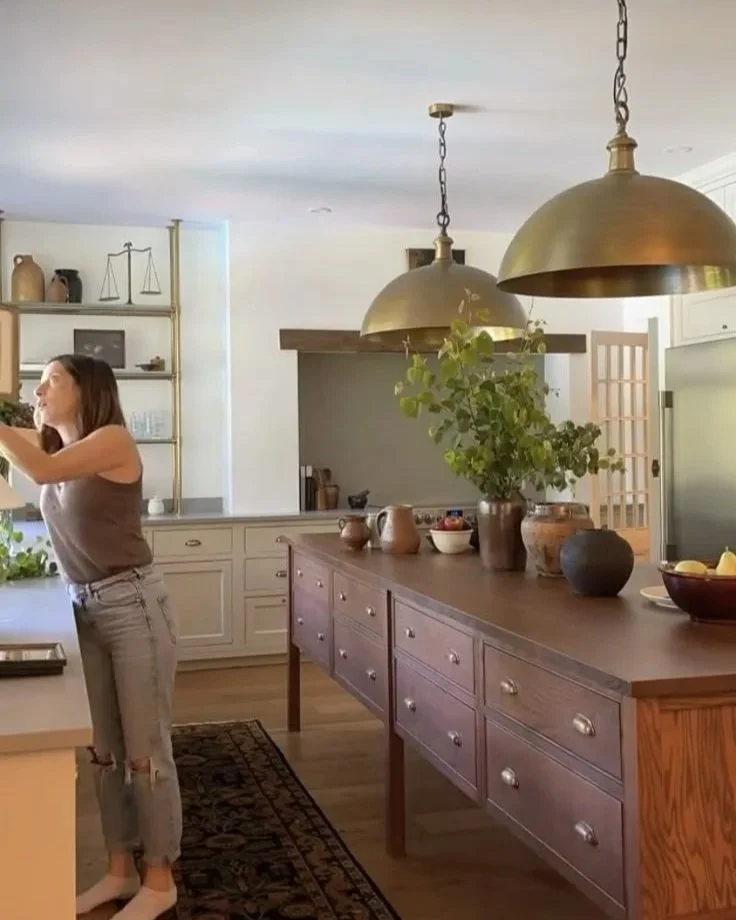
Another fixture I decided would play a leading role was the kitchen island pendants. In our design, the kitchen island is fairly small and sits in the middle of the room with tall sloped ceilings above it. I really felt like the kitchen pendants needed to have some visual weight to ground that central space. From all my planning and mockups, I knew the pendants needed to be black in order to ground the island and in my inspiration images, I kept coming back to a subtle cone shape. I landed on two of the Gertie 3-Light Brass Pendants in black available on Wayfair. These were relatively affordable and sloped-ceiling compatible (which was a rare find, as it turns out!)
With my two leading ladies selected, I had to start casting the support. I wanted a small task light over our kitchen sink and decided a wall sconce could be a nice way to add some contrast amongst all the hanging fixtures. I fell in love with these ceramic cylinder sconces from Shades of Light, but after some consideration, figured they may be better in a location where you’re just looking for a warm glow rather than lighting a task area. I ended up settling on the Edie Sconce in brass with a glossy deep tan metal shade. In the laundry room, I wanted to update the flush-mount fixtures, but still choose something unique and beautiful. I found the Marta Mini from Vakker Lighting and quickly ordered two. I was drawn to their subtle vintage shape and style and thought they’d look like a classy pair of stud earrings in my color-drenched laundry room.

A simple linen drum pendant for the sunroom entry way
A final tip I wanted to highlight before I move on is how imperative it was to consider how these spaces interact with each other so I could create both consistency and contrast in my choices. Once I had selected the main fixtures, the only one I had left to find was a hanging light for the entryway in the sunroom. I originally had no idea what style of fixture I should do in this space, but once I had the other rooms figured out, it felt like a good opportunity to pull in another drum-style chandelier. I picked a much simpler fixture (The Bertan 4-Light Tiered Chandelier by Wade Logan on Wayfair), but thought the callback to the dining room establishes a good sense of flow. These fixtures would not be viewed in the same sightline. Striking the right balance between consistency (in finishes and styles) and contrast (in colors and scale) really help establish a feeling of connection without being too matchy.

Step 04 // Don’t Be Afraid To Change Your Mind (But Also Just Commit)
There are endless opportunities for creative combinations that can totally change the feel of the design between spaces. I had a lot of fun shopping around! However, there does come a point where you really just have to commit to your plan. If you want to change your lighting, you sometimes have to just take the risk and buy the fixtures to try.
However, it is very possible that you may need to change course. Certain parameters of your space may require you to adapt. In our home, the ceilings are sloped and I had to be extremely careful to find fixtures that were both sloped-ceiling compatible and long enough to appropriately hang in their intended location. I found a few fixtures that would have been perfect, but couldn’t be used on a sloped ceiling and it felt defeating at times. I had to try many different iterations of a design before I found the perfect fixtures. But eventually I got there and I’m really excited about the final plan.
While the majority of my planning stayed the same from my original decisions, one area where the lighting plan did shift was in the laundry room. Originally I had picked out two semi-flush-mount fixtures with a vintage flair to them. I purchased them and had them shipped from overseas before the renovation started. However, as time went on and the renovation began, we had the flexibility to adjust the plan in the laundry room once we saw what the new space would be. We decided to center the laundry sink on the door from the kitchen to really clean up the sightlines and I knew it would be the perfect opportunity to use lighting to add a focal point to the otherwise pretty simple laundry room. I ended up purchasing a beautiful hand-blown glass pendant to hang directly over the laundry sink and suddenly the semi-flush-mounts I originally picked out didn’t make sense. With some insight from our electrician, we shifted gears and decided to add a few can lights to the ceiling to serve the practical need of lighting this well-used space and let the over-sink pendant be the leading lady in the room instead.
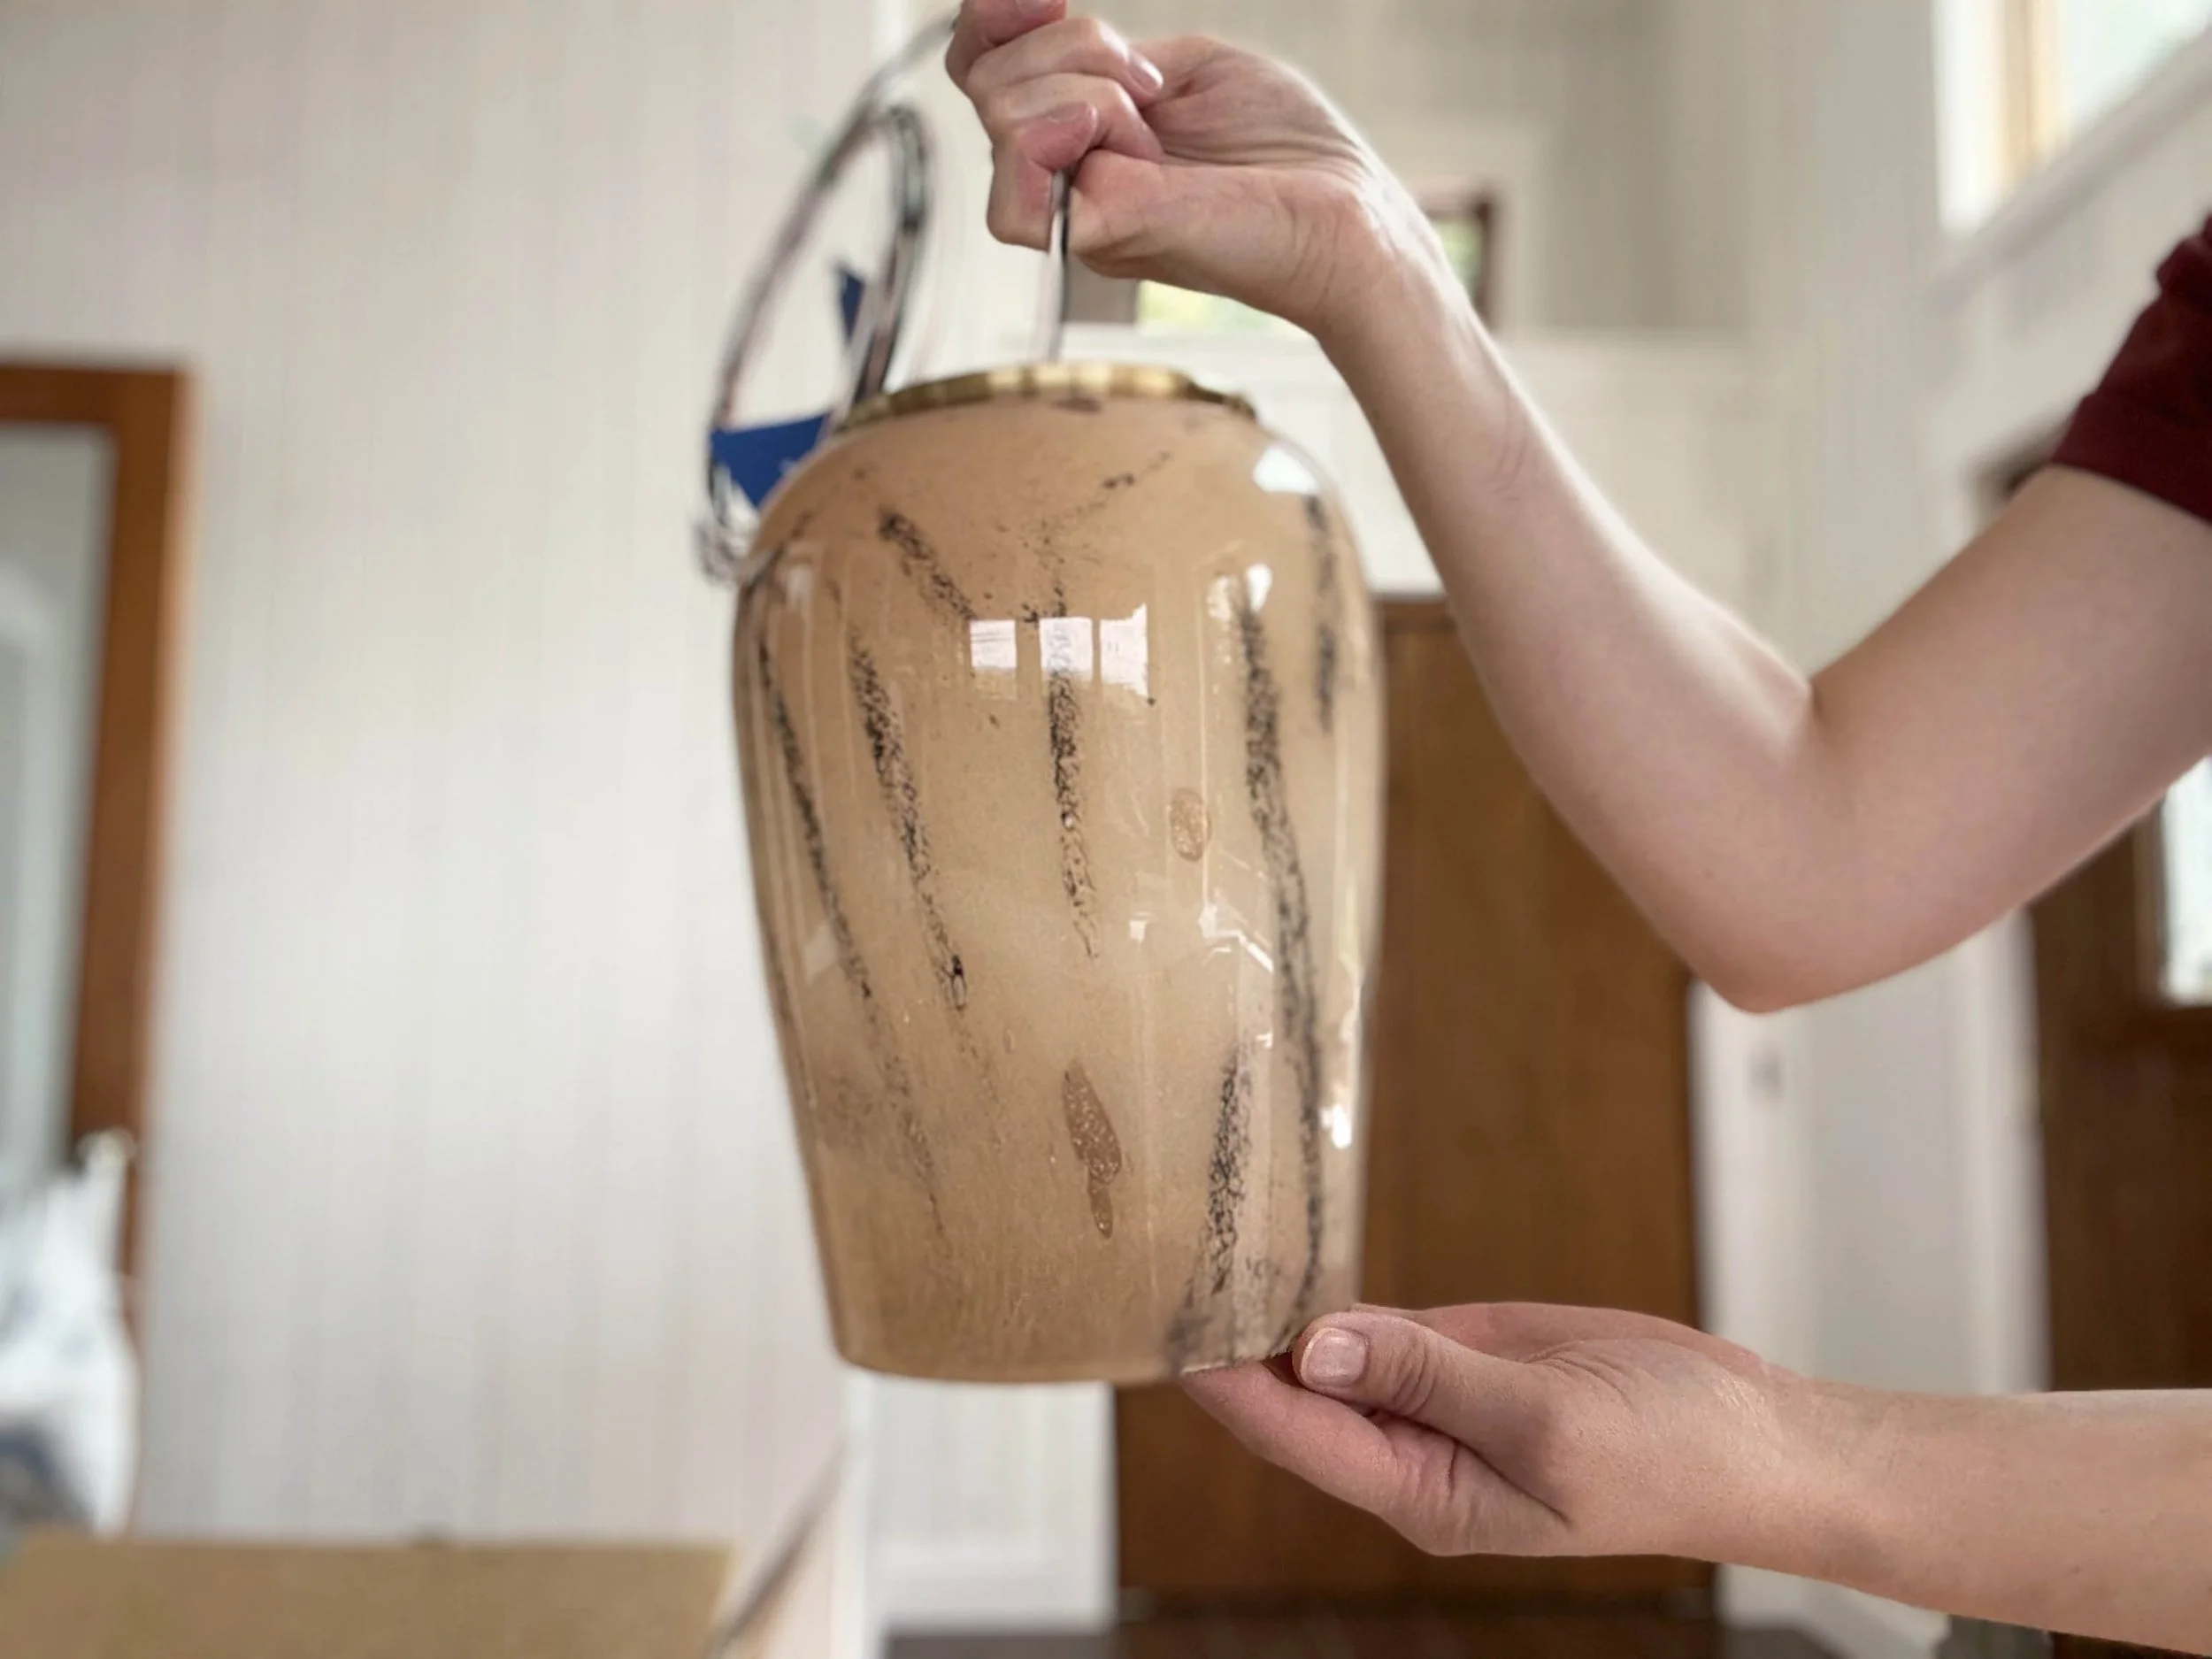
The one-of-a-kind hand-blown glass pendant I selected for the laundry room
Since I already had the two semi-flush-mounts, we decided to keep them and will either use them in a more understated area (like the hallway to the master suite) or save them for a future project. I still really like them and already know that they work with the other fixtures we are using in our home, so they should pretty seamlessly integrate somewhere else. But for now, I’m glad I wasn’t afraid to shift gears because I’m really happy with the updated design.
Our home is still very much so under construction, so none of the light fixtures have been hung as I write this post. It’s very possible that some things may change once we start to get things in place. I’ll be sure to share more images once we finish this renovation and get everything in place so you can see the full vision, but I do hope that sharing some of my selection process may be helpful to see in action.
Where I Like To Shop Online For Light Fixtures
To finish us off, I wanted to take a moment to list out a few of my favourite places to shop for light fixtures. Large home decor stores like Wayfair have endless options in a wide array of styles and is very accessible. Wayfair constantly runs sales and if you keep your eye on particular pieces, you can snag them when they drop in price. Shades of Light has a wide array of styles and price points. I love that they have numerous collaborations with some popular names in the home design world (think Ben & Erin Napier or Chris Loves Julia), so you can find some beautiful designer-worthy fixtures at an accessible price. They only occasionally run a sale, but if you sign up for their newsletter, you’ll be informed when those run. Hudson Valley Lighting has stunning designer fixtures. Their pieces are on the higher end of the accessible scale, but even just to browse through to find inspiration or pick up one or two smaller pieces to pepper in with more affordable fixtures from other retailers could be a great option.
There are style-specific shops out there too, so if you have a general idea about what style fixtures you like, you could always explore a few more niche options. For example, Article is great for mid-century modern pieces. Mitzi is great for more sculptural pieces. Serena & Lily is great for a more coastal look. I have personally never bought a fixture on Etsy, but I’ve heard it’s a great resource for vintage fixtures.
There are so many more options out there - a simple Google search or image search on Pinterest can lead you to new shops you didn’t even know existed!
