How To: Refinish a Wooden Dining Table
Back in the Fall, I worked on completely transforming our dining room from top to bottom (you can read more about that here). As part of that transformation, I worked on a variety of different projects to bring it all together, but the one I was most nervous to tackle was refinishing a secondhand dining table. I had purchased this table on our local buy-and-sell for $100 CAD nearly two years before I got around to tackling it. I saw a lot of potential in it with the beautiful oval top, tapered legs, and brass detailing, but just didn’t love the glossy, speckled and yellowed finish on it. Before this project, I had never used a chemical stripper to strip down a piece of furniture, but I really envisioned this table staying a beautiful wood tone and knew it was finally time to give the refinishing process a try. Some pieces you just can’t paint - this table was one of them.
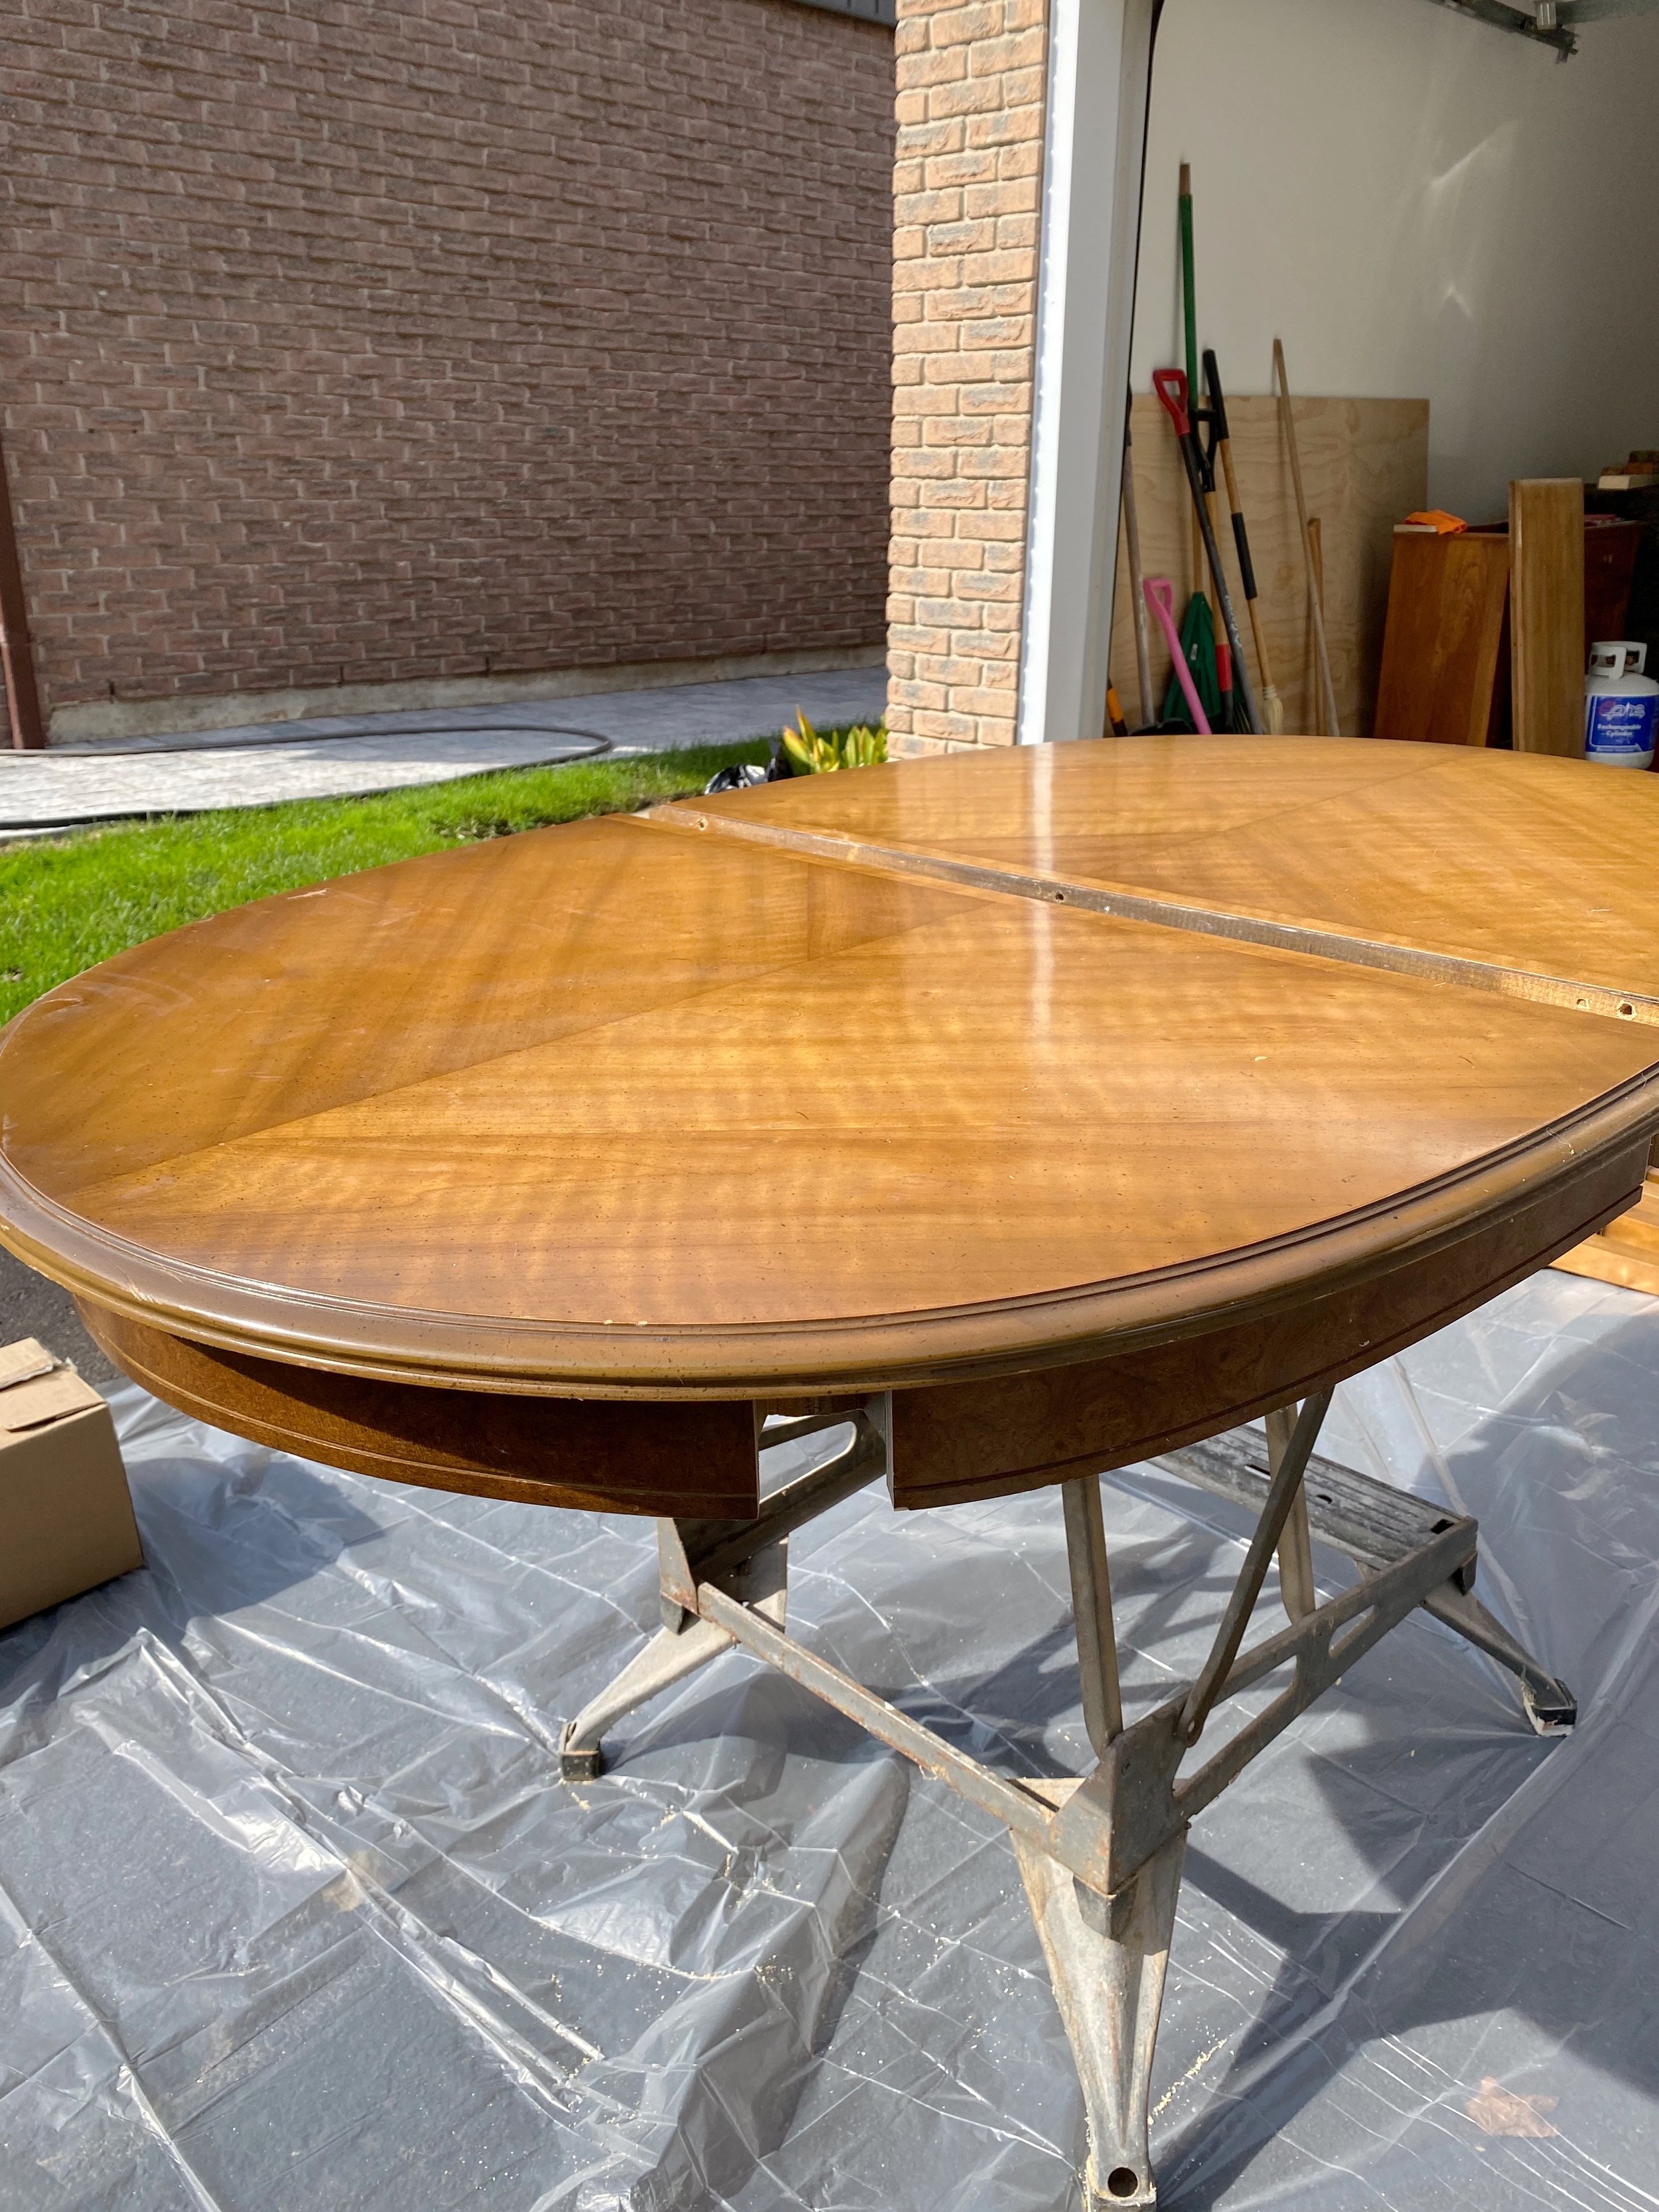
Before I explain exactly how I tackled this project, let me show you what this table looked like before I started. From the moment I picked it up from the seller, the table was already disassembled and I never bothered to put it back together. It has a beautiful oval top and includes two leaves to extend the length. Each tapered leg nestles into the skirting of the table and all the details are the perfect balance between classic and simple. But that finish - ugh. It was beautifully done and still in great condition, but I just didn’t like the high gloss and yellow undertone. I wanted the new finish to be a little more natural so the beautiful details of the design could shine. And yes, a little less speckle-y was the goal too.
Before
Before
Before
Before
I figured I would share a tutorial about exactly how I tackled this project so that you can do it too. Trust me when I say that it seems intimidating, but it is definitely a really satisfying project when all is said and done. If I can do it, so can you!
Step 01: Stripping the old finish using a chemical stripper.
My first step was to strip down the existing finish to bring the table back to raw wood. I decided to do this using a chemical stripper. You may be wondering if you need to use a chemical stripper or if there is another option for removing the old finish. In short, no, you do not need to use chemicals to do this. But - and this is a huge but - to save yourself a lot of time spent endlessly sanding, using a chemical stripper will definitely help to expedite the stripping process. Don’t get me wrong, though, even though I chose to go the chemical direction, I was definitely still intimidated to try. Even in my limited knowledge about chemical strippers, I knew going in that they were smelly, messy, and involved multiple steps. But like any other time I try something new, the best thing I could do was prepare by doing some research and gathering all the necessary supplies before diving in. I ended up watching this video multiple times and referenced this tutorial to make a plan of attack for my own table.
The first thing you should do is purchase and gather all the supplies you will need:
Klean Strip chemical stripper or a comparable product - this one container did my entire table and two leaves with not a drop to spare
chip brushes (2-3)
scraper - use plastic (if possible) or a really old dull metal one
steel wool (medium-coarse)
spray bottle with clean water
safety wear - nitrile gloves, a respirator, closed-toe shoes, and an apron
drop sheet and old cardboard boxes or metal pans
orbital sander
This process gets messy and smelly and takes some time, so set up your workspace in a well-ventilated area that you can use for a while. If you have a shop with doors that open, that would be a great option. I simply set myself up on our driveway on a nice autumn day and decided that I would work on my table in sections. I ended up working at it over a series of three different days, completing the table top one day, the leaves on another, and the legs on yet another. Ideally you would just do it all at once, but it does take some time and unlimited time is not a luxury I have at this phase of toddler-parenthood so I had to split it up.
You can fully intend to be really tidy and careful, but I guarantee that this process will still make a mess. I laid a drop sheet on our driveway, propped the table pieces up on a sawhorse and some scrap pieces of wood, and gathered all my supplies. I had a garbage bag for disposal nearby and extra cardboard boxes to toss used supplies into. Before opening the stripper, I put on my nitrile gloves and a respirator to protect my hands and lungs from the chemicals.
When you’re ready to get started, dump a generous glob of the stripper onto your table surface. Use a chip brush to spread an even layer across the surface, being sure that it sits on the surface in a fairly thick layer. If you notice that the stripper is drying out quickly, you likely need to apply a thicker layer. Be careful not to go over the areas you have already applied stripper to repeatedly. You should simply apply it and then let it sit, undisturbed, for the recommended amount of time that the package outlines. For the product I used, the recommend wait time was 10-15 minutes. Once you apply it and let it sit for a few minutes, you should see the finish on your table start to bubble. Resist the temptation to start scraping - wait the fully recommended time.
I strongly suggest working in small areas at a time, such as half of the table top, because you don’t want the stripper to dry out before you have a chance to scrape it off.
Once the stripper has been sitting on your table surface for the recommended amount of time, you can start to scrape it off. I used a metal scraper, but had to be very gentle, as the metal edge can easily gauge the softened wood surface. I’ve seen others use a plastic scraper instead to avoid this risk. Working from one side of your table, glide your scraper across the surface and push the material into an old metal pan or empty cardboard box. To avoid any noticeable scratching, do your best to scrape with the direction of the wood grain and work slowly. Only use the scraper to remove the chemicals (and finish) from any flat surfaces.
To remove the stripper from any areas that have small details or are rounded, use the wire brush to scrape into the grooves. The brush gets really gunky and clogged up, but take your time and work around these areas gently to avoid damaging them. Once you remove this first layer of stripper, you should see that there are streaks in your finish and that it has started to come off.
Once you have scraped most of the stripper from the surface, grab a piece of medium-coarse steel wool and apply more stripper to the surface of the table. However, rather than brushing it around with the chip brush, use the steel wool to scratch the stripper across the table surface in the direction of the wood grain. This will help to work the stripper into the areas of the surface where any of the finish still remains and pull up any stubborn bits of finish. Turn the steel wool around as you work, as it very easily gets clogged with bits of the old finish. Be sure to have lots of it on hand so you can change it out for a fresh piece when needed.
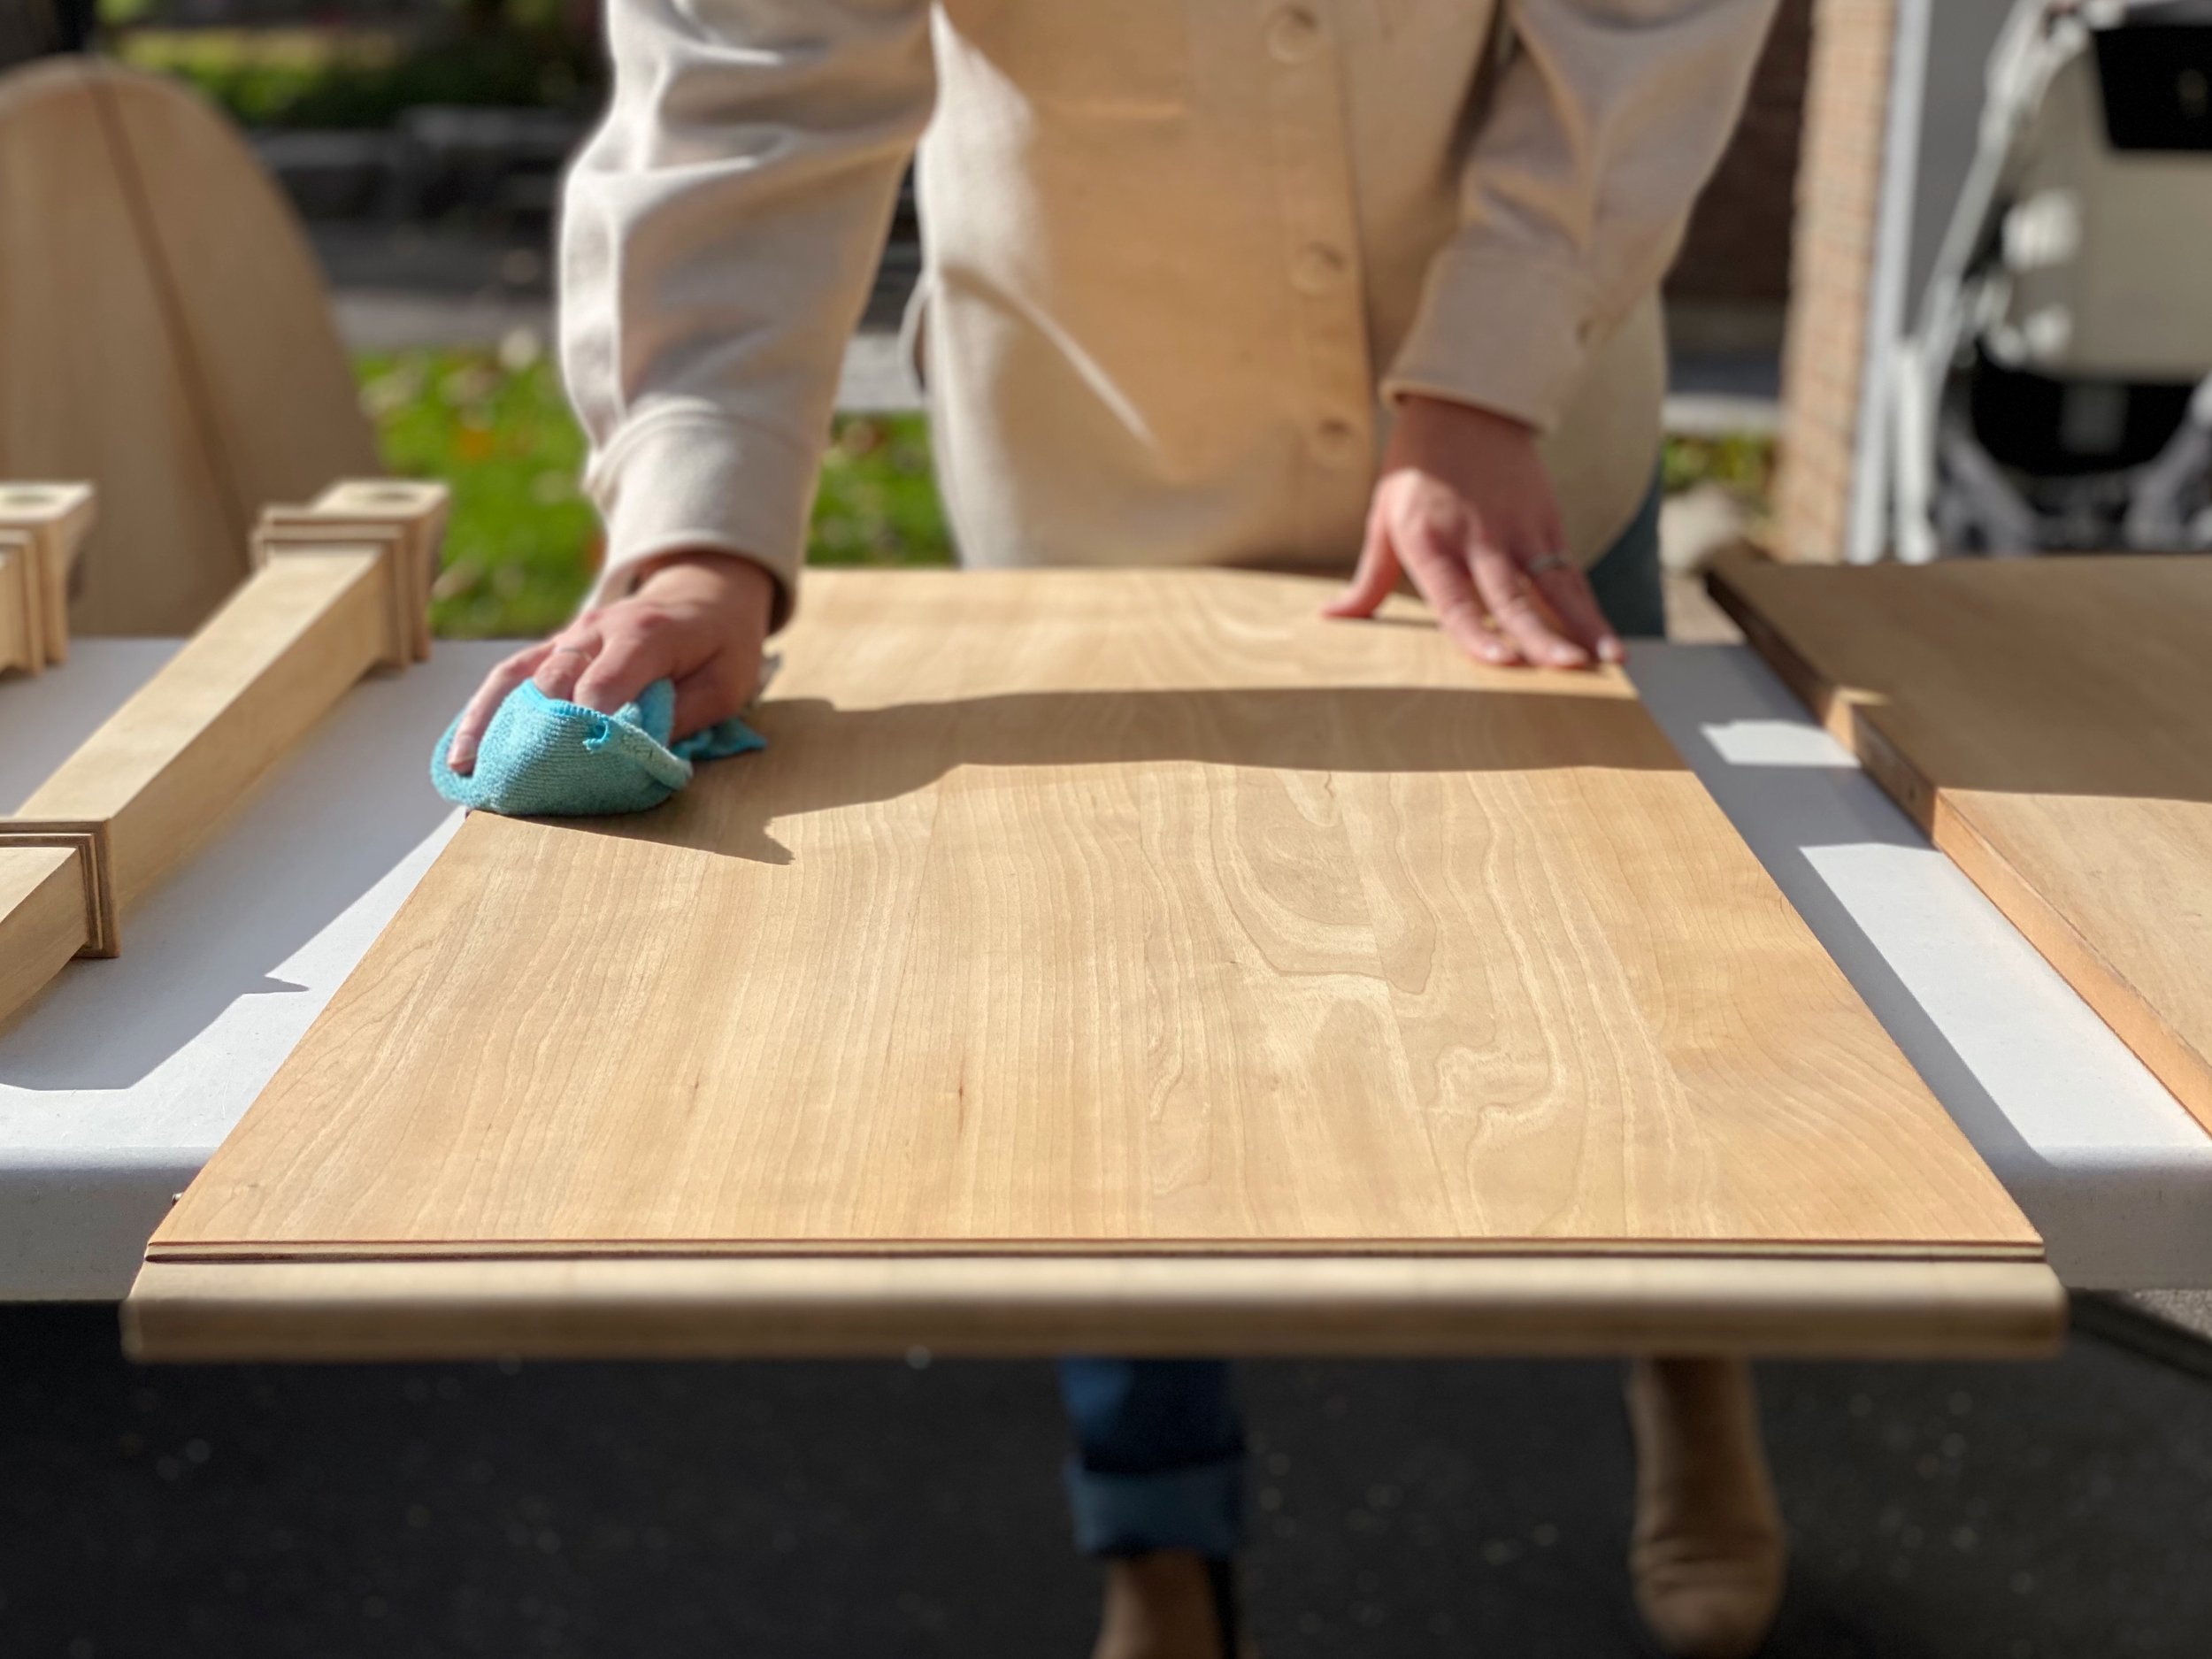
Once you are finished with the steel wool, you will need to neutralize the stripper that still remains on the surface of your table. You can buy specific products that help to do this, but I personally opted to use water. Spray the water onto a clean rag and wipe it across the surface. Like the steel wool, your rag may pick up a lot of the residue, so be sure to turn it around and replace it once you feel like it is no longer cleaning the surface of the table. The purpose of the water is that it will remove the extra stripper residue and prevent it from clogging your sandpaper when you go to sand the surface later, so be sure to continue wiping it down with fresh water until your cloth remains relatively clean. You will need to allow it to fully dry for at least 24 hours before actually attempting to sand.
The table top is stripped, but the table skirting is not.
The old finish before stripping (left) and the old finish after stripping (right).
Repeat this process for all areas of the table that you are trying to strip the finish from. As I mentioned, I completed this process over three different days, focussing on a different area each day. The most difficult part to strip down were the table legs, as they had a lot of extra details and small nooks and crannies. It took me a lot of extra time and I had to focus a lot more effort on the steel wool step. Take your time and be careful not to damage your surfaces.
It’s worth noting that the chemical stripper will likely not completely remove the old finish. Regardless of whether or not you use the chemicals, you will still need to sand. It just helps to do the bulk of the work so that the sanding step goes much quicker. In the photo above, you can see the comparison between the side of the table where the stripper has not been used (left) and the side of the table where the stripper has been used (right).
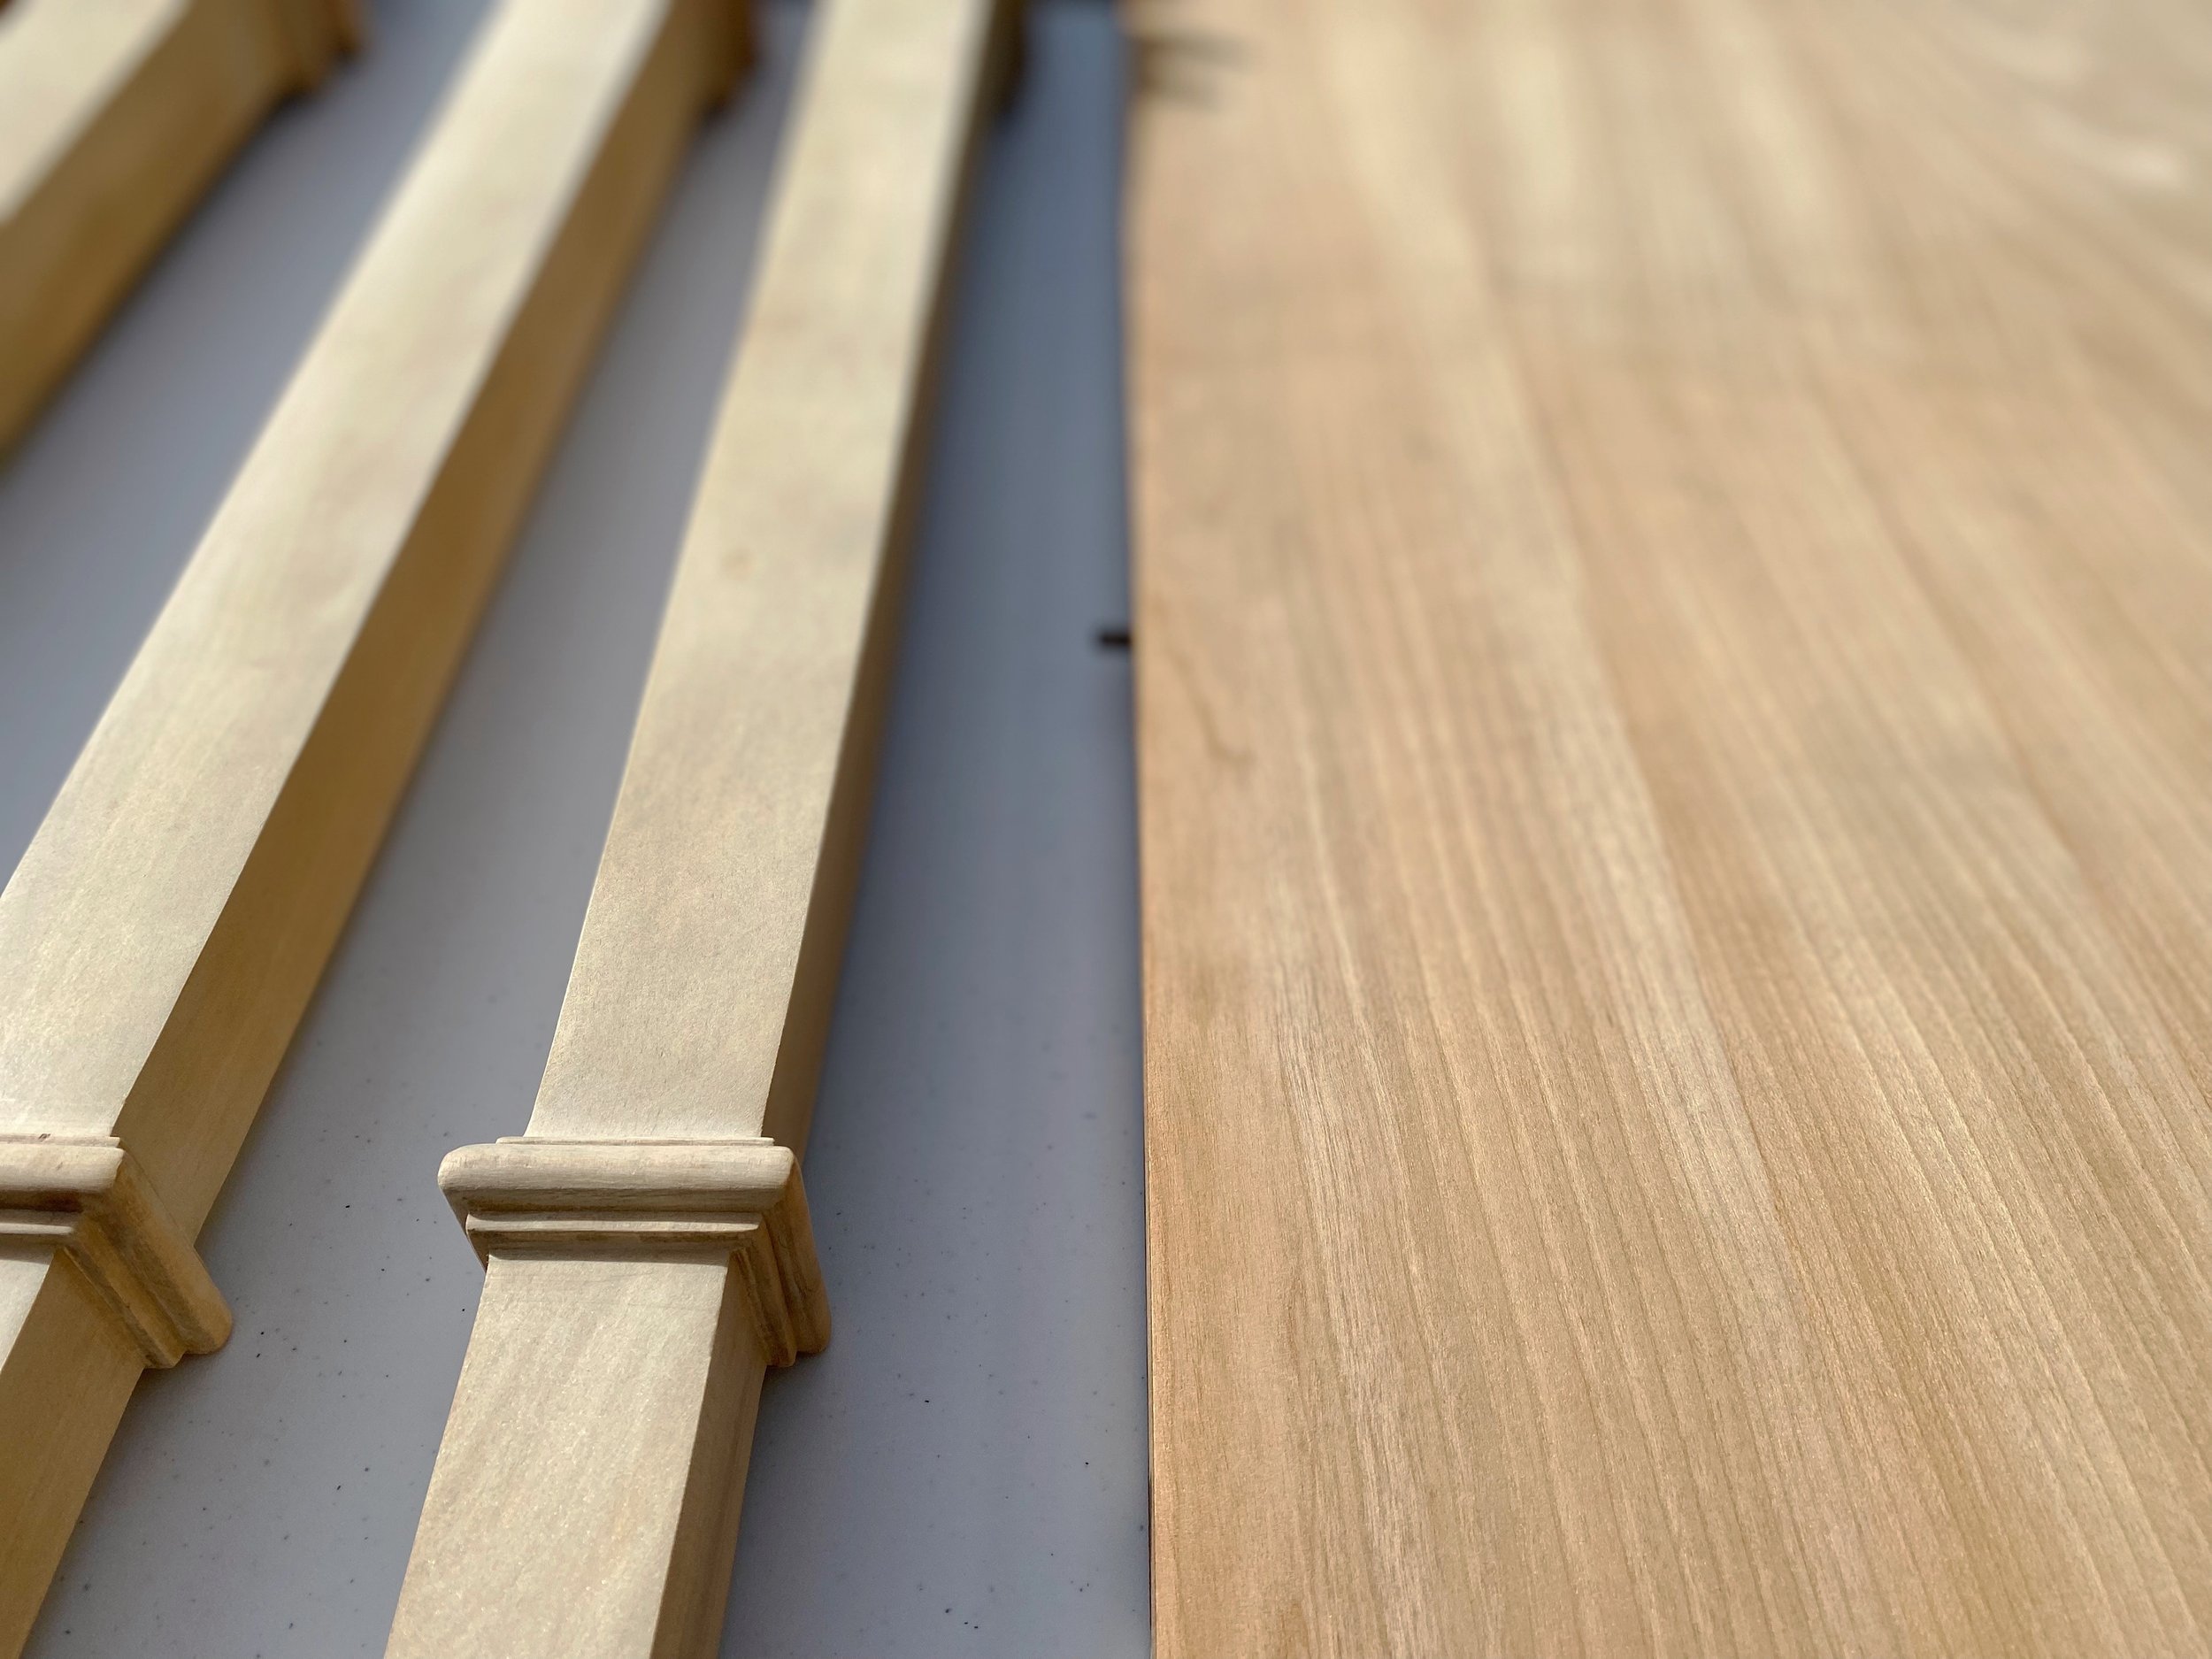
The table is ready for sanding.
You will need a few different grits of sandpaper, including 150 and 220.
Step 02: Sand the surface.
Once you have given your table an adequate amount of time to dry, you can get to sanding. Thankfully, this step in the process goes really quickly if you have already stripped the old finish with the chemicals. My table only had one layer of finish on it, but some old pieces of furniture have multiple. Depending on how much of the old finish still sits on your piece, you may need to start with a fairly coarse sandpaper and work your way up to something finer. My table only had a few streaks of the old finish, so I started with a 150 grit and finished with a 220 grit, but pieces that have more of the old finish remaining could start with an 80 grit and then proceed to move through the 150 and 220 afterwards.
It is helpful to use an orbital sander and work in the direction of the wood grain. This proved to be pretty interesting for my table, as I realized there was an intricate pattern of how the wood on my table top was assembled together, but I did my best to work with the grain whenever possible. I sanded the rounded edge details and the legs by hand so I wouldn’t accidentally remove some of the beautiful curved details. At this point, I also realized that my table was comprised of three different types of wood. The table top appeared to be red oak, the table legs seemed to be poplar, and the table skirting was a veneer. They all sanded differently and I had to be extremely careful when working on some areas so I didn’t sand off too much.
The tabletop after the chemical stripper only (left) and the tabletop after the chemical stripper and additional sanding (right).
You can see in the image above the difference that the extra sanding step made. The left half of the table shows what it looked like after only being stripped with the chemicals and the right half of the table shows what it looked like after being stripped with the chemicals and then sanded. By this point, I really fell in love with the blonde finish and almost convinced myself to keep it raw. But remember how I mentioned that my table was made up of three different types of wood? Once everything was sanded down, you could really see the difference. And spoiler alert: the new finish helped to draw that out even more.
Step 03: Select a new finish.
The entire purpose of embarking on this project was to replace the existing table finish with something I liked better, but I was terrified to choose what that something better would be. The entire stripping and sanding process was pretty involved, so I was afraid that I would apply a new finish, hate it, and have to do it all again. I put off selecting a new finish for a few weeks because I was so nervous that I would make a decision I would regret. But lucky for me, on the exact weekend I was humming and hawing over my next steps, one of my favourite furniture flipping YouTubers shared a table flip video and the finish she chose really spoke to me.
For this step of the process, I needed a few more supplies:
wood stain - I used Minwax’s oil-based stain in Weathered Oak
polycrylic or polyurethane - I used Varathane’s Diamond Finish Water-Based Clear Topcoat in matte
Before I applied the stain, I used a wood conditioner. Wood conditioners are designed for use on softer woods, like pine, which tend to take a stain unevenly. Even though my table was not made of pine, since it was made up of so many different types of wood, I decided to use a wood conditioner anyways to make sure that I wouldn’t have any areas that appeared more splotchy than others. The problem with my selected wood conditioner and stain, though, is that they were oil-based, which can naturally draw out a lot more of the red and orange tones from wood. I didn’t even consider this when I went ahead and applied it to my table, but it didn’t take long for me to realize that my red oak table top looked unbearably orange while the other parts of the table looked a fair bit different. I decided to forge ahead with the stain I selected anyways.
I applied the wood conditioner with a clean rag, wiping it across the surface. I wiped away any excess before letting it sit for the recommended amount of time before applying the stain. I chose to use Minwax’s Weathered Oak oil-based stain, which has a grey undertone. I thought it would help to neutralize the red undertones of my wood. I applied it in the same way I applied the wood conditioner, dipping a clean rag into the stain and wiping it across the table. I didn’t want the finish to get too dark or saturated, so this method prevented the stain from soaking too far into the surface of my table. I ended up applying three coats of the stain using this method to every part of the table.
I allowed the finish to dry for a few days before reassessing. I brought the table into my dining room so I could see it in the light it would be living in and I’m sure you can guess this by now, but I hated it. Since the table top was made of red oak, it had such a red undertone, but the table legs and table skirting looked so grey and dull. I didn’t like the finish on any of the pieces. And so began the process of trying to figure out how I would fix it.
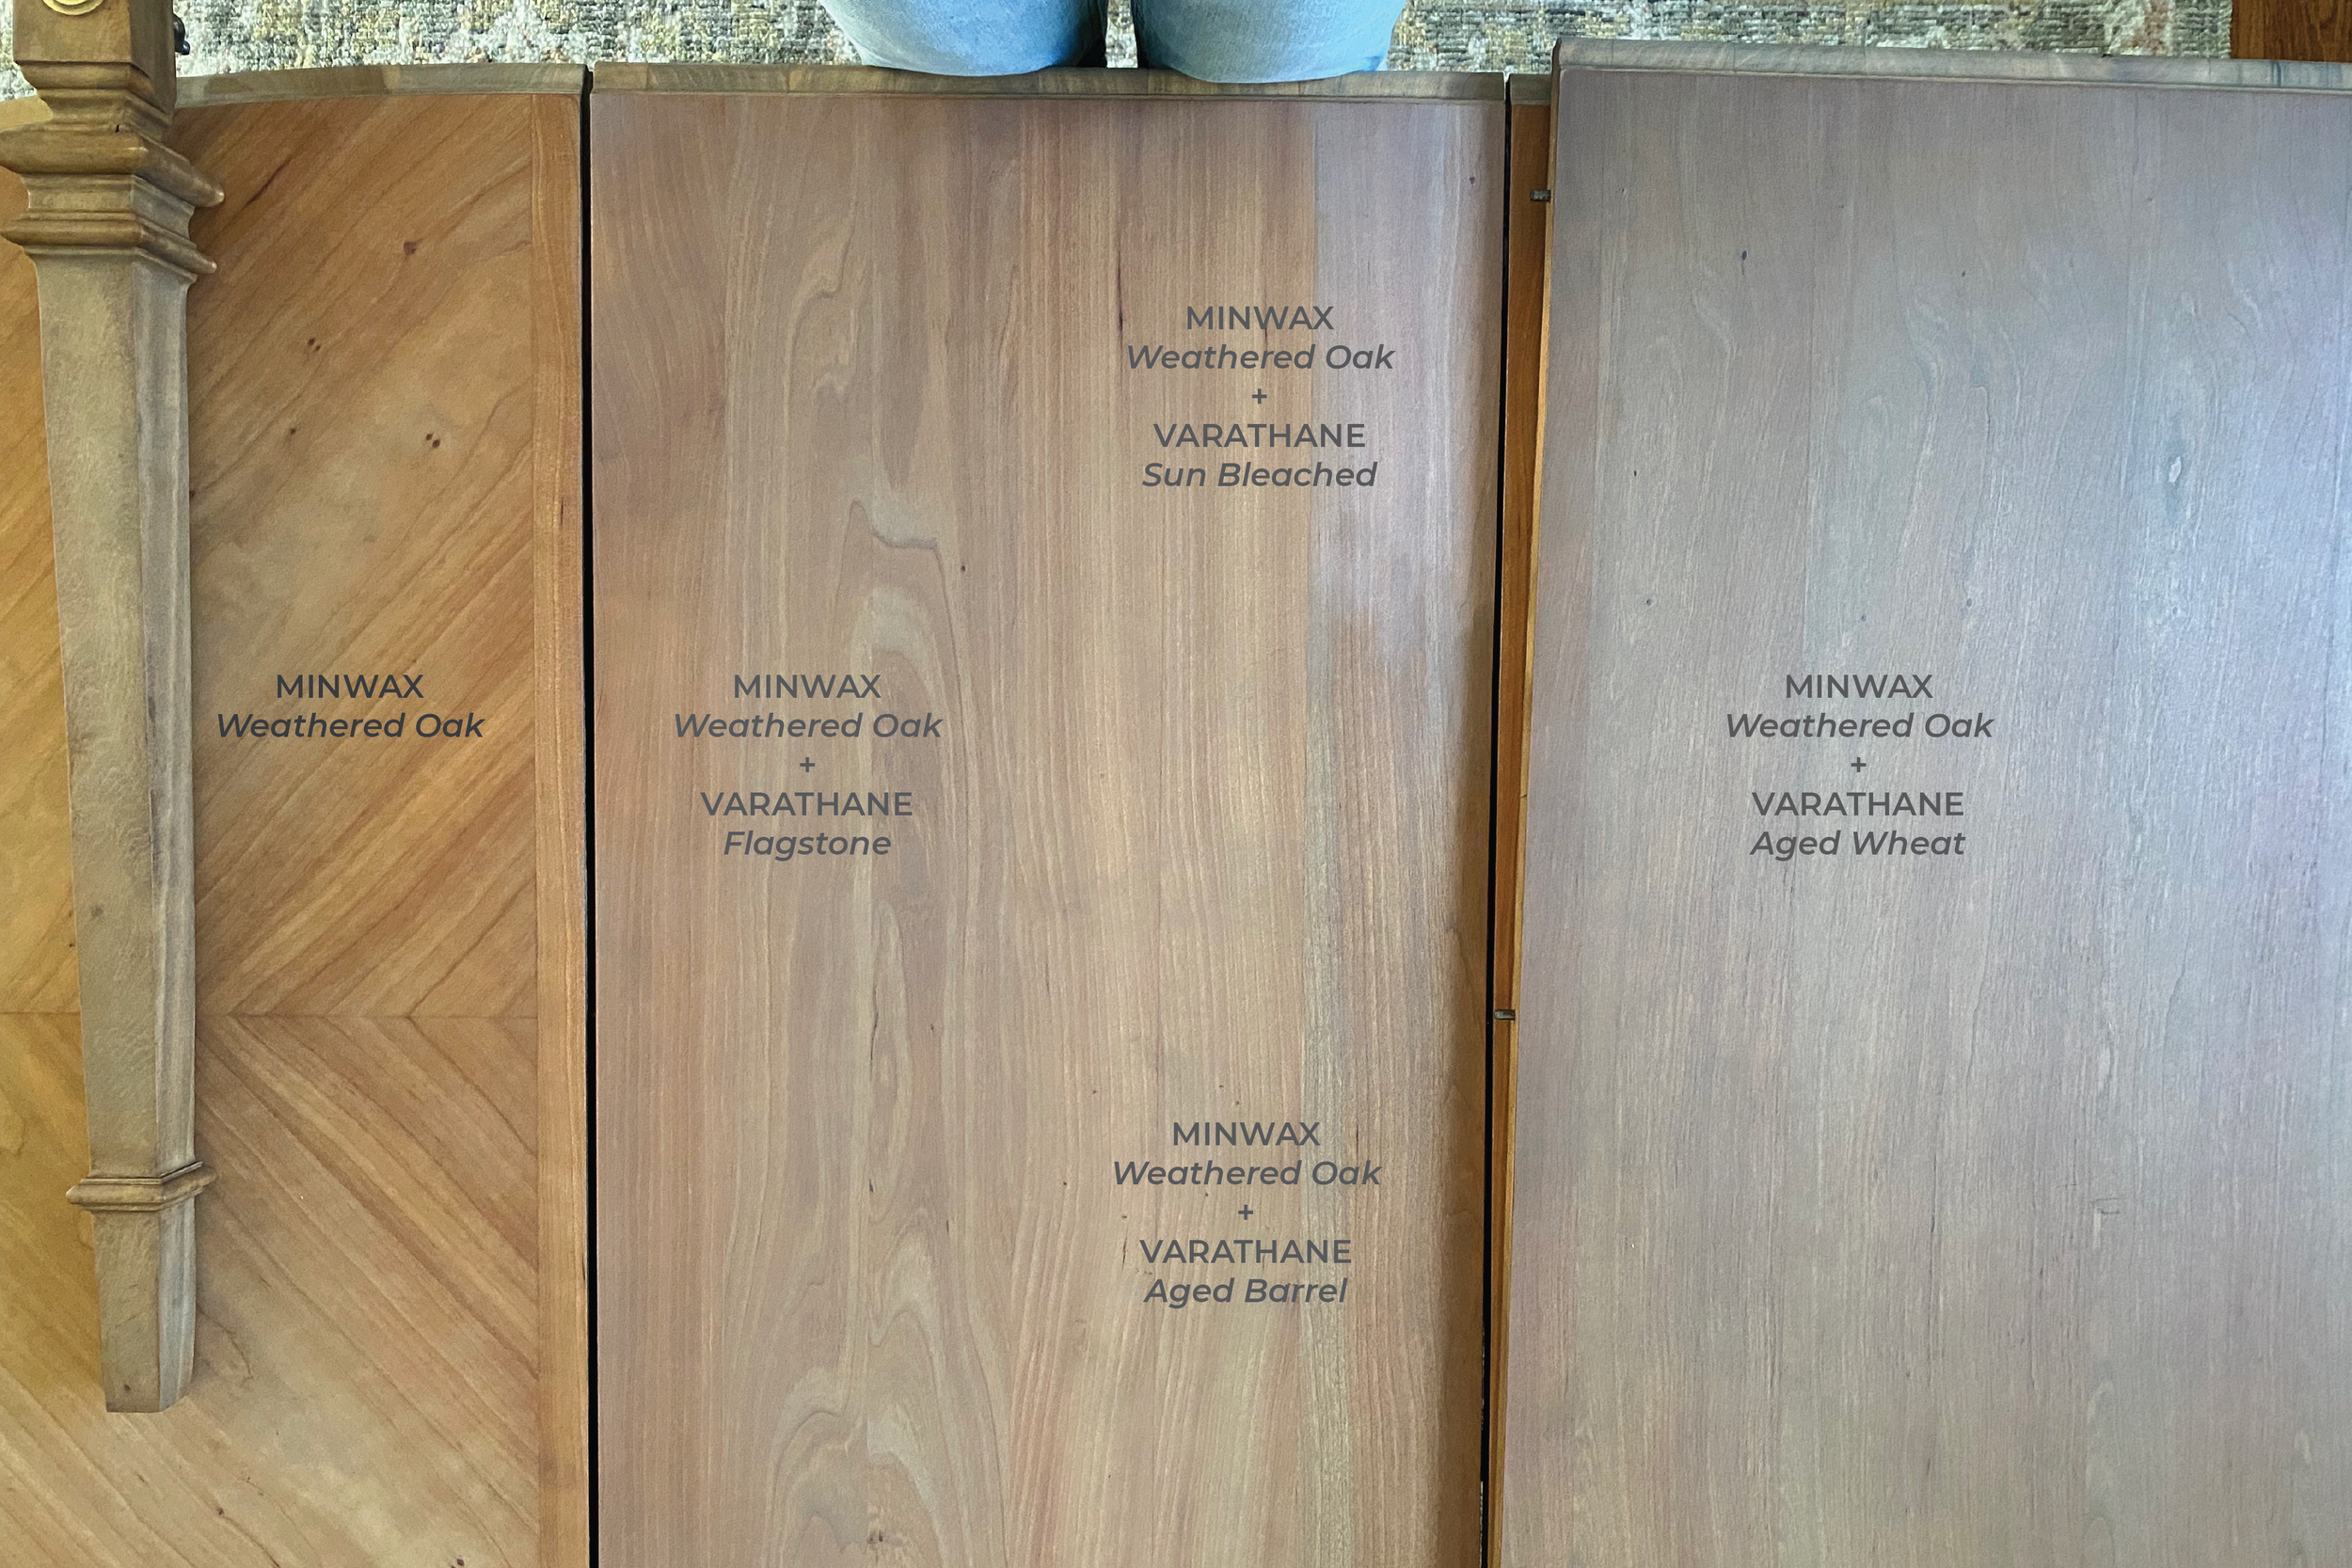
A comparison of the different stains I tried on top of the Minwax Weathered Oak finish.
Step 04: Damage control.
When comparing the pieces, I realized that I didn’t hate the tone - my original plan was to refinish the table in a beautiful mid-tone, not too light, not too dark. However, I hated the red undertone of the table top and I hated the dull grey of the skirting and legs. I decided to first focus my efforts on the table top, as that was the most prominent part of the table. I have some knowledge on colour theory and figured that I could maybe play with the undertone of other stains to help neutralize some of the red. I went through my collection of stains and tried a few different options. The stains I had in my collection were all Varathane brand oil-based options, but at this point, I was looking at stripping down the entire thing again anyways, so I really had nothing to lose with trying.
Here’s the stains I tried on top of the stain I had already applied:
Varathane’s Aged Wheat - I used this stain on our stairs and it has a green undertone, which would be the most surefire way to cancel out some of the red undertones. Turns out this was true, but the overall look was a little too dark for what I was after with my table.
Varathane’s Flagstone - I love this light-wash tone on pine, so I wondered if it could cancel out some of the red while still keeping the overall tone in the mid-range. This was a fairly good option, but it did read a little bit more purple than I would want.
Varathane’s Sun Bleached - This is a white-wash and not what I was going for, but I figured it was worth a shot to try. Of course, it turned the red oak undertone to a pink and I hated it.
Varathane’s Aged Barrel - This stain has a grey undertone, much like the original stain I used, but I also noticed a touch of green in it. Much to my surprise, it didn’t end up reading too grey and when applied sparingly using the same cloth-wiping method that I originally used, it maintained the warmth of the red oak while neutralizing the red tones slightly. This was my winner!
I applied two light coats of Varathane’s Aged Barrel to the table top and I loved the way it looked. Next I had to bring the other parts of the table - the skirting and the table legs - along for the same journey. After the first finish caused them to turn really grey, I realized that in order to match them to the table top, I would first need to give them a red undertone too. I used a coat of Varathane’s Early American on each piece to get the red undertone, and then applied one coat of Oak Barrel. Much to my delight, they looked pretty close to the table top. They don’t match perfectly, but they were about as close as I figured I could get them.
I ended up loving the Frankenstein-finish I had crafted up. It took a journey to get there, but it was the perfect warm, natural-looking mid-wood tone I was after in the first place. Not too grey, not too red, not too yellow. Just right.
Step 05: Seal it up.
The final step of any refinishing project is to make sure you protect your new surface. I really didn’t like the look of the glossy finish on the original table, so I decided to go in the complete opposite direction and used a matte finish instead. I really wanted this table to maintain a natural look, so I applied two coats of Varathane’s Diamond Finish Water-Based Clear Topcoat in matte, allowing it to adequately dry in between coats. I also gave it a really light sanding by hand with a 400 grit sandpaper after each coat to ensure it was extra soft and smooth.
There is a lot of debate over whether to use a polyurethane or a polycrylic as a topcoat. Based on the research I did, each have different benefits, but generally you want to use an oil-based topcoat when you use an oil-based stain and a water-based topcoat when you use a water-based stain. From what I have read, oil-based topcoats will generally bring out more of the red undertones of the wood by nature, so I wanted to avoid that. I’m not sure how the water-based topcoat will stand up over time, especially since I used oil-based stains, but I’ll be happy to report back once this table gets a little more wear and tear.
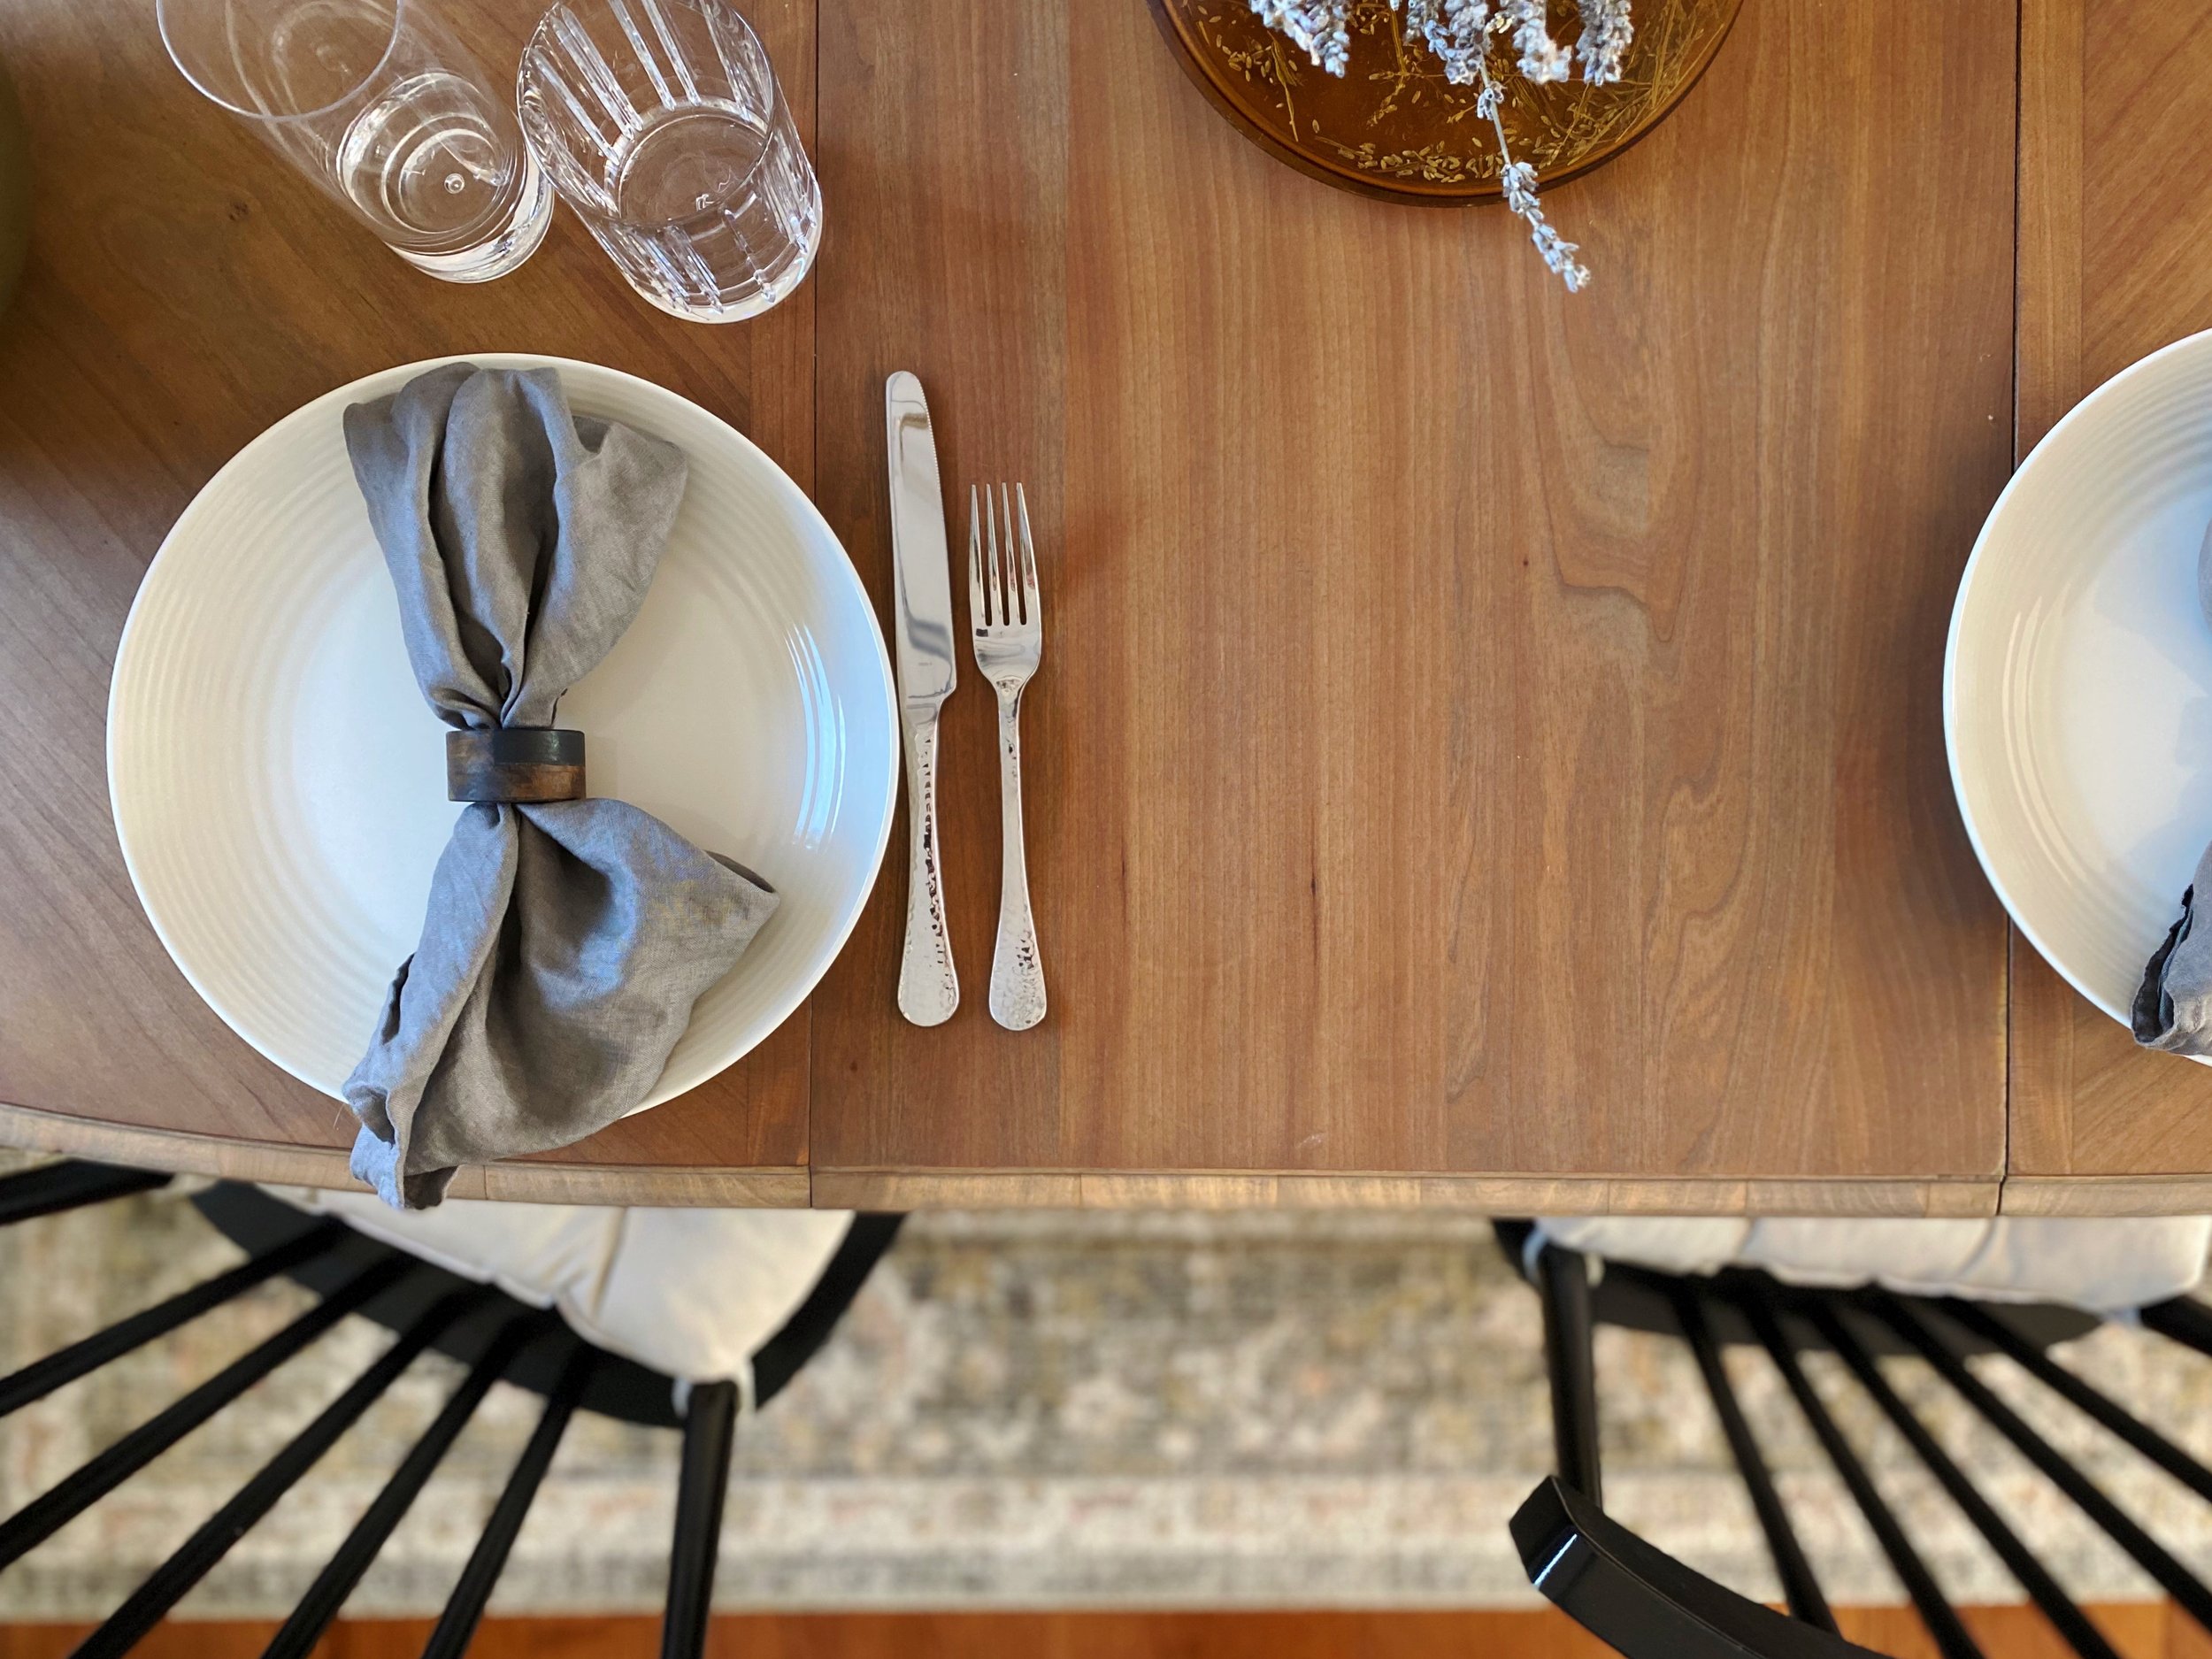
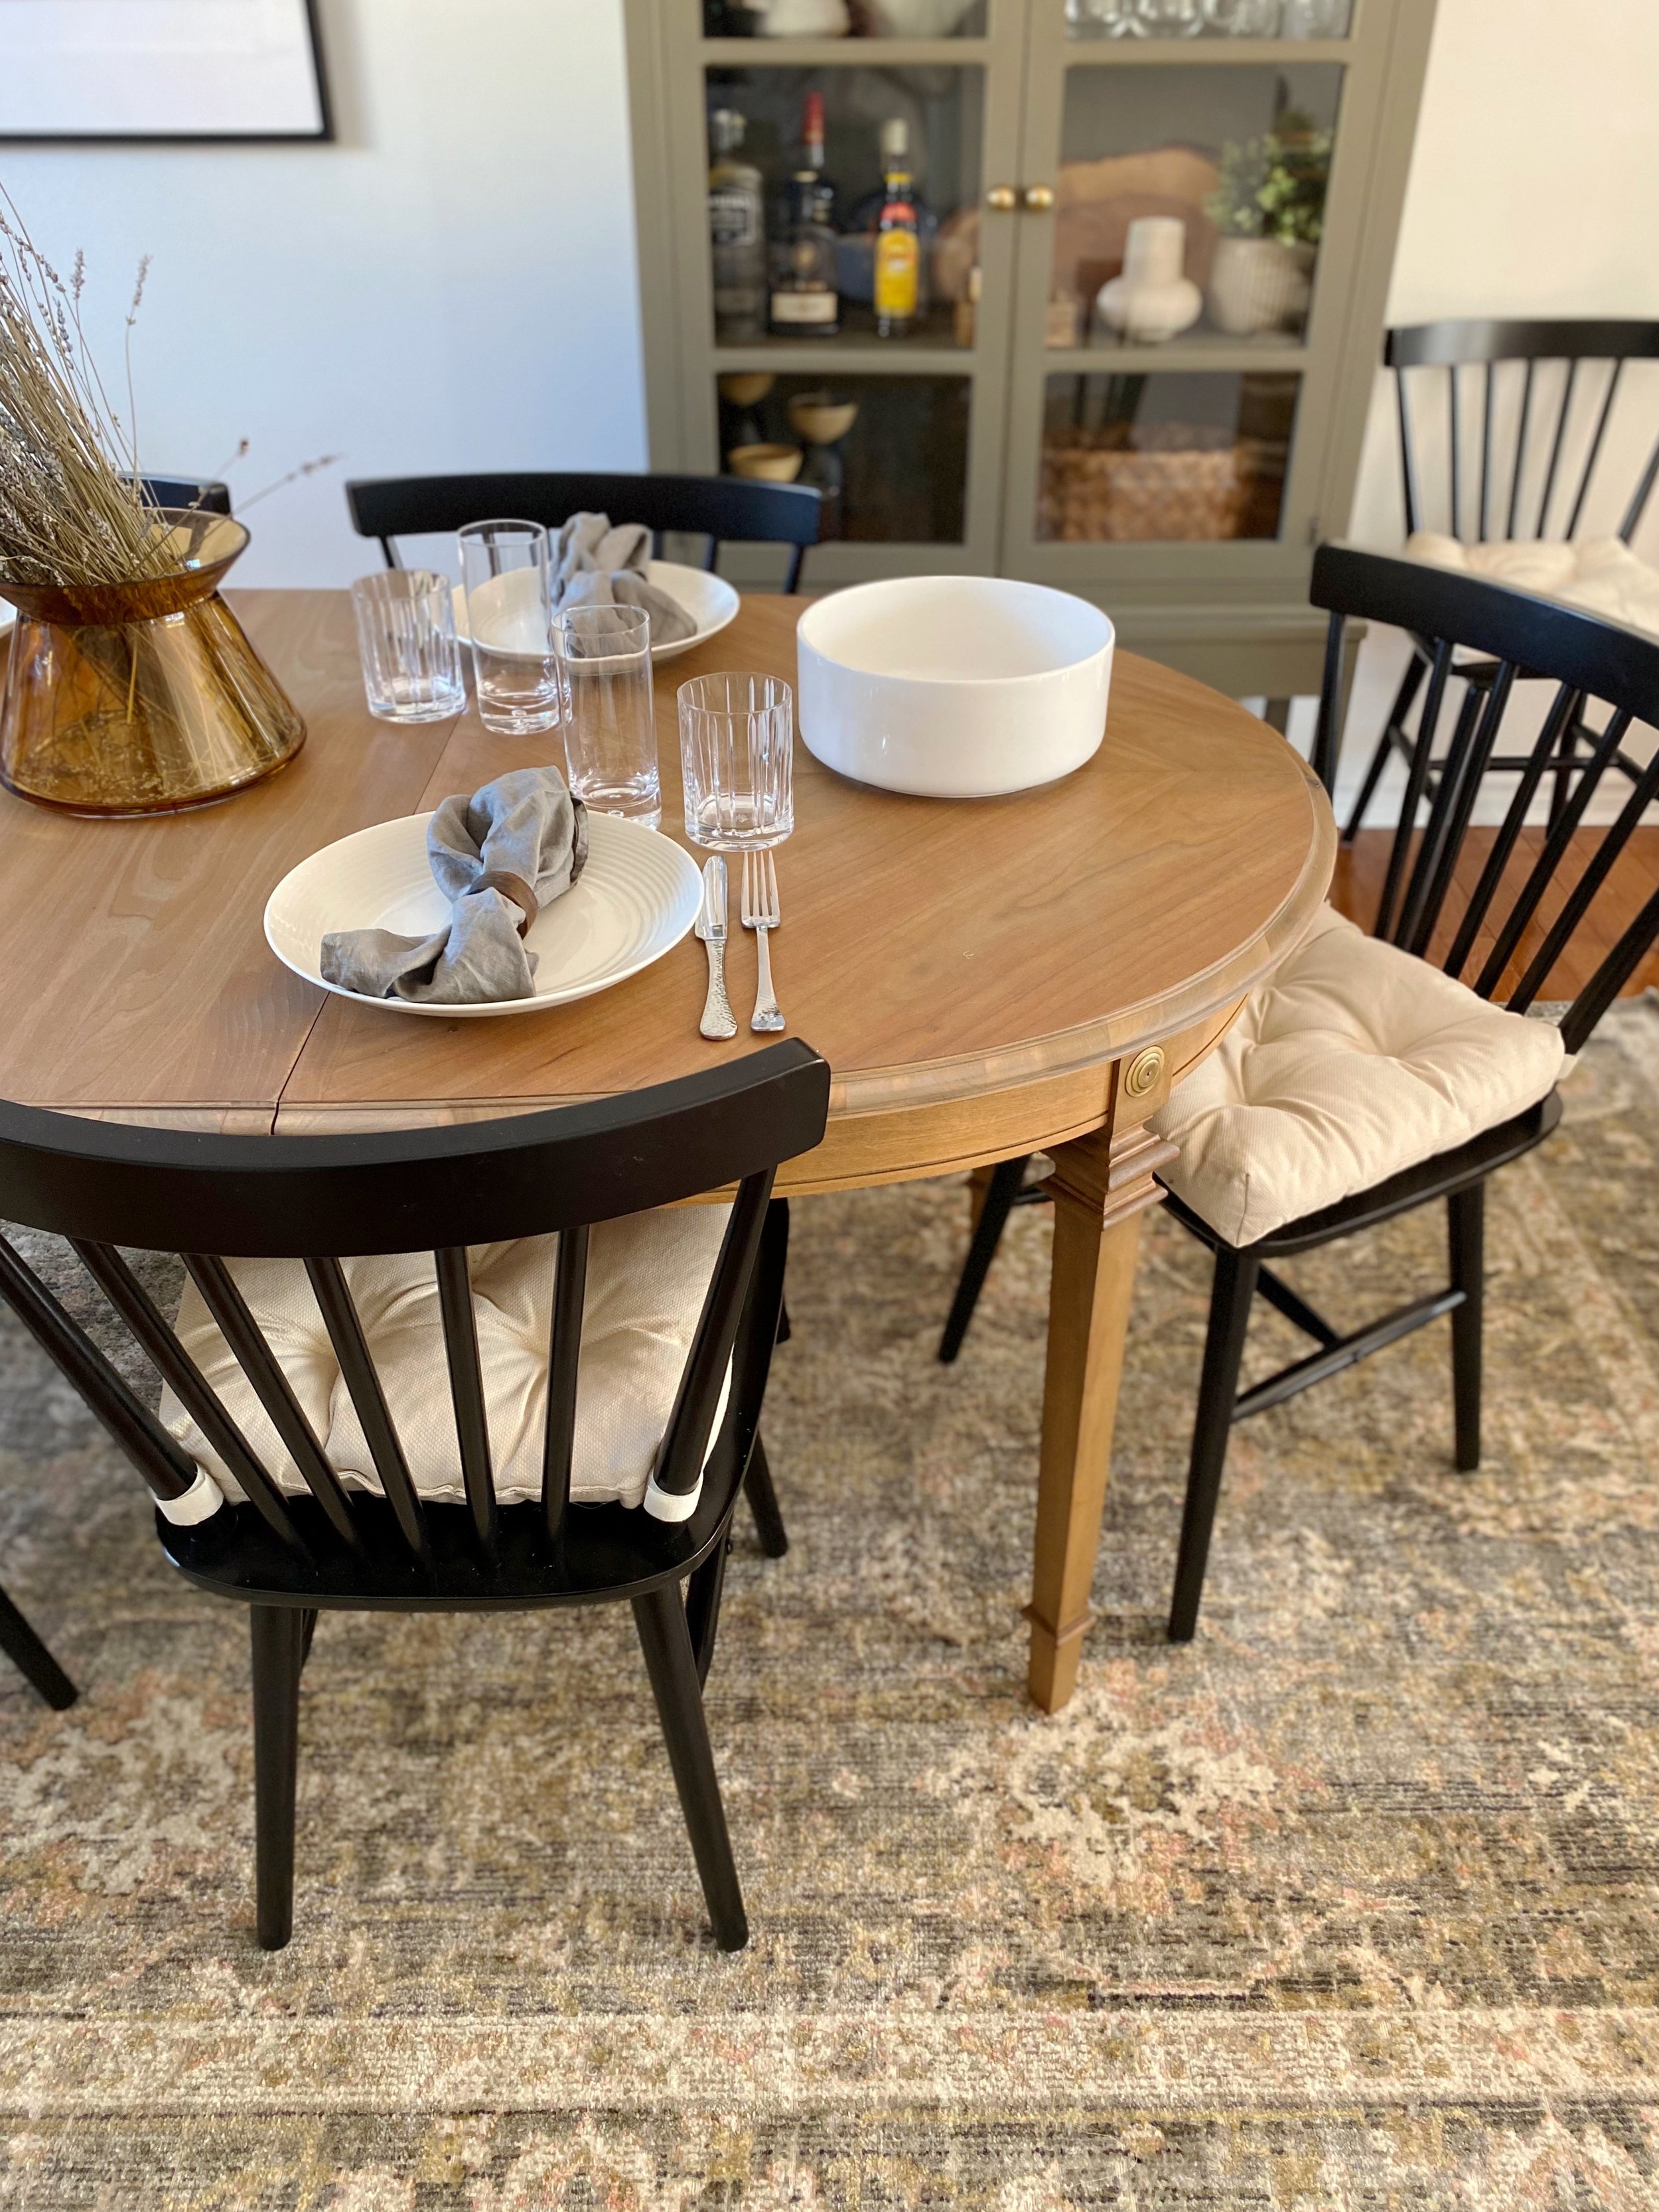
This table brings so much warmth to our dining room. I’m so glad I made the effort to refinish it rather than resorting to paint. I am definitely no stranger to painting furniture, but in this instance, this room needed this warm wood to ground the space and make it feel collected and worn in.
I hope you could glean something from my experience and found this tutorial helpful for your own refinishing journey. Every furniture piece is so different and unique, but the process is generally the same across the board, and like I said, if I could do it, so can you!
Want to see this process in video form? We’ve got a YouTube channel for that!

