DIY Old-World Style Stone Vase

A few weeks ago, I came across a really beautiful console table on our local buy-and-sell. Up until that point, I didn’t realize that I actually needed a console table, but once I saw it, I kept coming back to the listing. After taking a few measurements, I realized that it would actually fit perfectly between our open living and dining space to help establish a little bit of visual separation and ground the floating accent chair in our living room. It just needed a little love. I have been working on updating that table (which was halted as I waited for one particular supply to arrive) and hope to share that makeover in the next couple of weeks. But for now, I decided I would share another simple DIY I created as I began thinking through the styling for that new little space.
I had a very specific vision for the styling. I definitely looked around our home to see if there were any pieces I could pull from other spaces to use on the console table, but I wasn’t able to find anything quite right for the idea I had in my mind. I turned to the next best option: the thrift store!

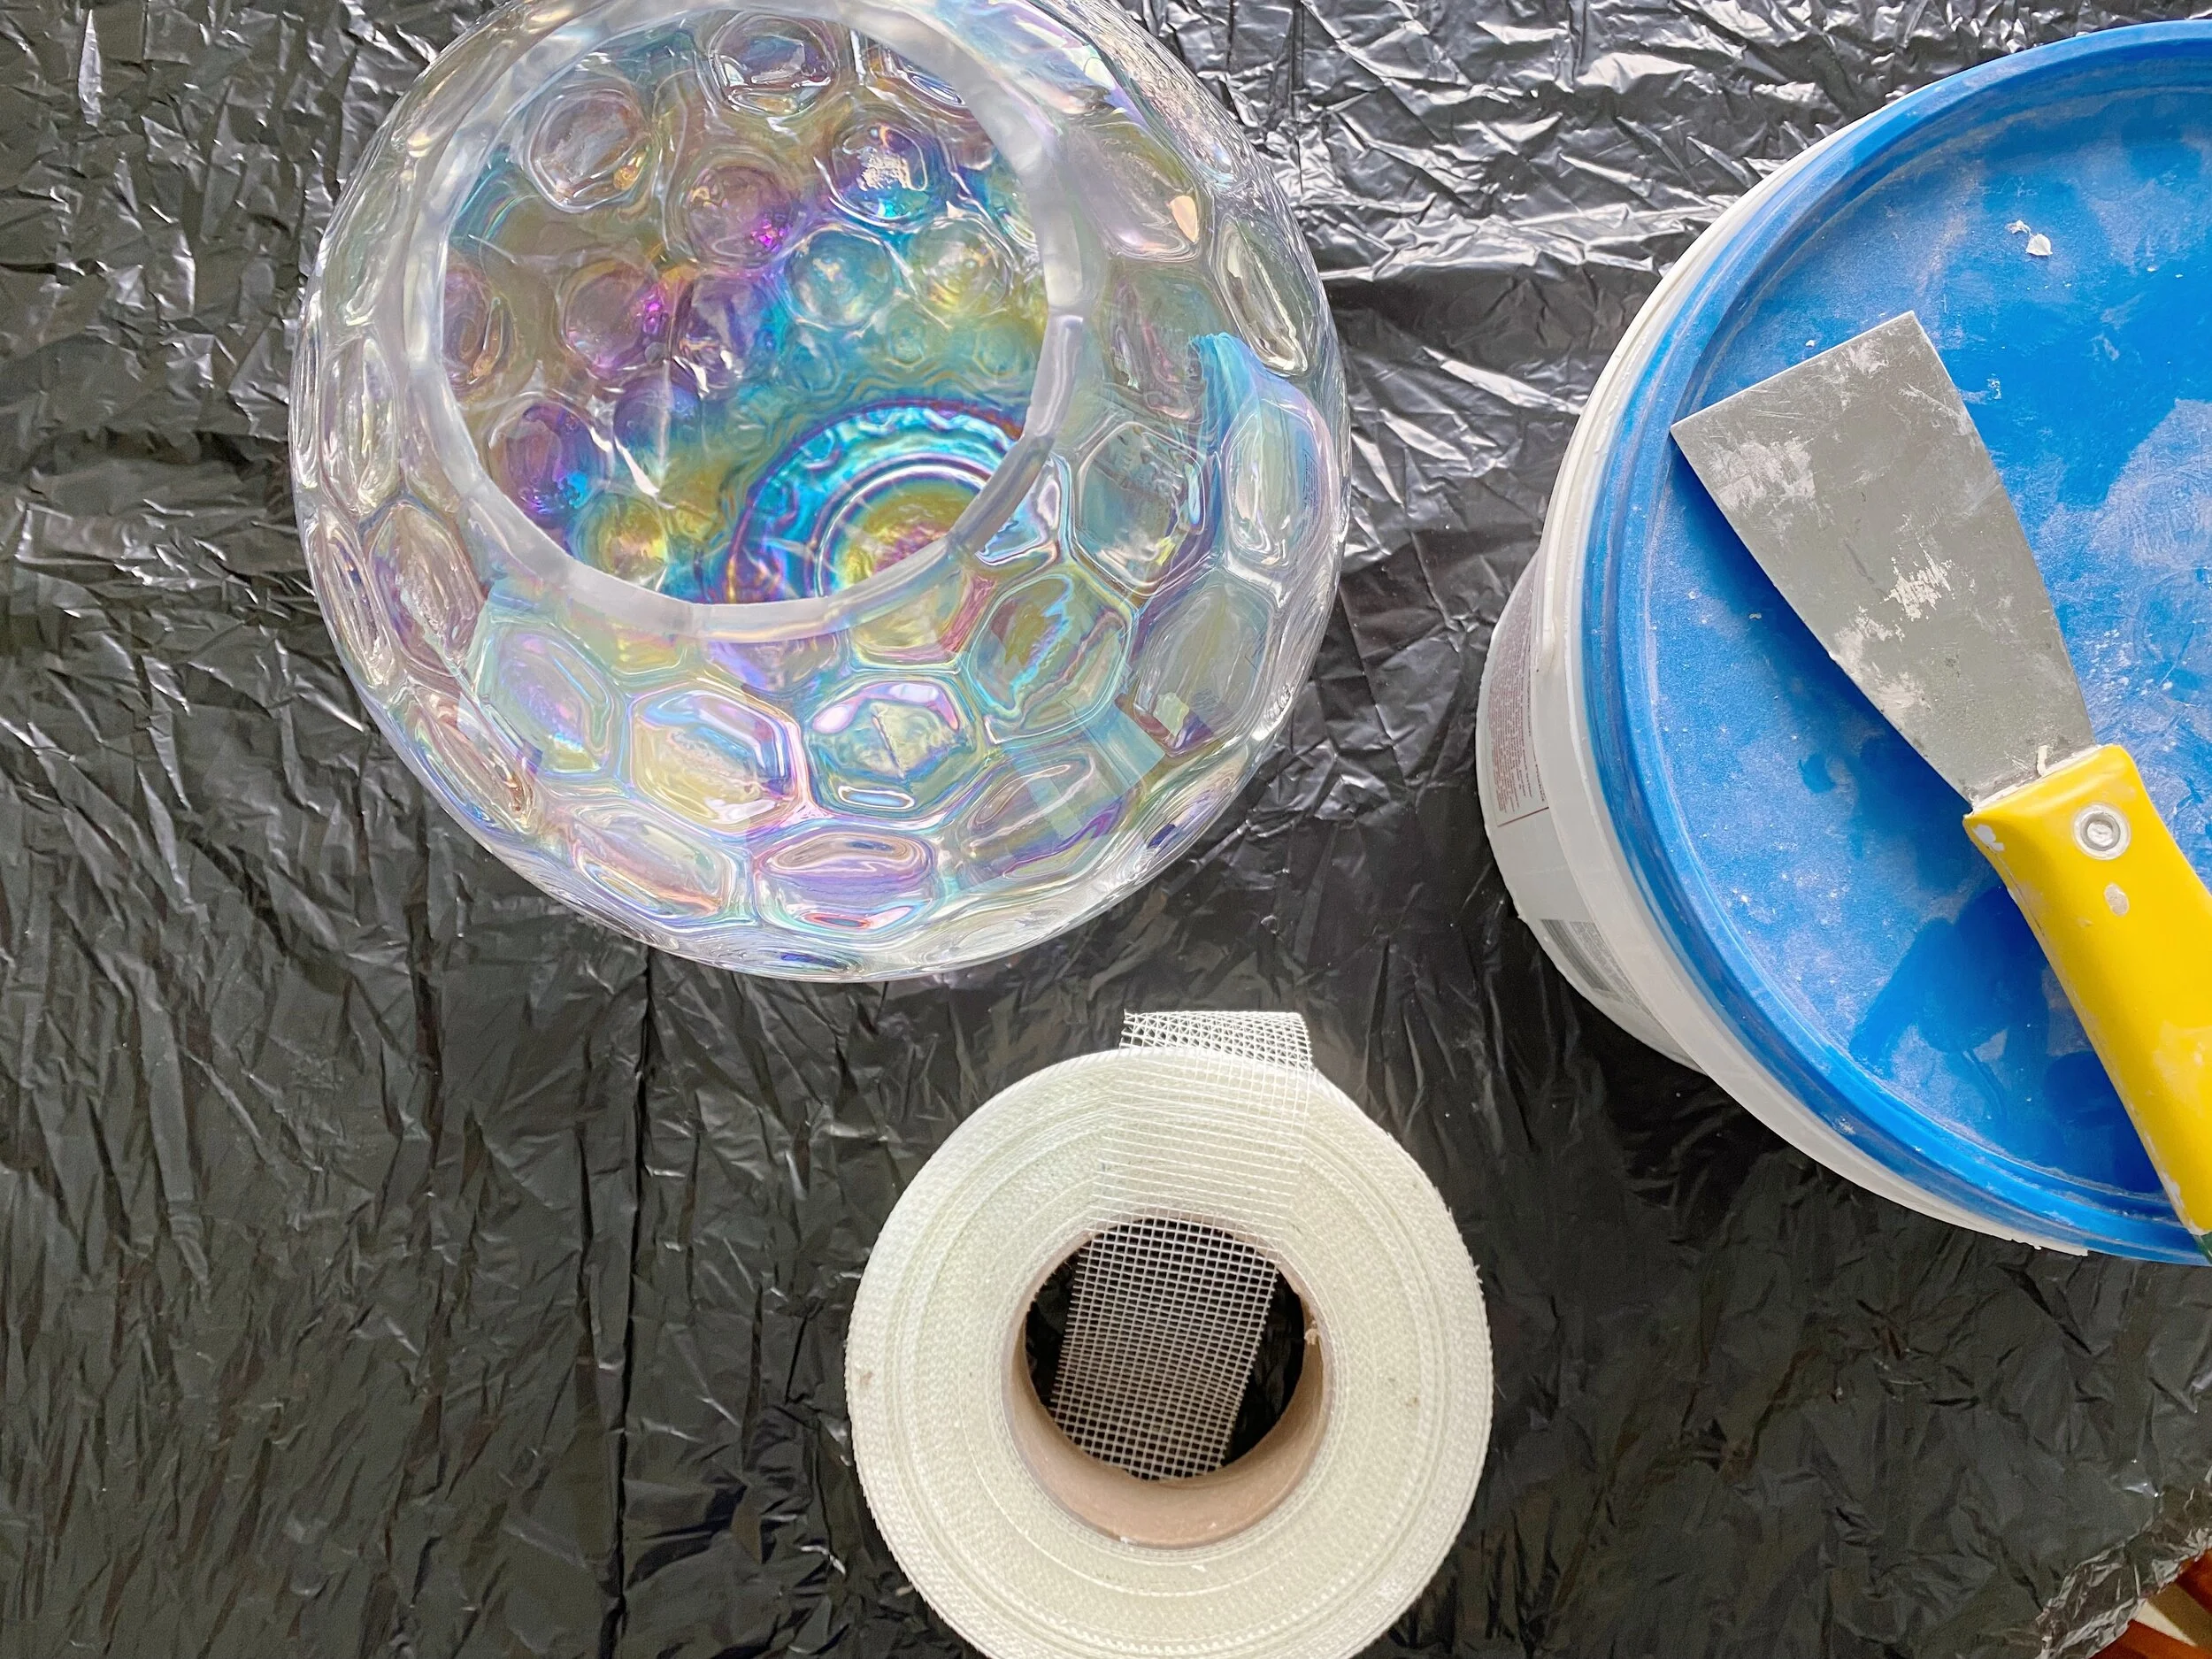
Something that is really underrated in styling is the concept of scale. It can be really hard to get the right balance of proportion and scale to create enough visual interest without having it look cluttered and congested. When I pictured this little table space, I knew I wanted some (faux) stems of some sort that sat in a large rounded vase. I wanted it to feel almost a little too big. My initial vision was a simple rounded glass vase, but it proved pretty tricky to find without a huge price tag. I came across a large glass vase at the thrift store for only $4 that fit the bill in size and shape, but it wasn’t the simple clear glass I envisioned. Instead, it was a little…colourful. I decided to work with what I could get my hands on and shifted my focus to a style that I could DIY. Which brings me to this tutorial.

I’ve done the ceramic-paint-and-rubbed-dirt trick on many thrifted pieces in the past, but I wanted something that felt a little more rugged this time. I wanted it to look really old. I knew that in order to get the texture I was after, I needed to use a material that was pretty substantial, like drywall compound. But according to my research, applying that to glass was not a viable option. Naturally, I tried it anyways. And guess what? It worked! Here’s how I did it.
You will need:
an old or thrifted glass or ceramic vase
drywall compound
mesh drywall tape
a spackle knife
fine-grit sandpaper (400 grit)
paint in various colours (acrylic, chalk, or latex in a more matte finish all work)
Step 01: Apply the tape.
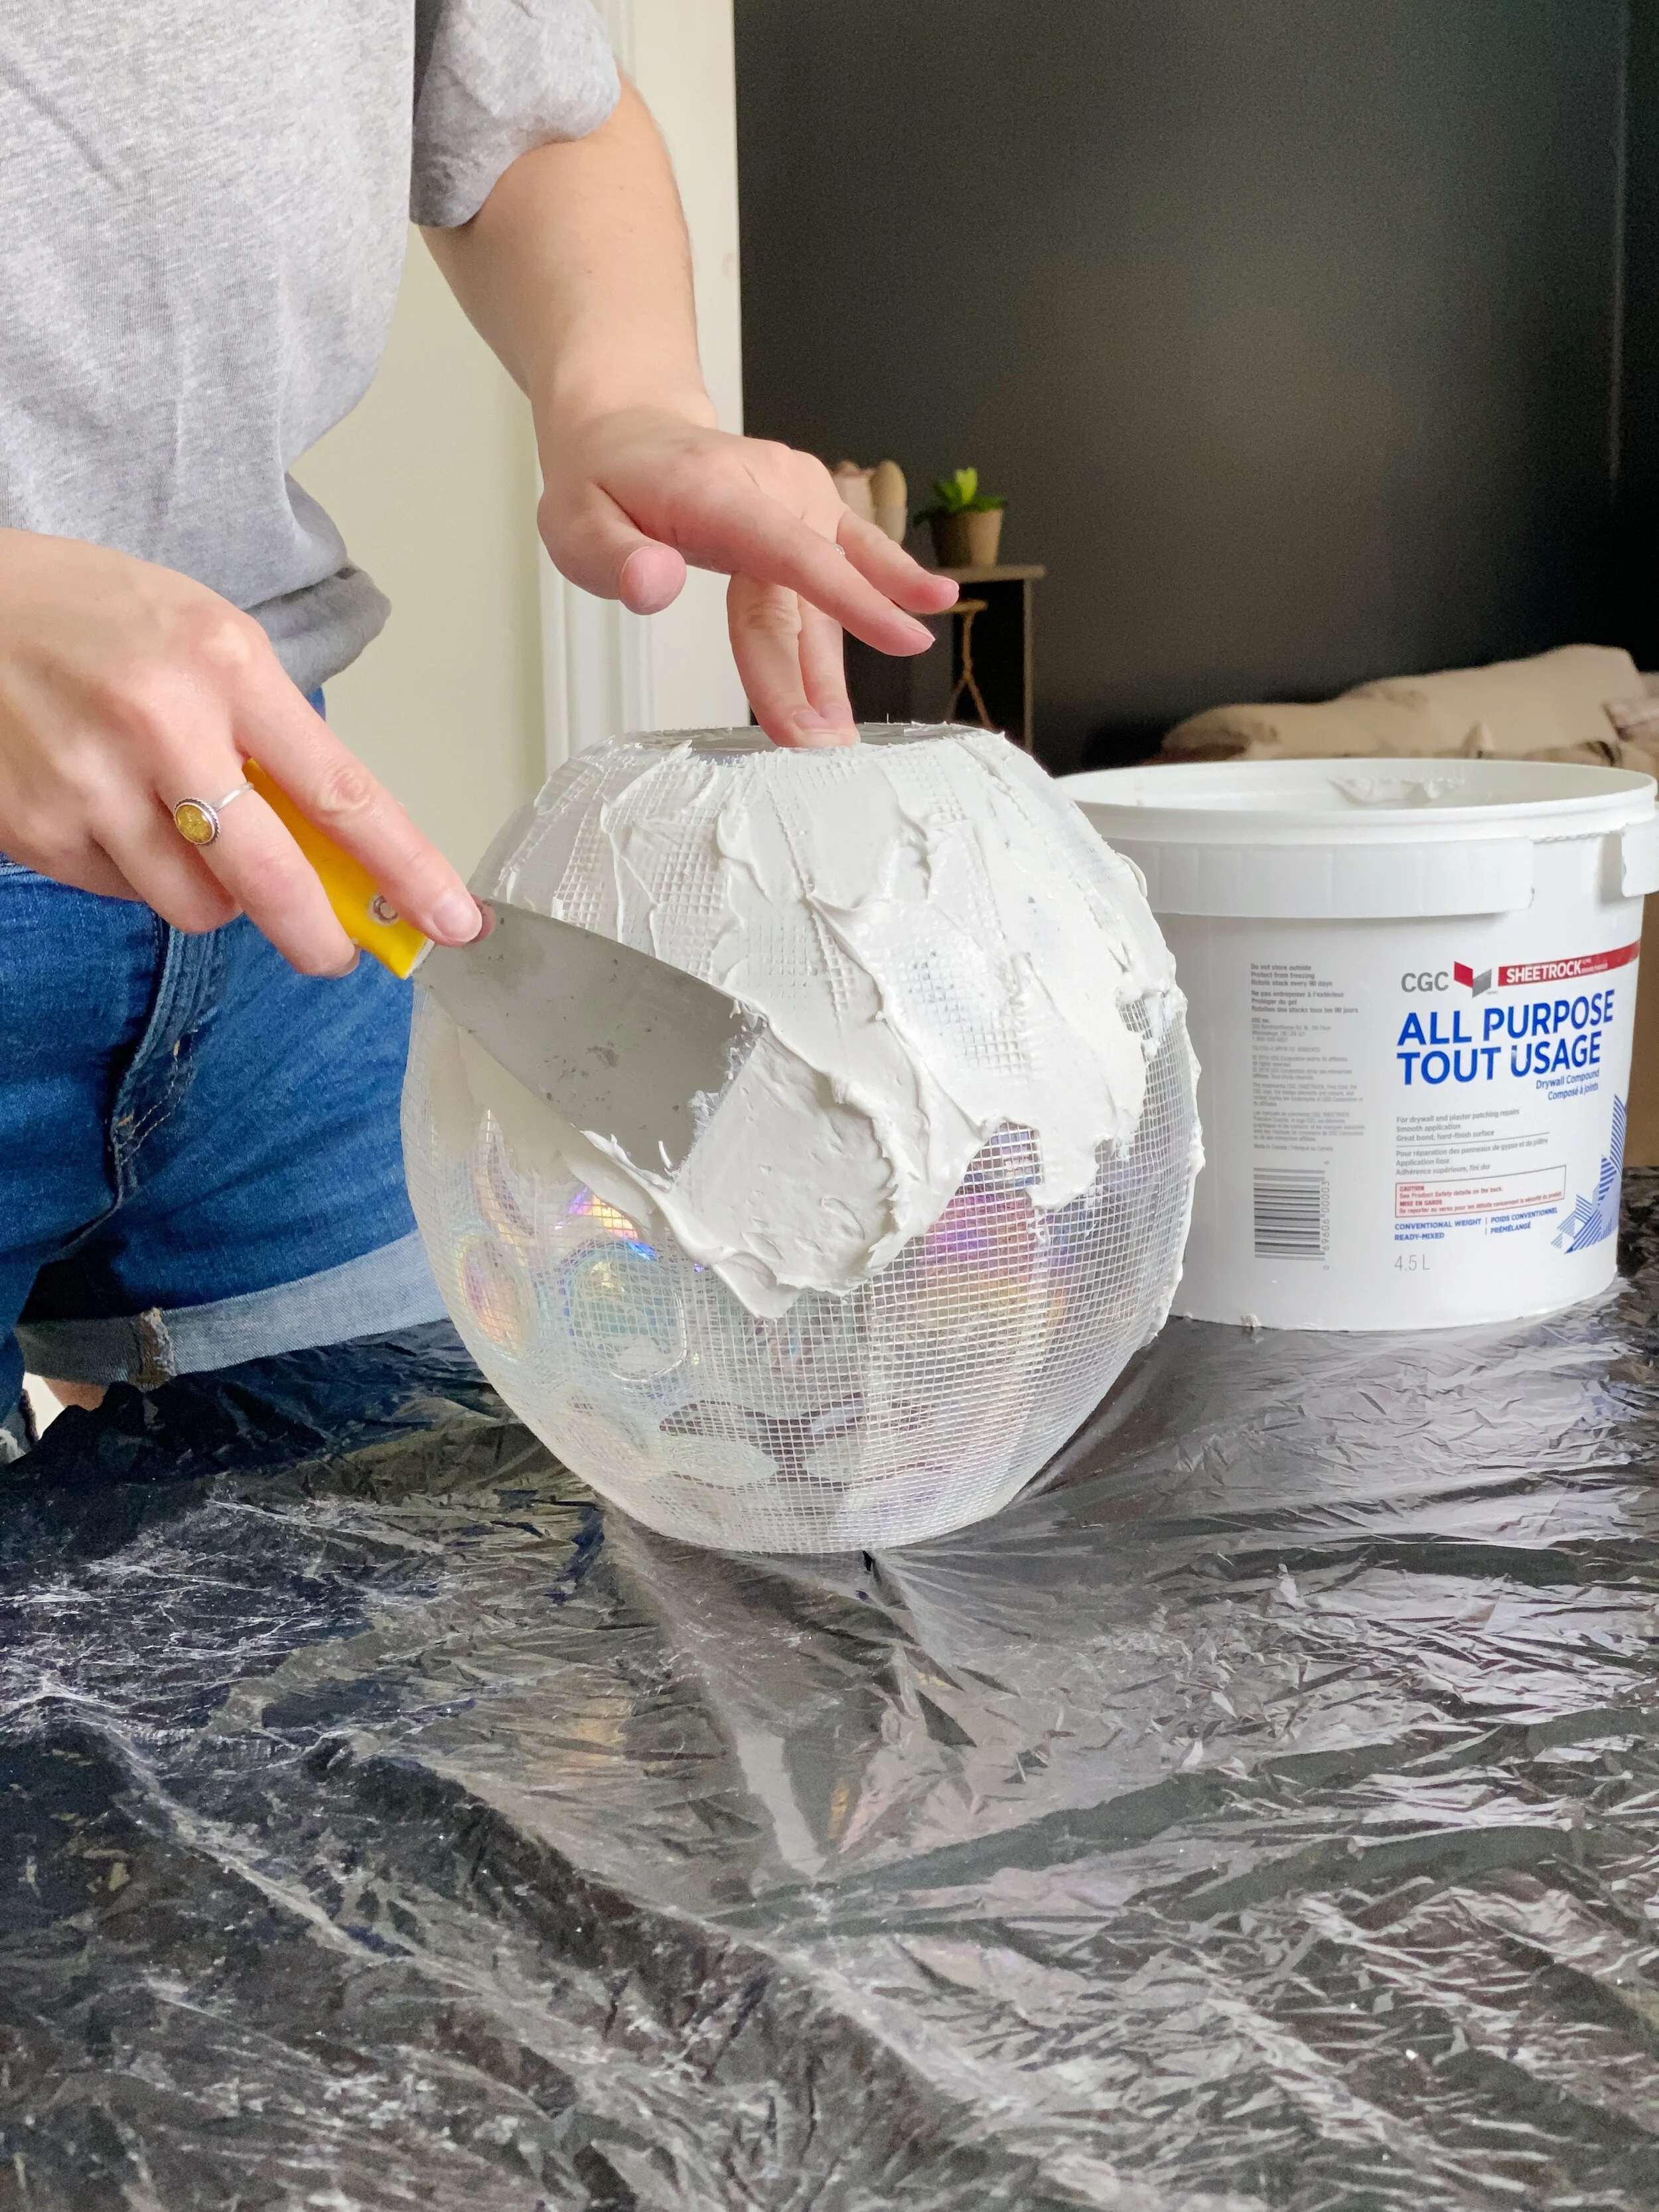
This process is very easy to do, but will get a little messy and takes a few steps with drying time in between. Be sure to set up your work area somewhere out of the way so your vase can dry without being disrupted. Lay out a garbage bag or big sheet of paper that protects your work surface. To get started, you will need to cover your vase in strips of mesh drywall tape. Drywall compound may not adhere very well to a glass surface, but the mesh tape will give it a little bit of something to cling onto. I covered the entire surface area, overlapping some sections to fit around the curved shape of the vase. I also tucked the strips up and around the rim of the opening. This tape has a little bit of stickiness to it so it will stay in place, but you may need to be pretty intentional about going over it with your fingers to stick it down firmly.
Step 02: Cover the tape in a light coat of drywall compound.
This first coat of drywall compound is intended to be a foundation. Using your spackle knife, coat the entire vase with drywall compound, being sure to push it into the cracks of the mesh tape. Depending on the shape of your vase, you may need to work in two sections - top and bottom - with drying time in between. I tried not to focus on the texture at this point. Work your way around the entire thing until all the tape is coated. There may still be sections that show the mesh texture, but you will do another coat to cover this once the base coat dries. Drywall compound takes quite some time to dry, so set it aside until it has completely hardened (approximately 12 hours).

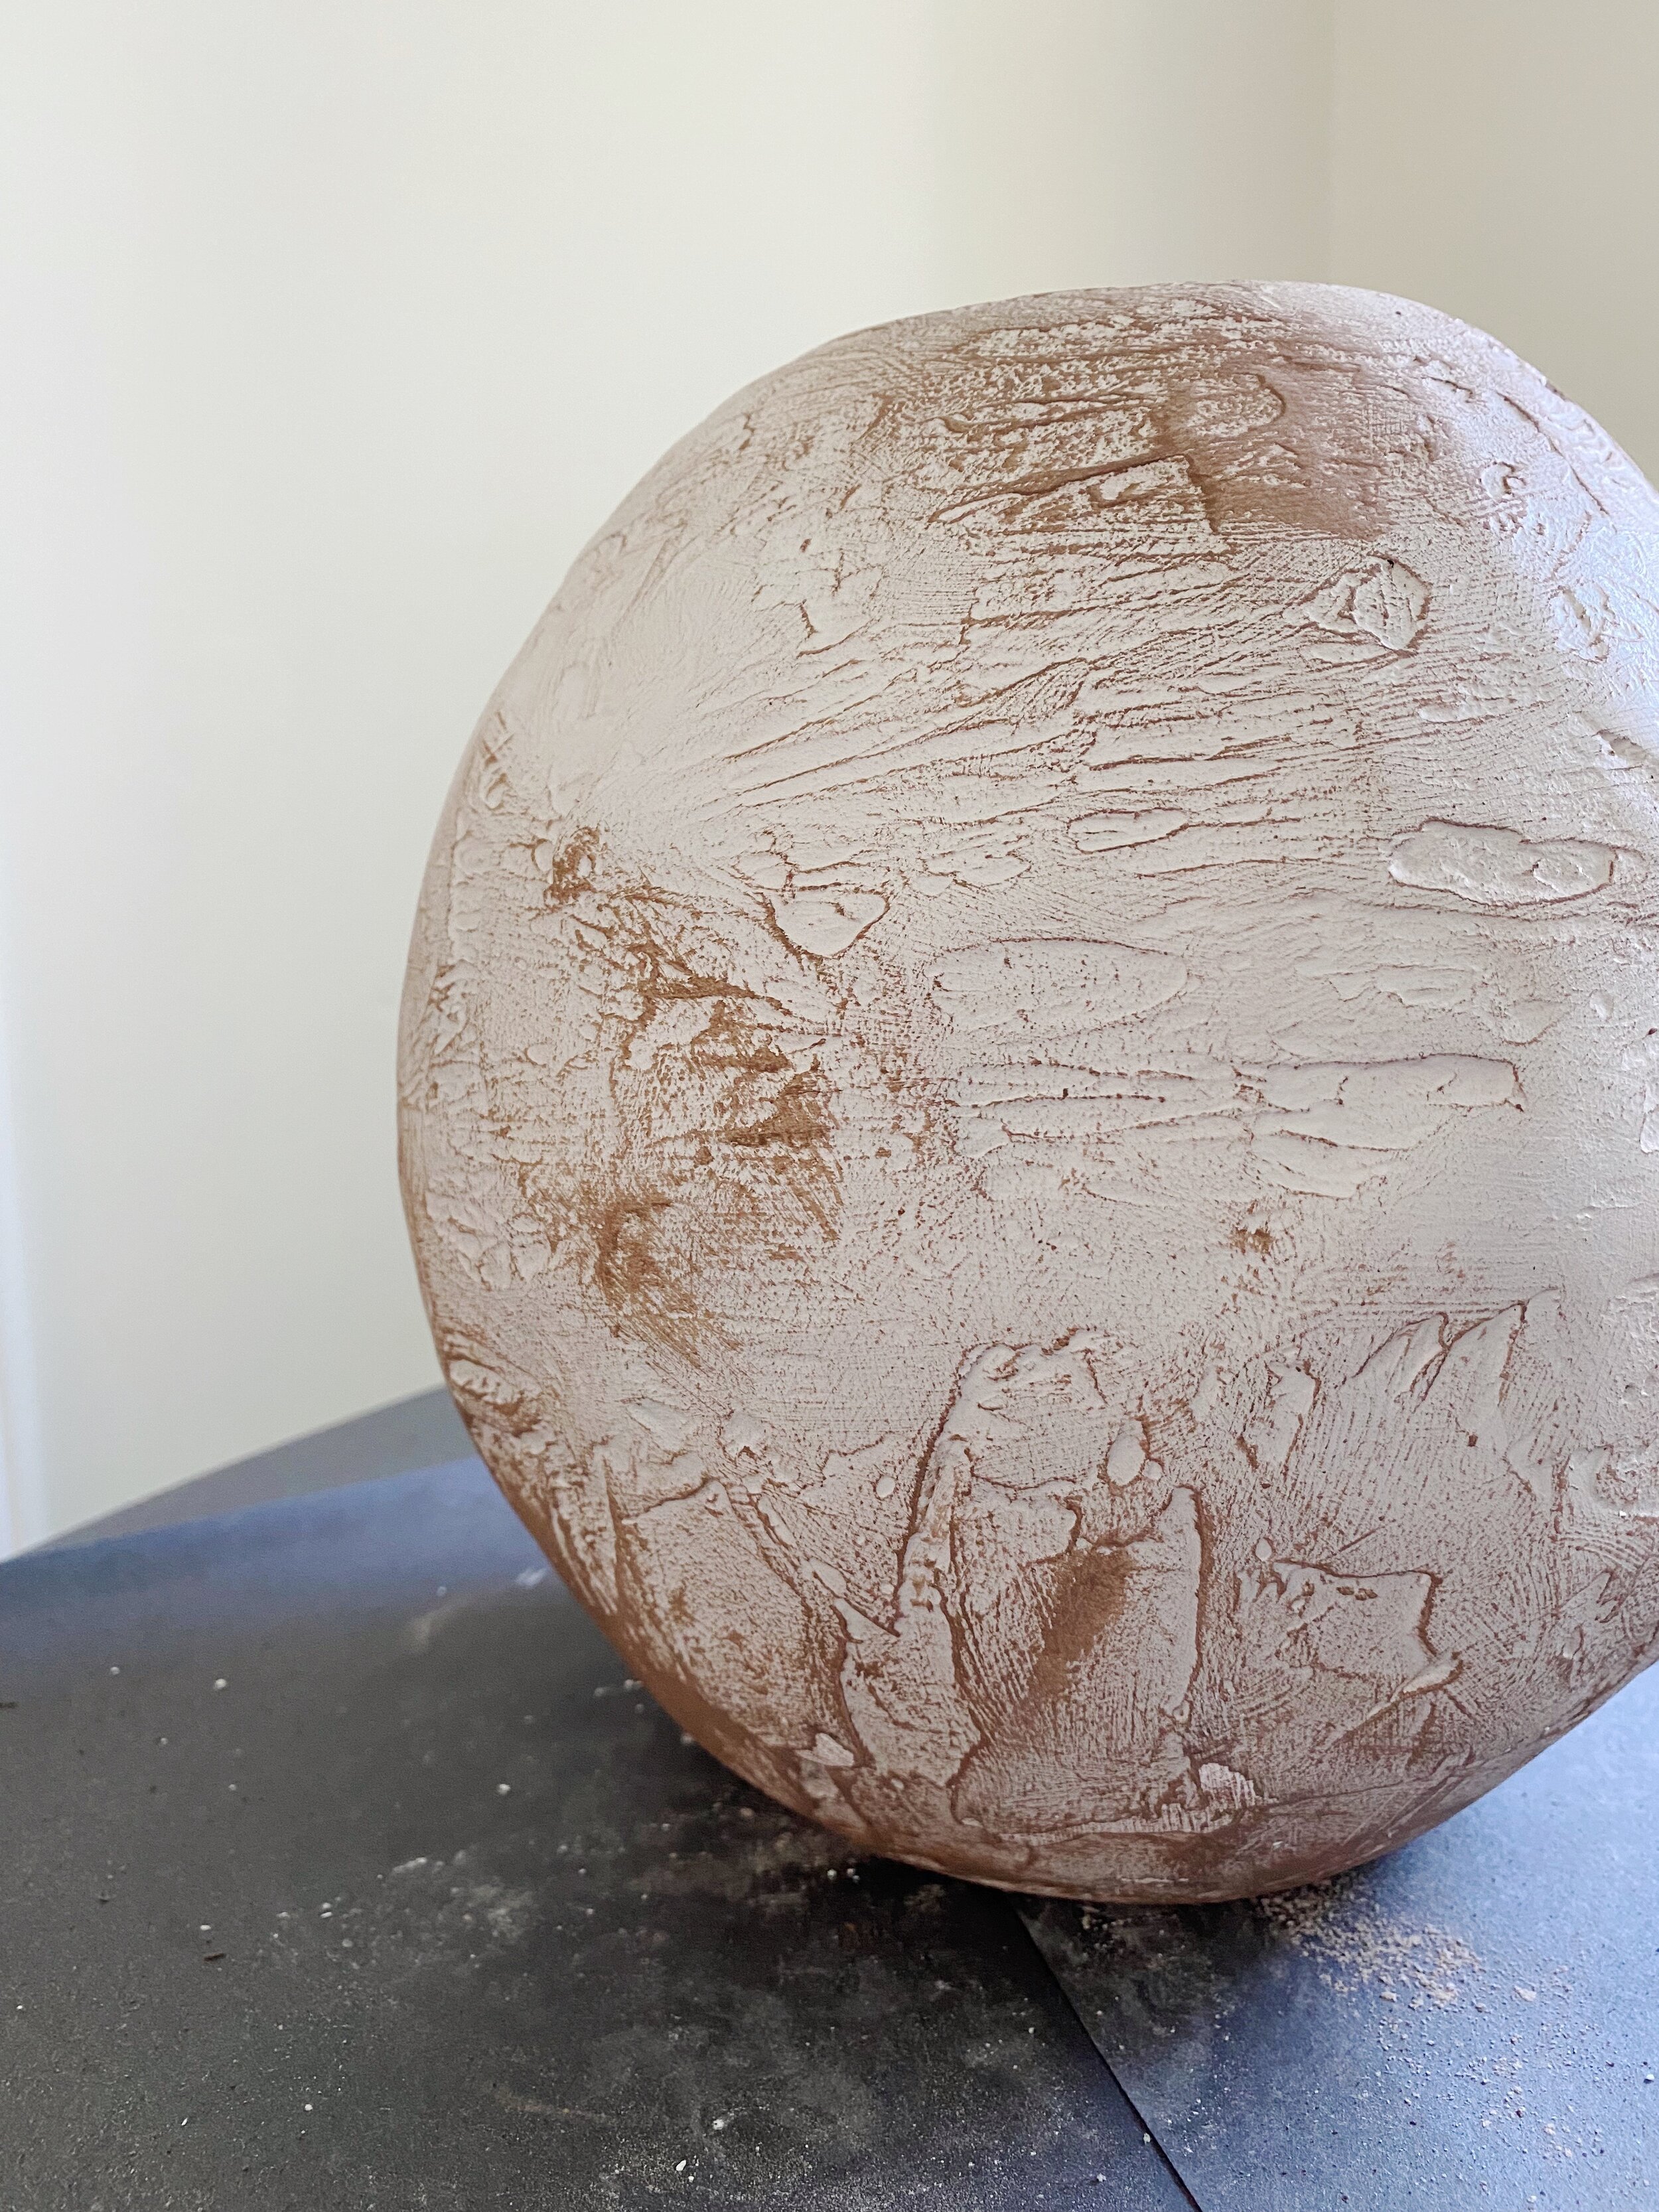
Step 03: Add the texture.
Once the foundation coat is dry, add another coat of drywall compound. Be mindful of covering all the areas where the mesh tape is still exposed. You can use your spackle knife or your fingers to create a really unique texture that you are happy with. I did a combination of both. Once again, allow this coat to completely dry for at least 12 hours.
Step 04: Smooth it out.
Part of creating the stone look is keeping the texture, but giving it a smoothed-out finish. Use a fine grit sandpaper (like 400 grit) to smooth out all the rough ridges and bumps in the dried compound. You can sand it as much or as little as you like. Just be mindful that sanding it too much may expose the mesh tape underneath. I recommend sanding it outside to avoid making a huge mess in your home and wearing a mask so you don’t breath in the dust particles. When you’re finished, brush or blow off the excess sanding dust.

Step 5: Paint, paint, and more paint.
You can decide what tone you want your finished piece to be. I decided to go for a lighter finish, but knew that I wanted some darker areas showing through. I decided to first paint a layer of brown paint so that when I scuffed up the final paint coat, the darker bits would be exposed. I used a brown chalk paint, but you could also use acrylic craft paint or leftover house paint. Just ensure that it is in a matte or eggshell finish.
I coated the entire piece in a dark brown paint followed by a beige-grey chalk paint. I then worked at highlighting some of the texture by using a drybrush technique to brush on some additional thin layers of brown and greige paint. There wasn’t much of a science to it. I just went for it and knew that if I wasn’t happy, I could always paint over it again.

The first coat was a dark brown paint.
Next, I covered the dark brown with a greige tone. Then I used the drybrush technique to build up various layers of brown and greige to highlight the different textures and make it look worn and aged.
Step 6: Sand it again.
The final step in the process is aging the vase with a little more sanding. Once again, I used a 400 grit sandpaper and worked my way around the vase to sand off some of the top coat of paint. This step really helped to emphasize some of the beautiful texture. In some areas, I sanded too much and exposed the white drywall compound underneath, but I decided to leave it because I liked the interest and dimension that brought. Once you are happy with it, that’s it! You could coat the entire thing in a matte spray-on polycrylic top coat, but I just left mine as is. I think that more wear and tear over the years will only add to the look.
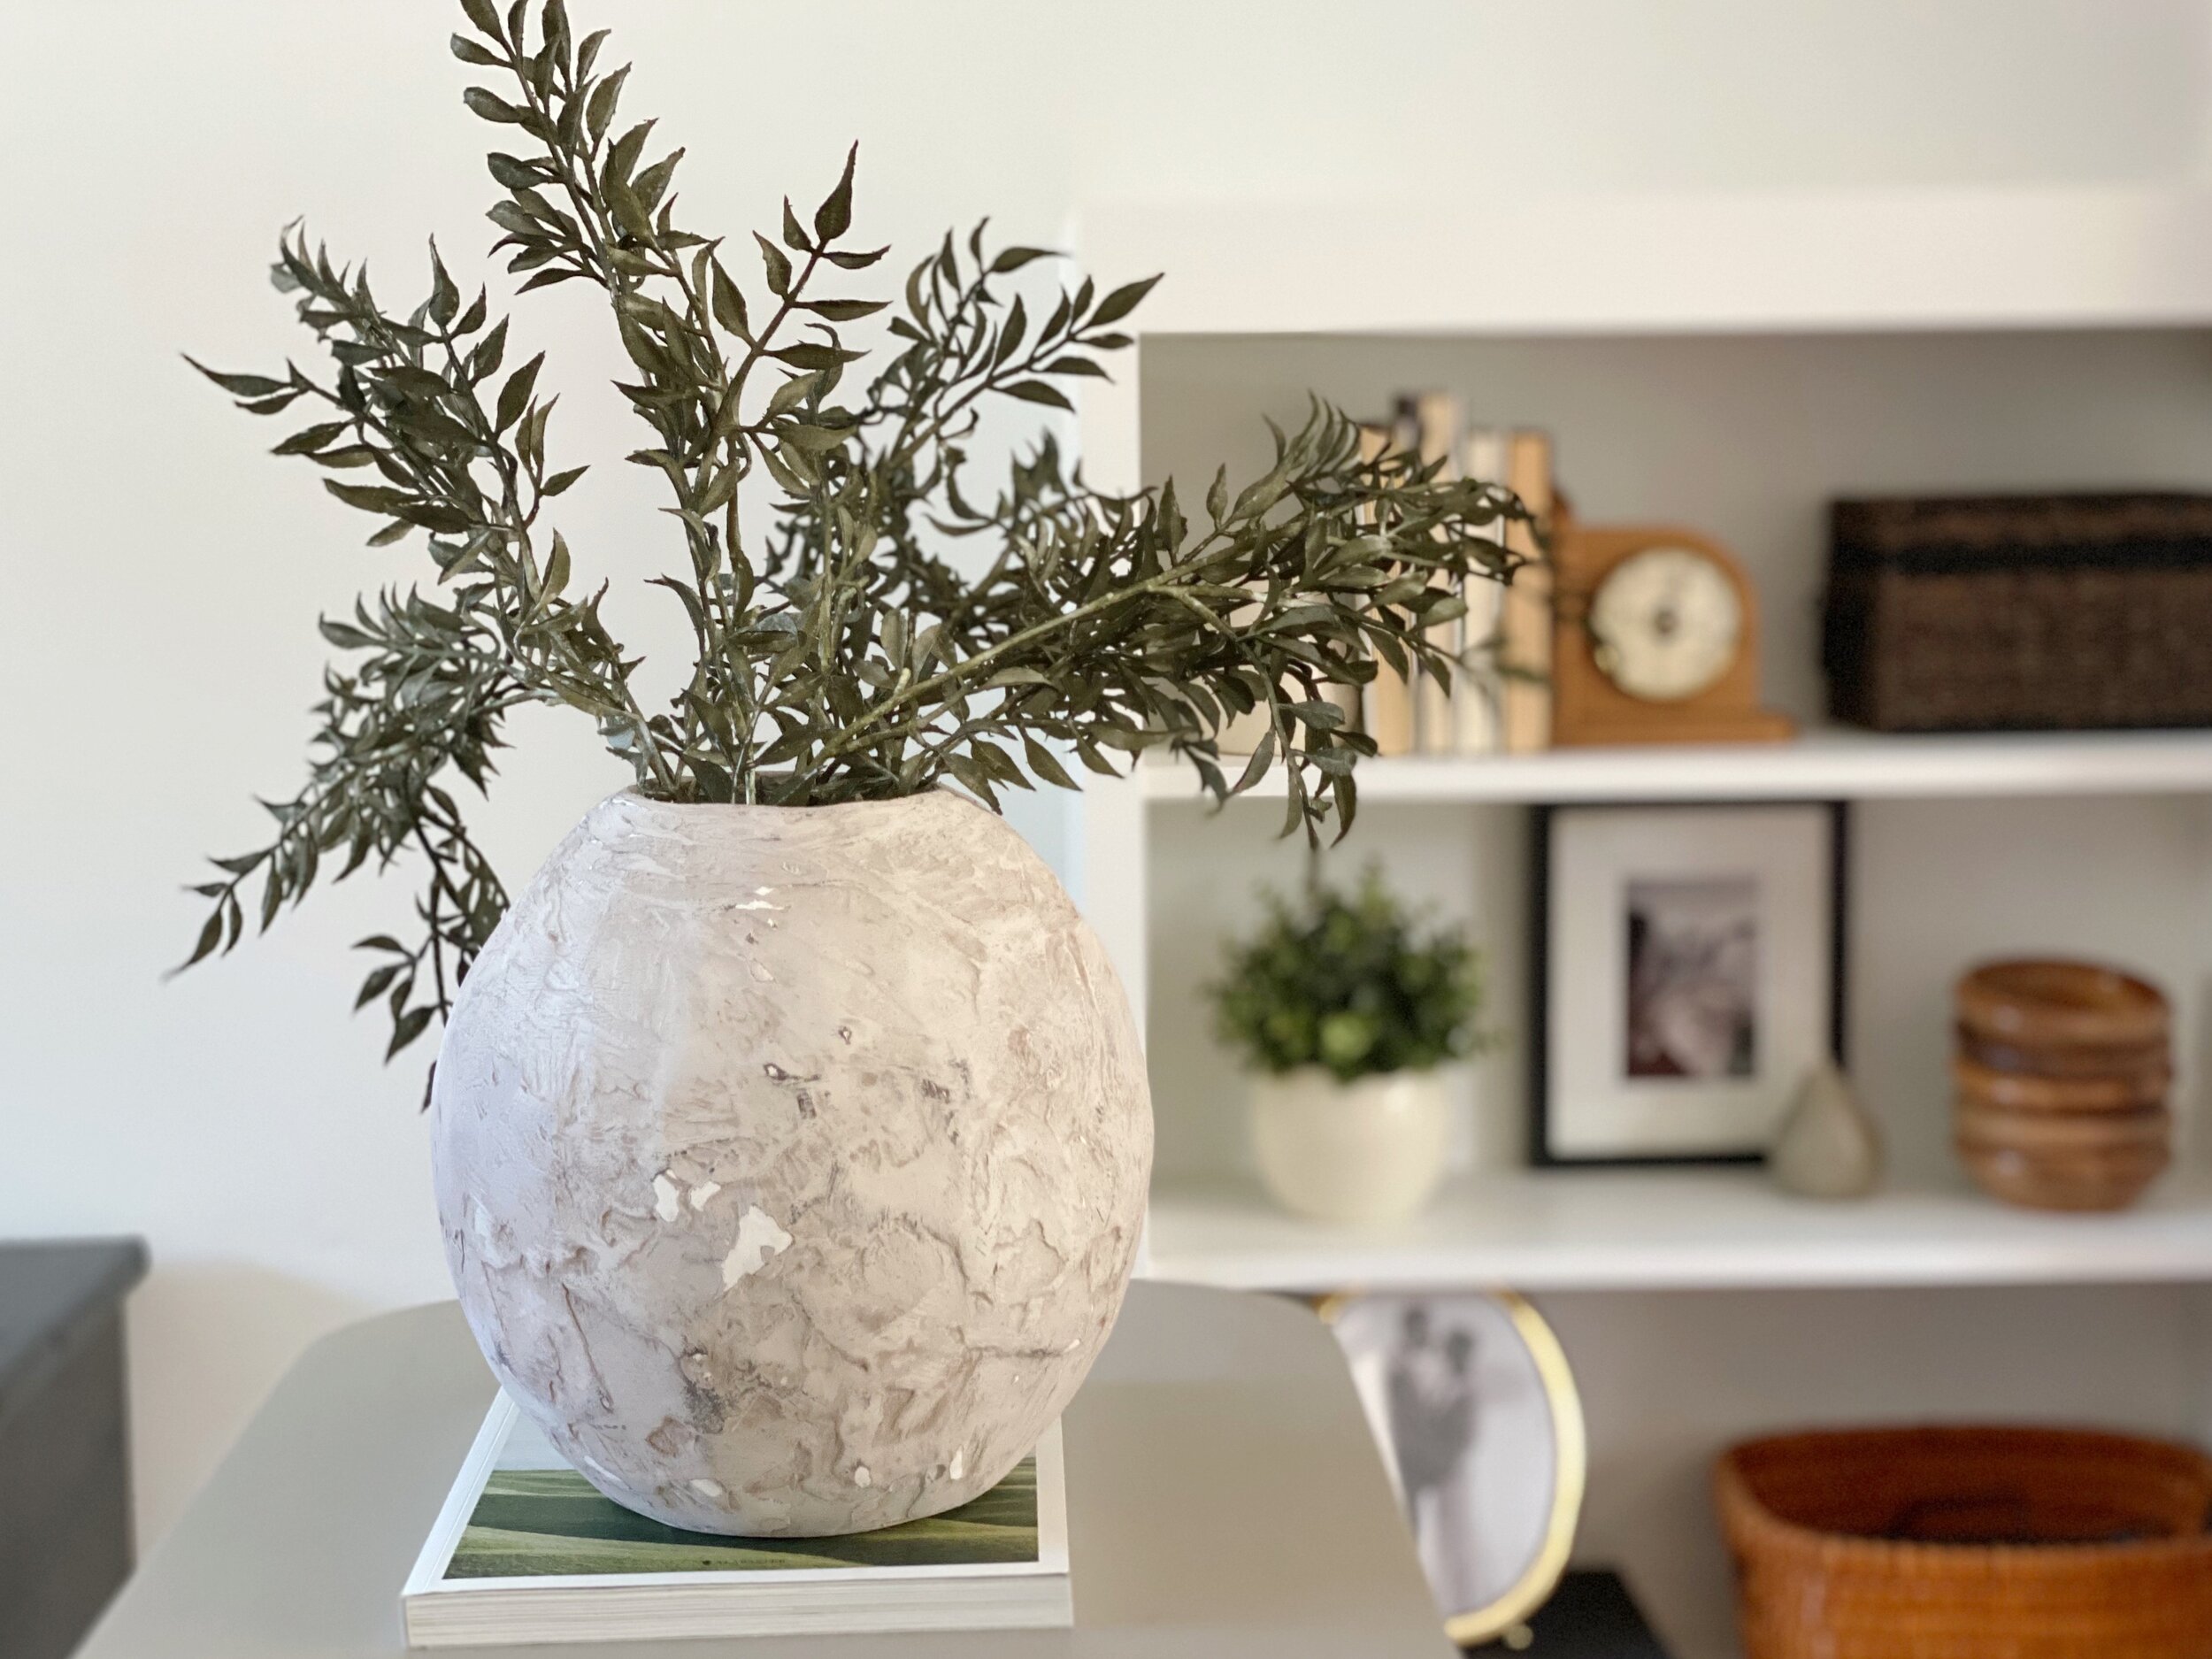

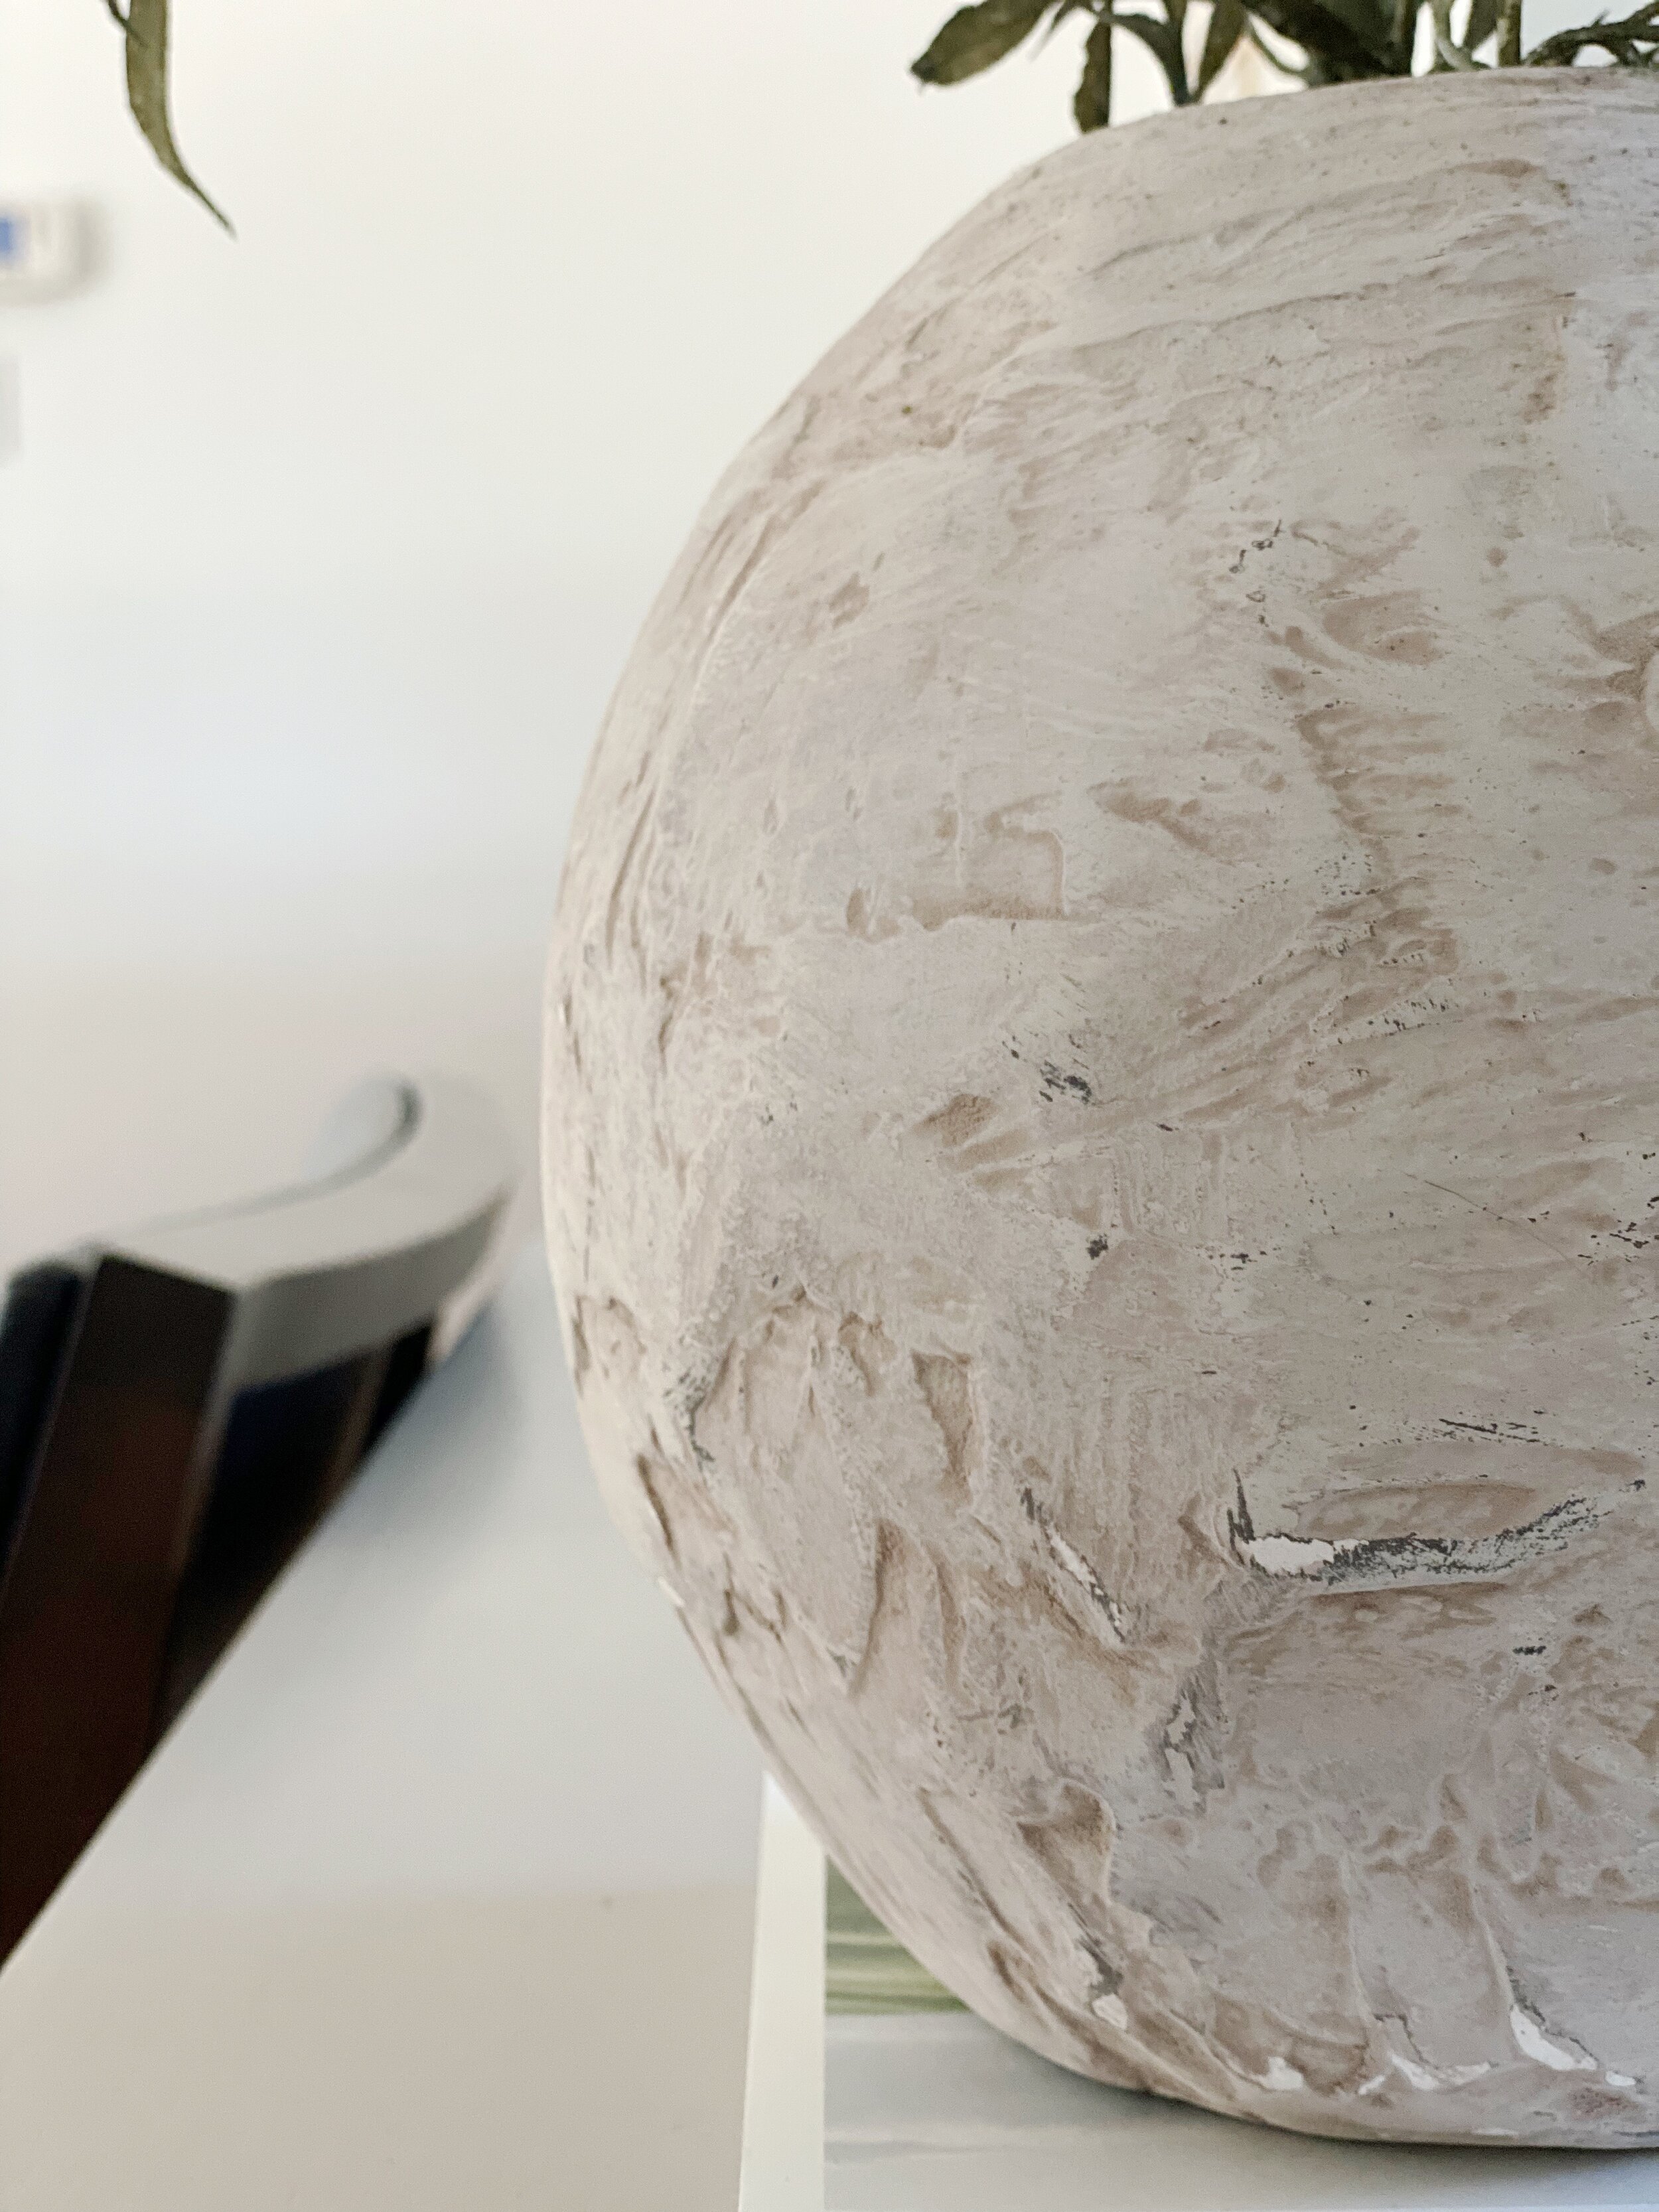
I styled the completed vase by adding three really beautiful faux stems that I bought from Michaels. I have two cats that will find any live plant the moment it enters our home, so faux is always the way I go. But if you don’t have that problem, you could always snip fresh foliage from outside and use that instead. The only note I will make is that if you create your own DIY vase, you probably shouldn’t use water in it for real flowers. It would be really hard to clean out and the water could damage the drywall compound finish. But a few live or dried branches probably wouldn’t hurt.

It may not be my original vision of a big round glass vase, but I’m so thrilled with how this DIY turned out. Other than the drying time between steps, it was really easy to create and required only a few inexpensive supplies. In fact, I had all of the supplies on hand already so I didn’t even need to purchase anything new. That makes it a very worthwhile investment at only $4 and some elbow grease.
As for the console table, I’ll be sharing more about that makeover process next week, but for now, you can catch a little sneak peek in some of these photos. I’d love to know if you tackle your own DIY version of this beautiful old-world style. It’s just so classic.
