DIY Eat-In Kitchen Nook

Postpartum is no joke. This being my second time through it, I was fully aware that taking care of my sweet little baby would take the majority of my efforts and attention for some time, but I can’t believe it’s already been nearly five months since we welcomed Franny into our family. It took some time, but her and I have finally settled into a daily rhythm, which has finally given me to opportunity to dip my toe back into the things that bring me joy. Working on our home being one of them.
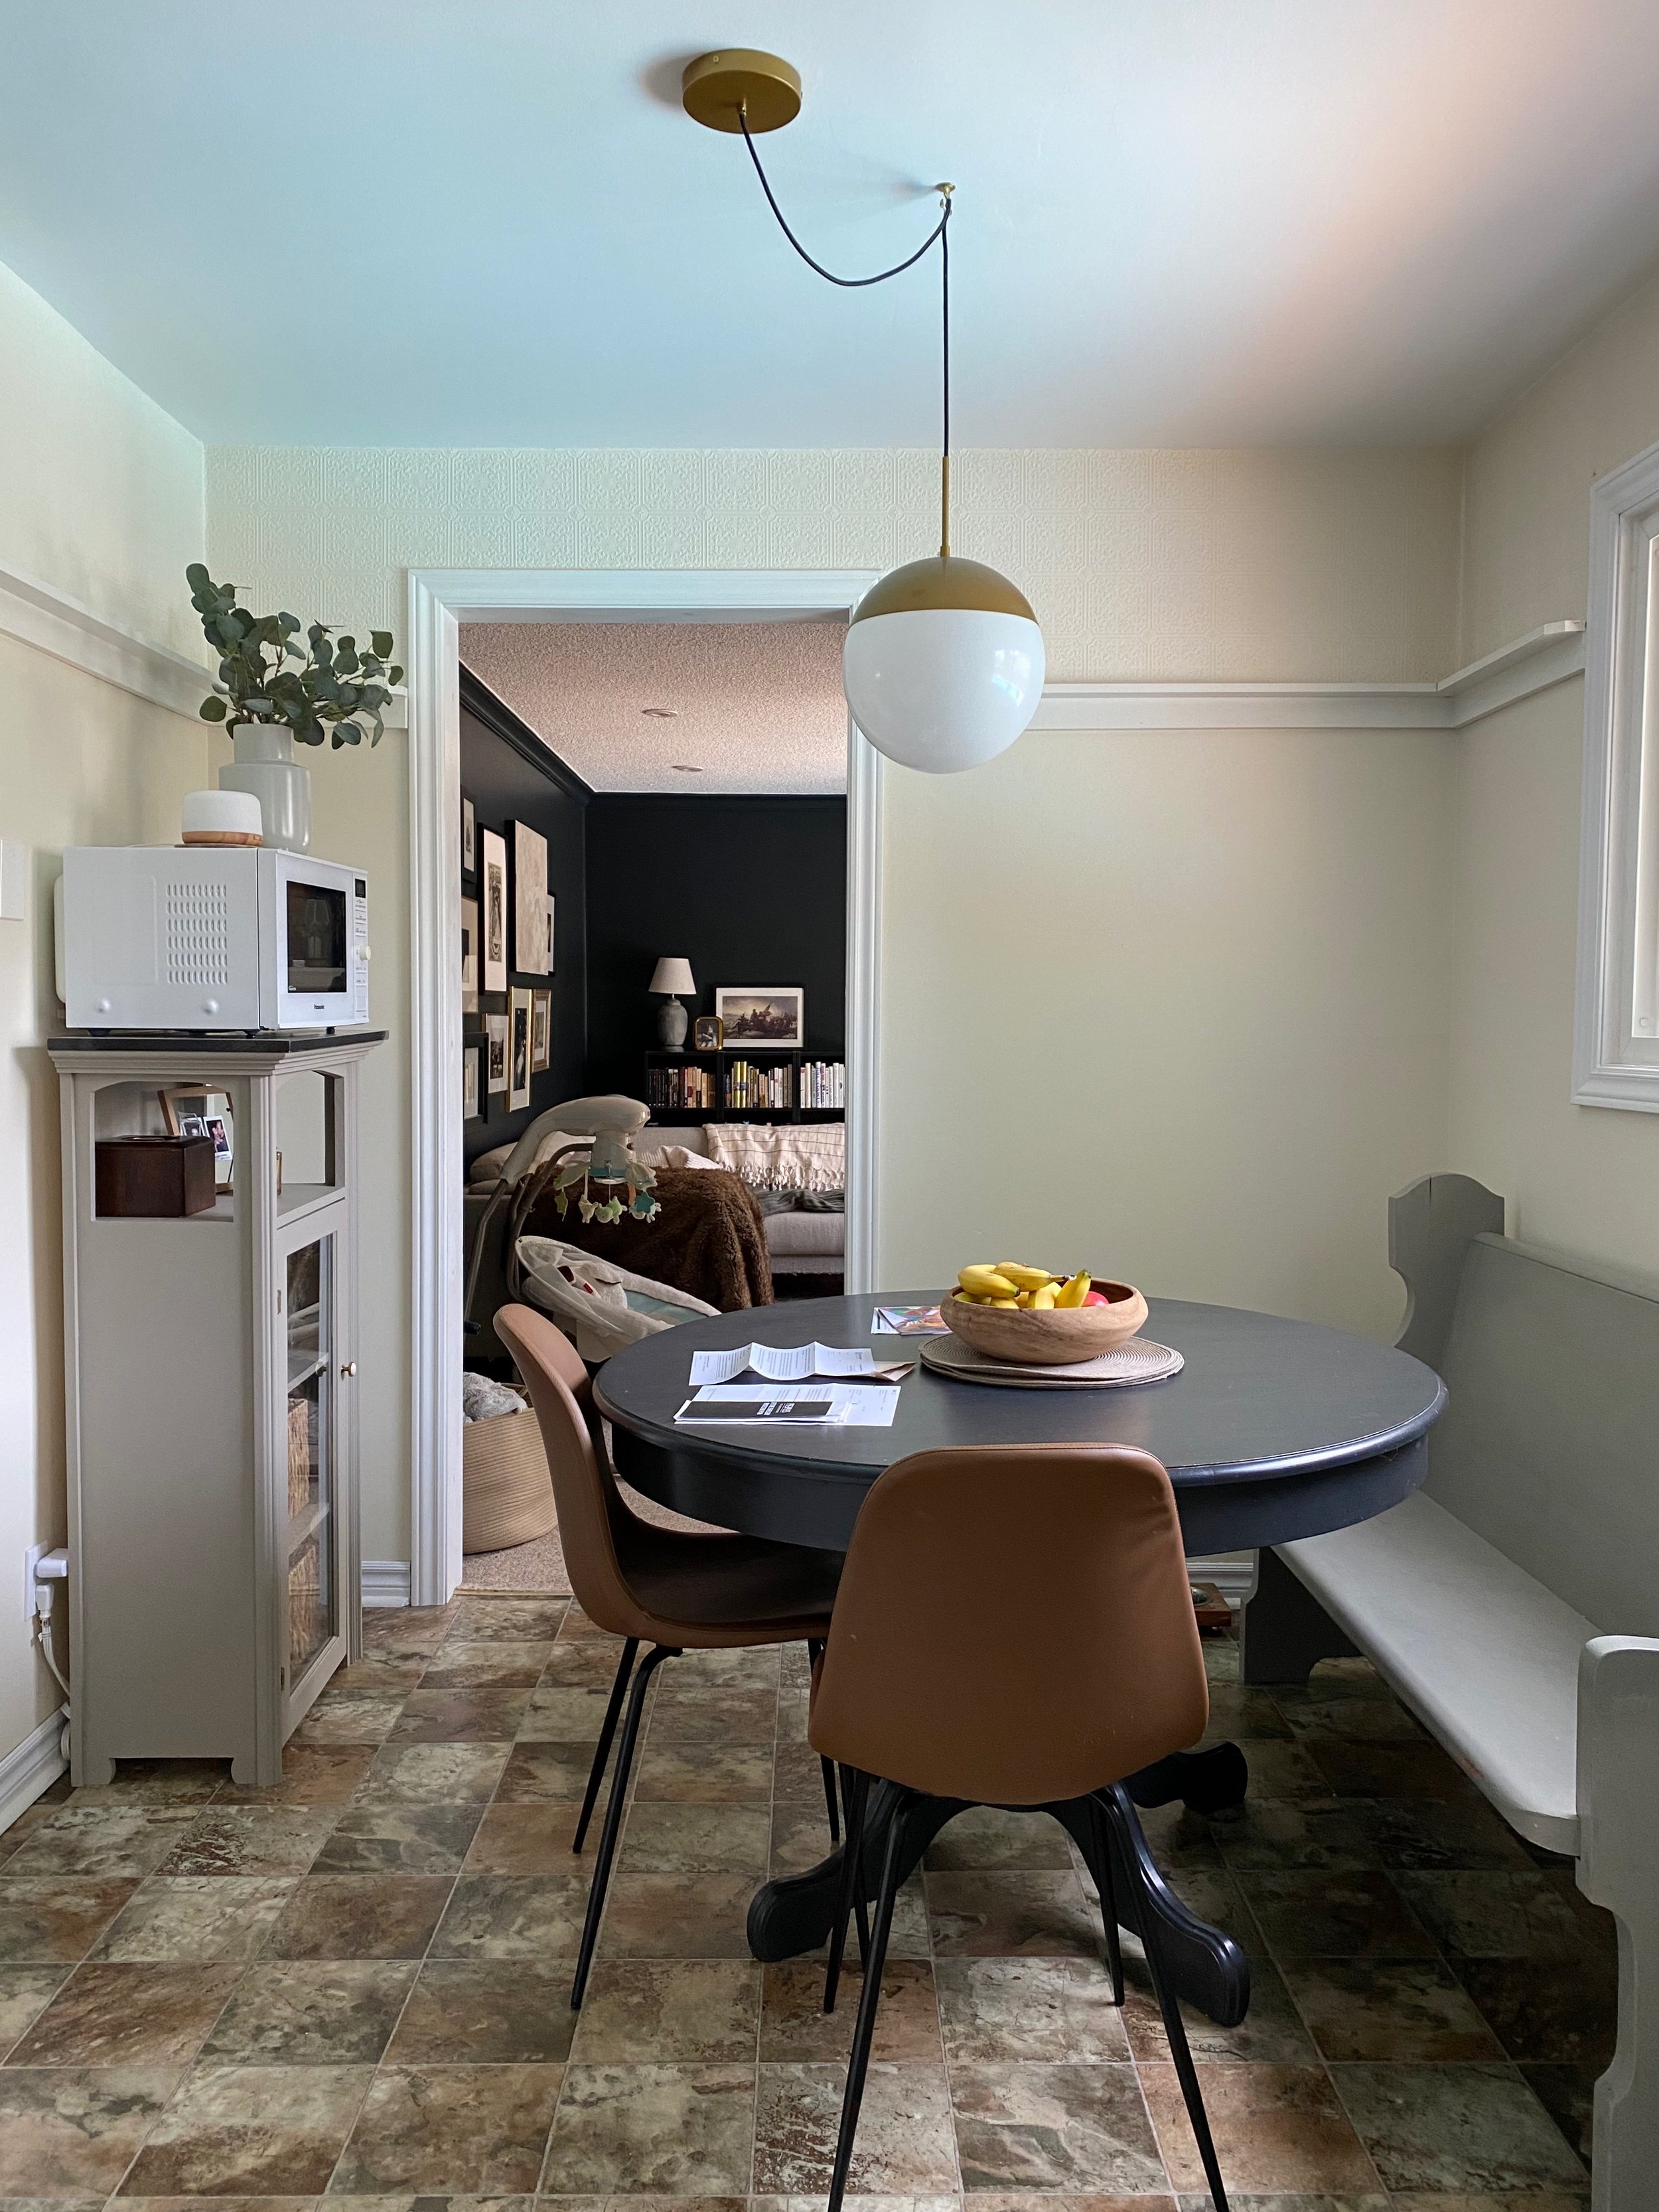
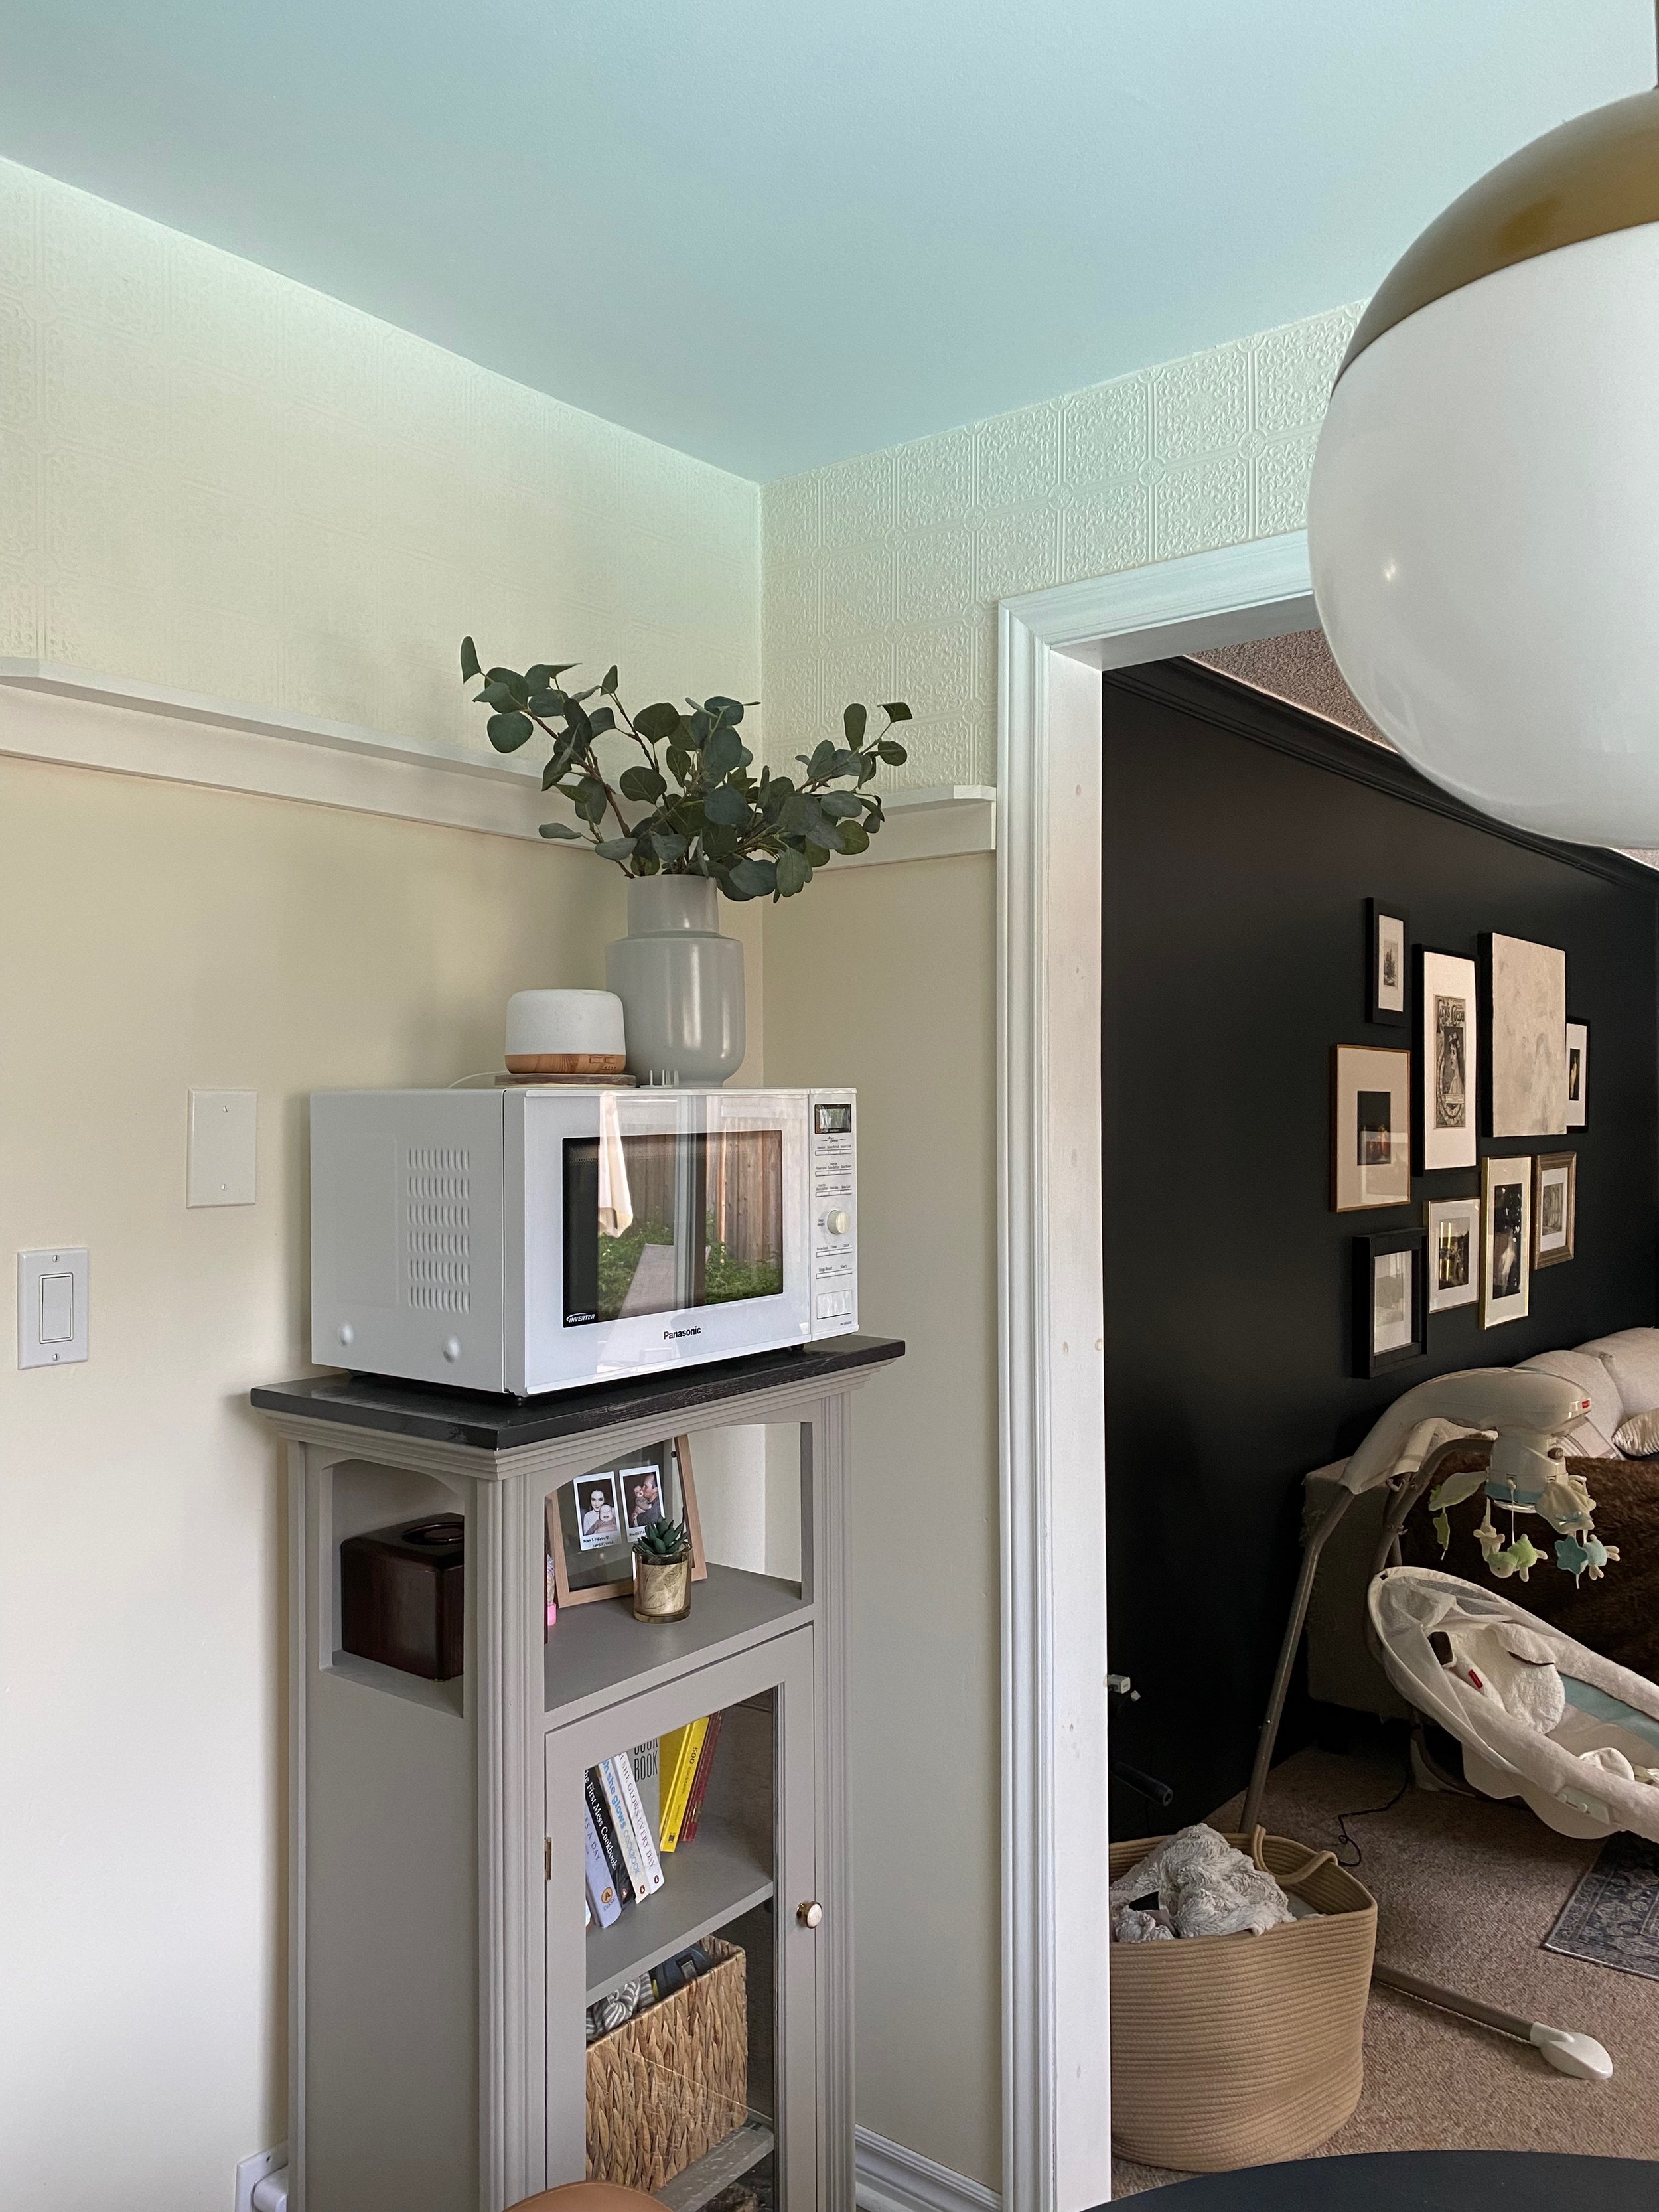
This is our eat-in kitchen nook. When we moved in, it had a sweet little plate rail installed with textured wall paper above it and a classic beige colour painted below. Within the first year of living here, the beige bothered me so much that I tried to find a paint tone that matched the textured wallpaper to paint out the bottom. It was enough to satisfy me for the time being, but I’ve always looked at this corner and known that it has more potential. It felt a little cold and needed just a little bit of intention thrown into it.

So I made a plan. A plan that didn’t require much money to execute. In fact, a plan that cost no money to execute. I had all of the supplies I needed in my shop already, including the trim pieces. I wanted to add some battens below the existing plate rail, thinking that it would help to ground the space. I made a to-scale rendering of the walls to ensure I had enough supplies on hand and to plan out the spacing of the battens, but other than that, I really just dove in and went right for it.
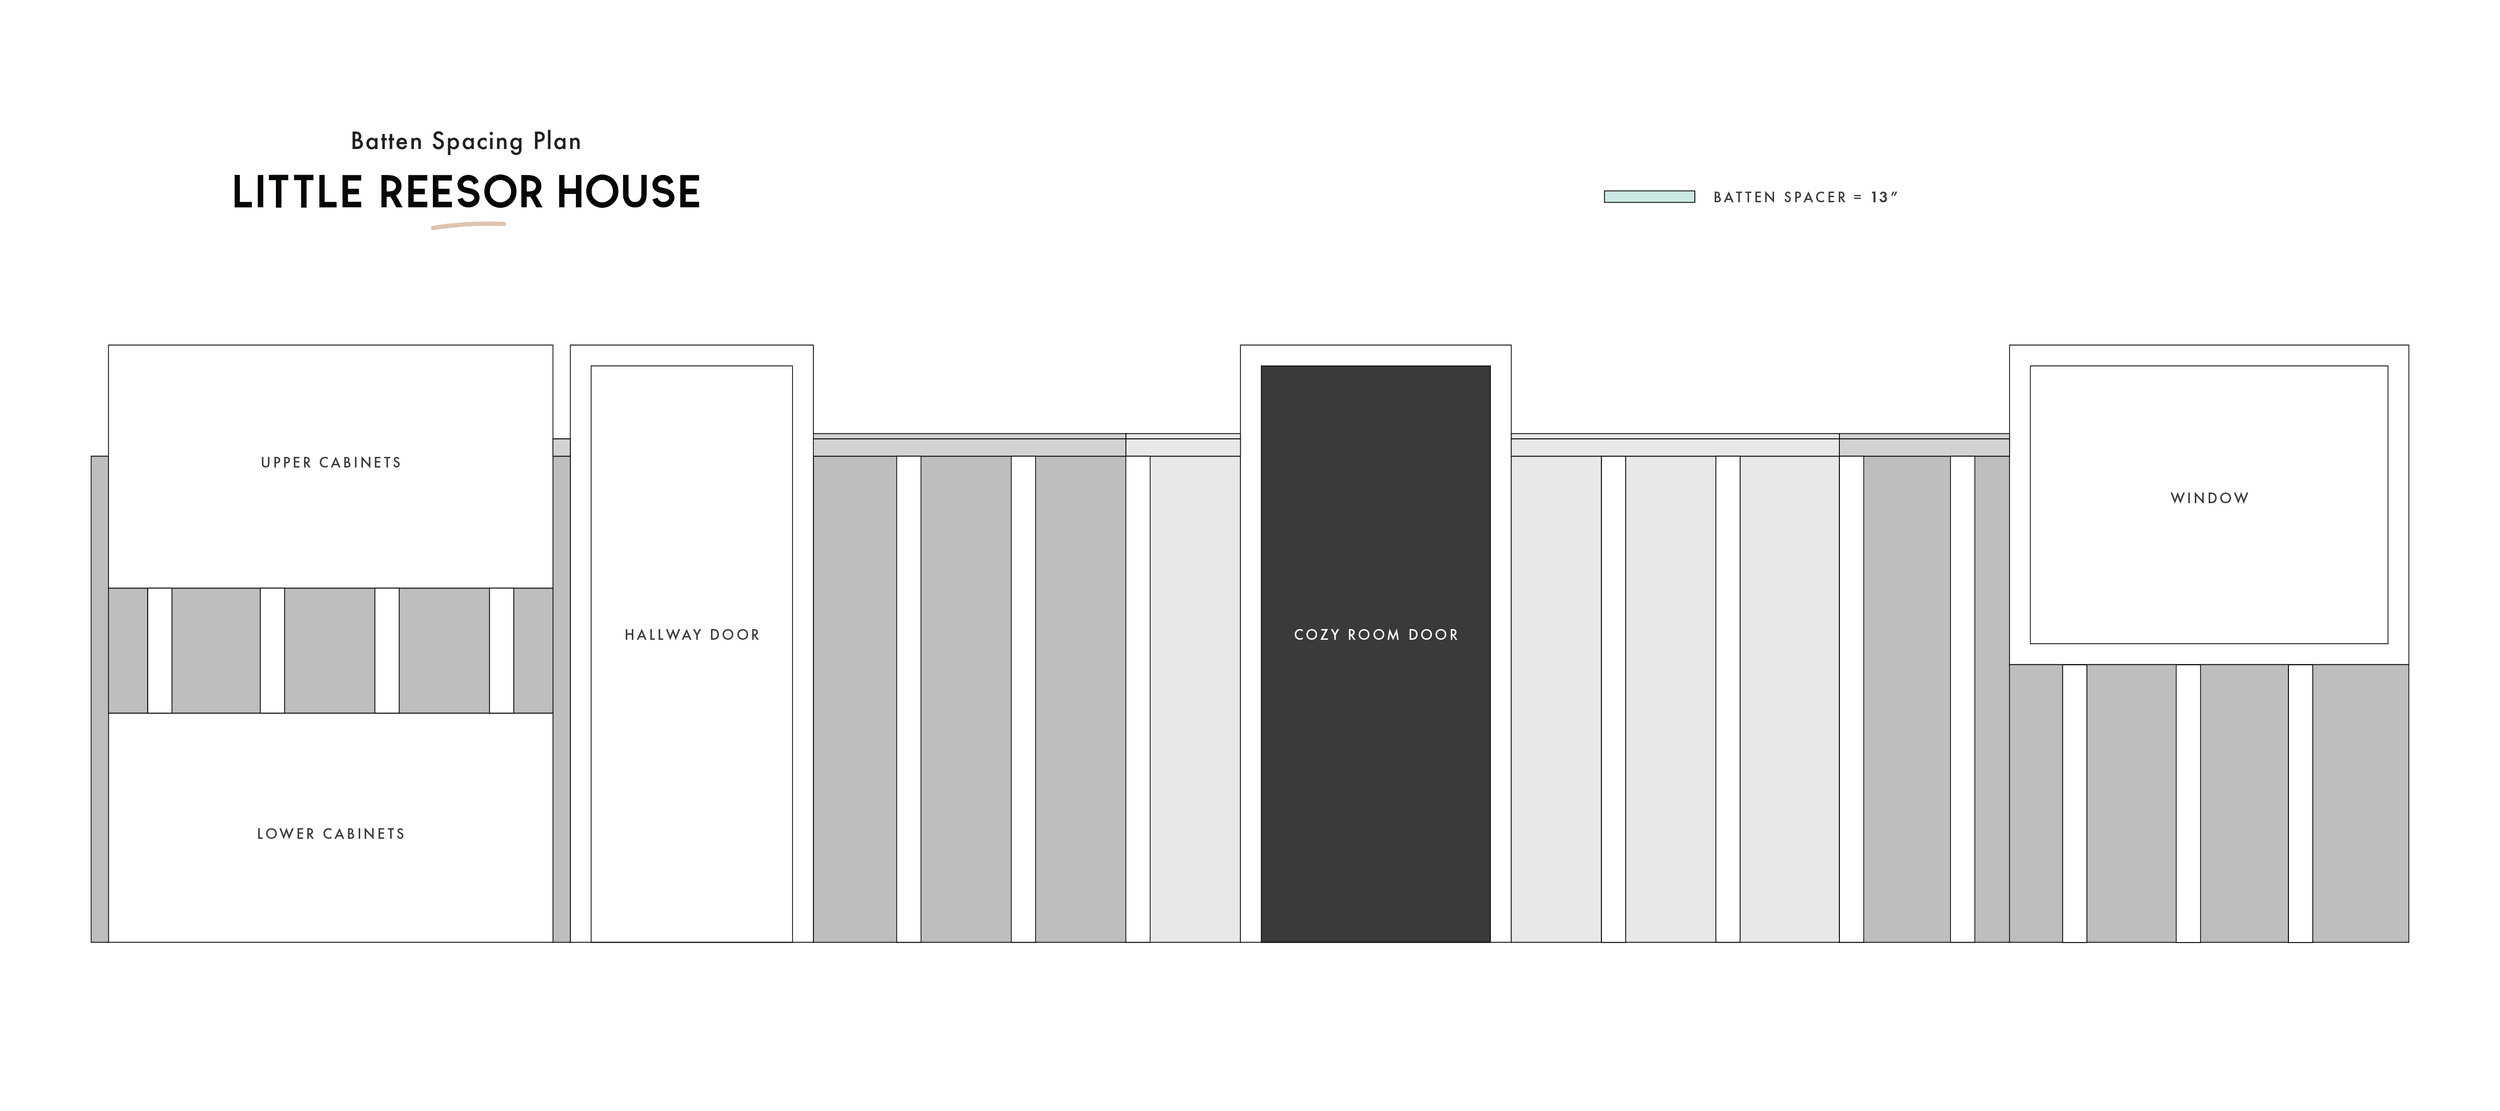
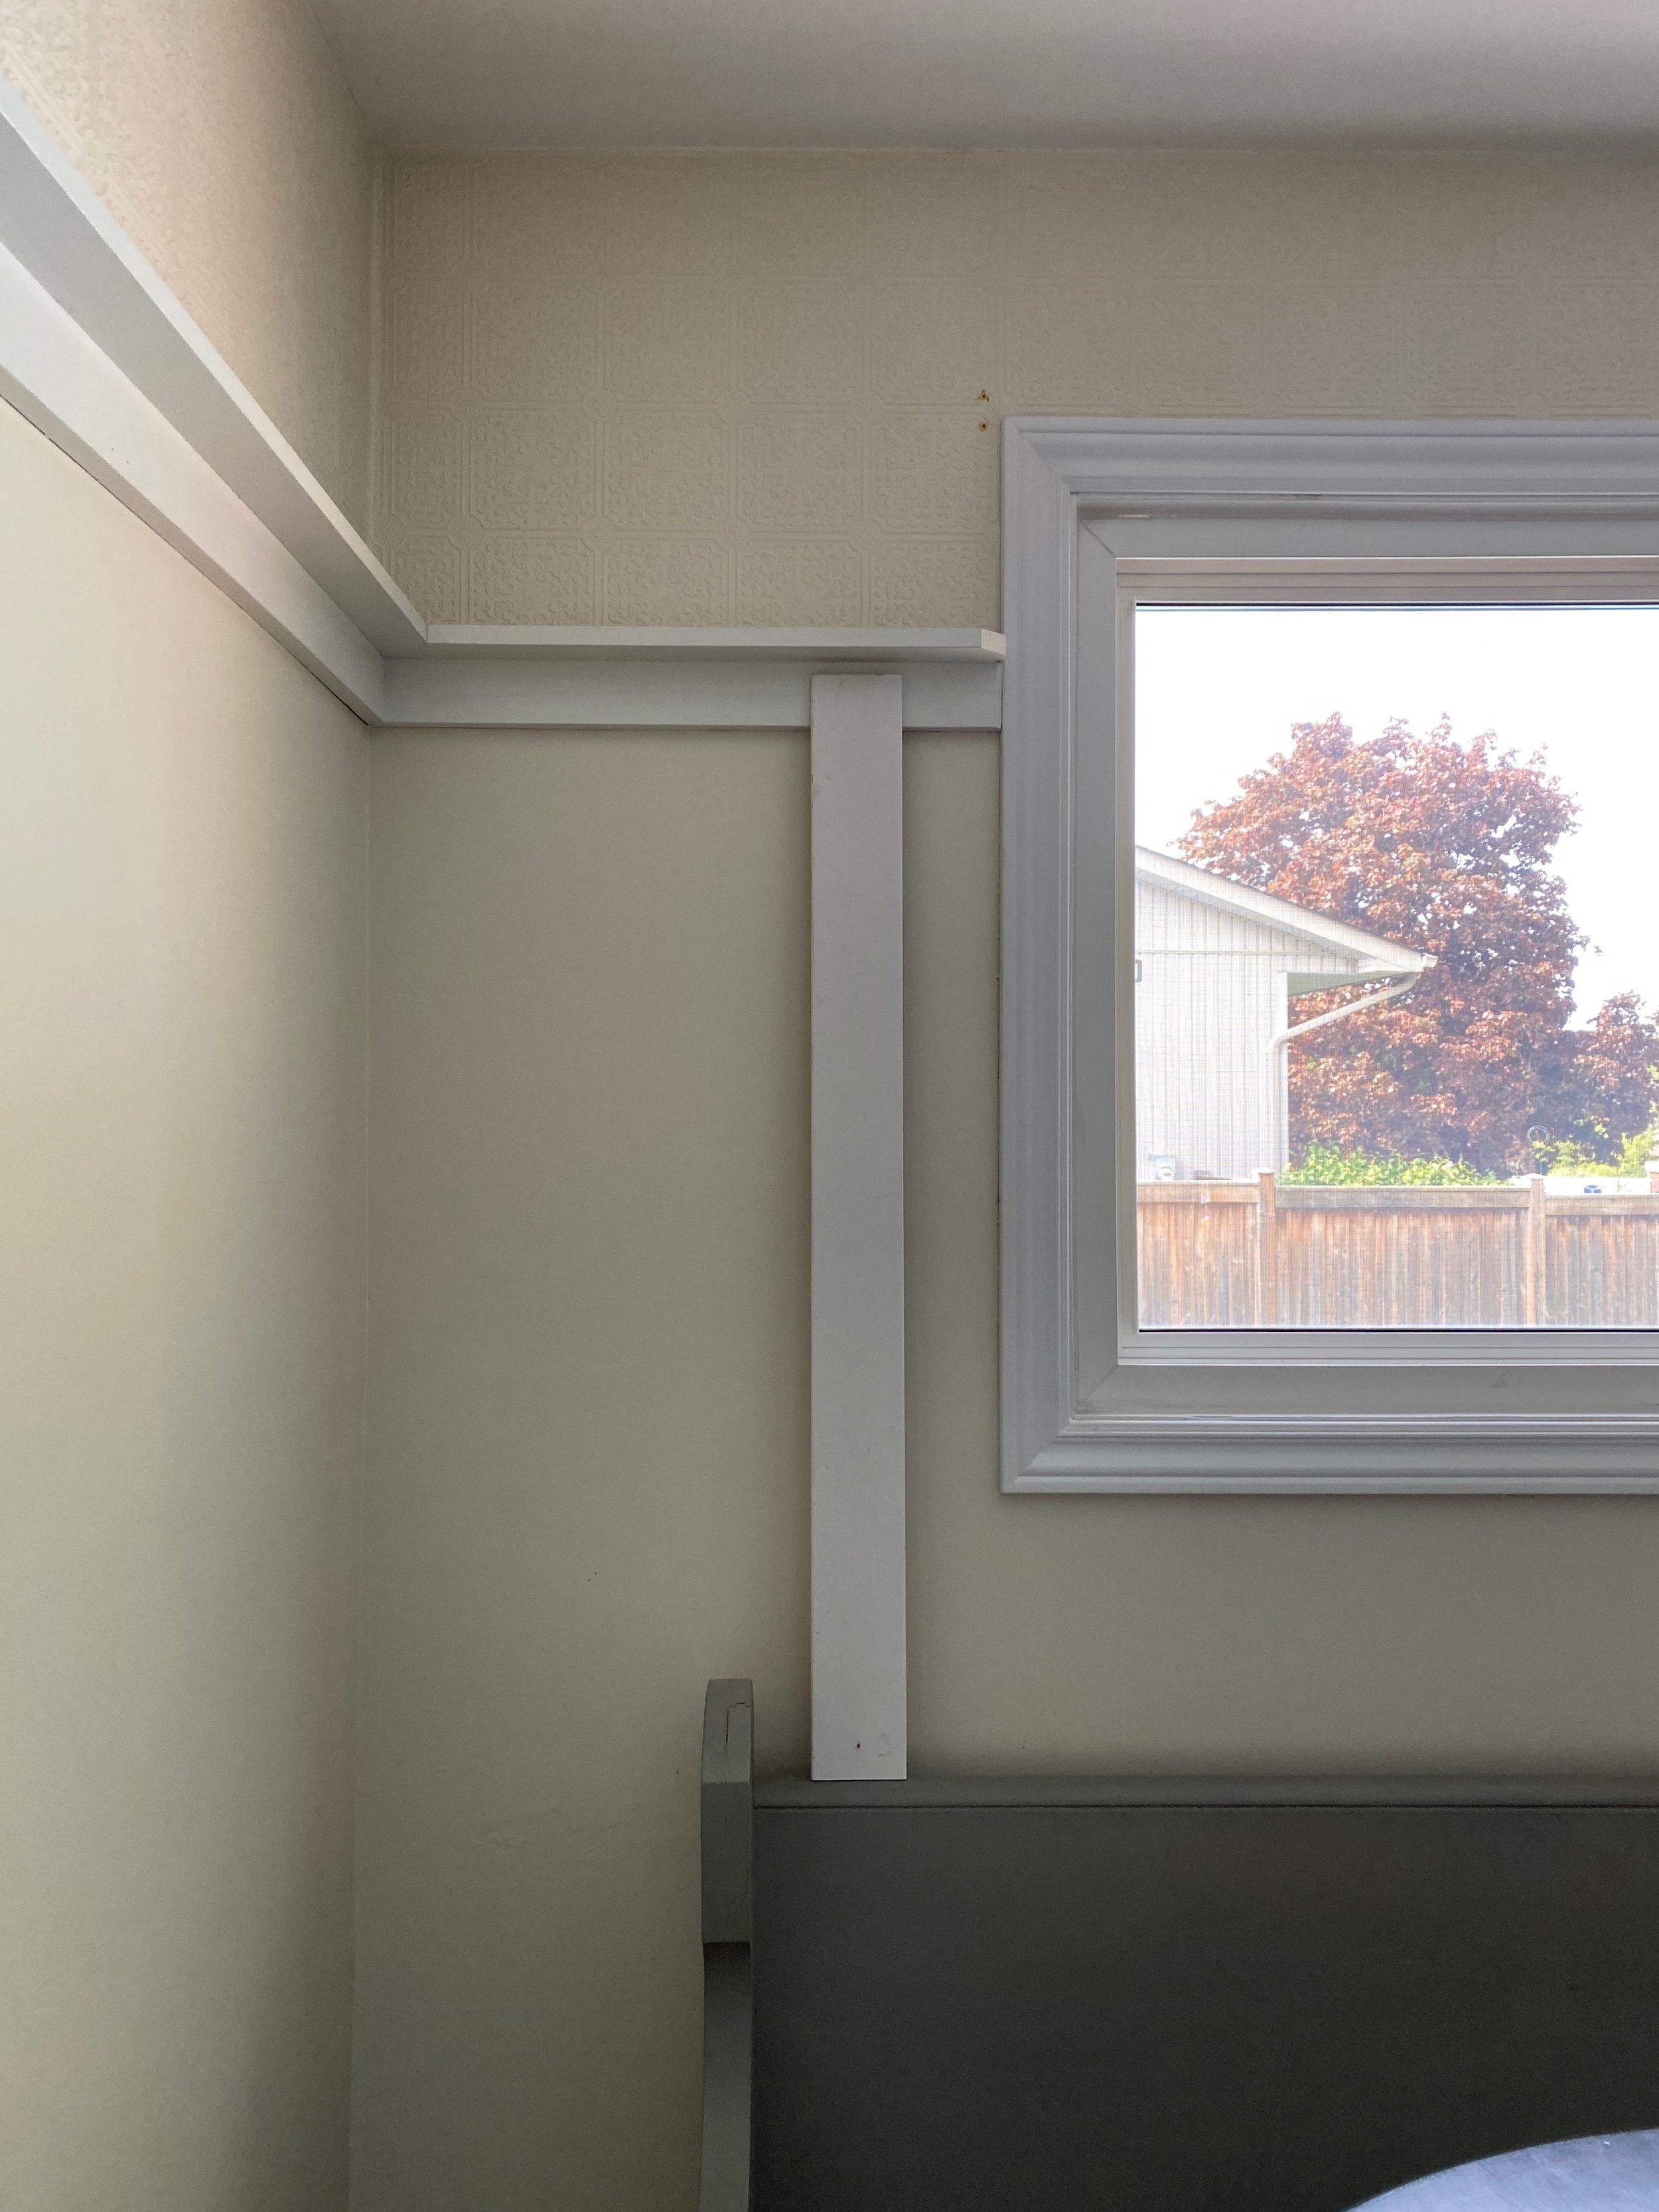

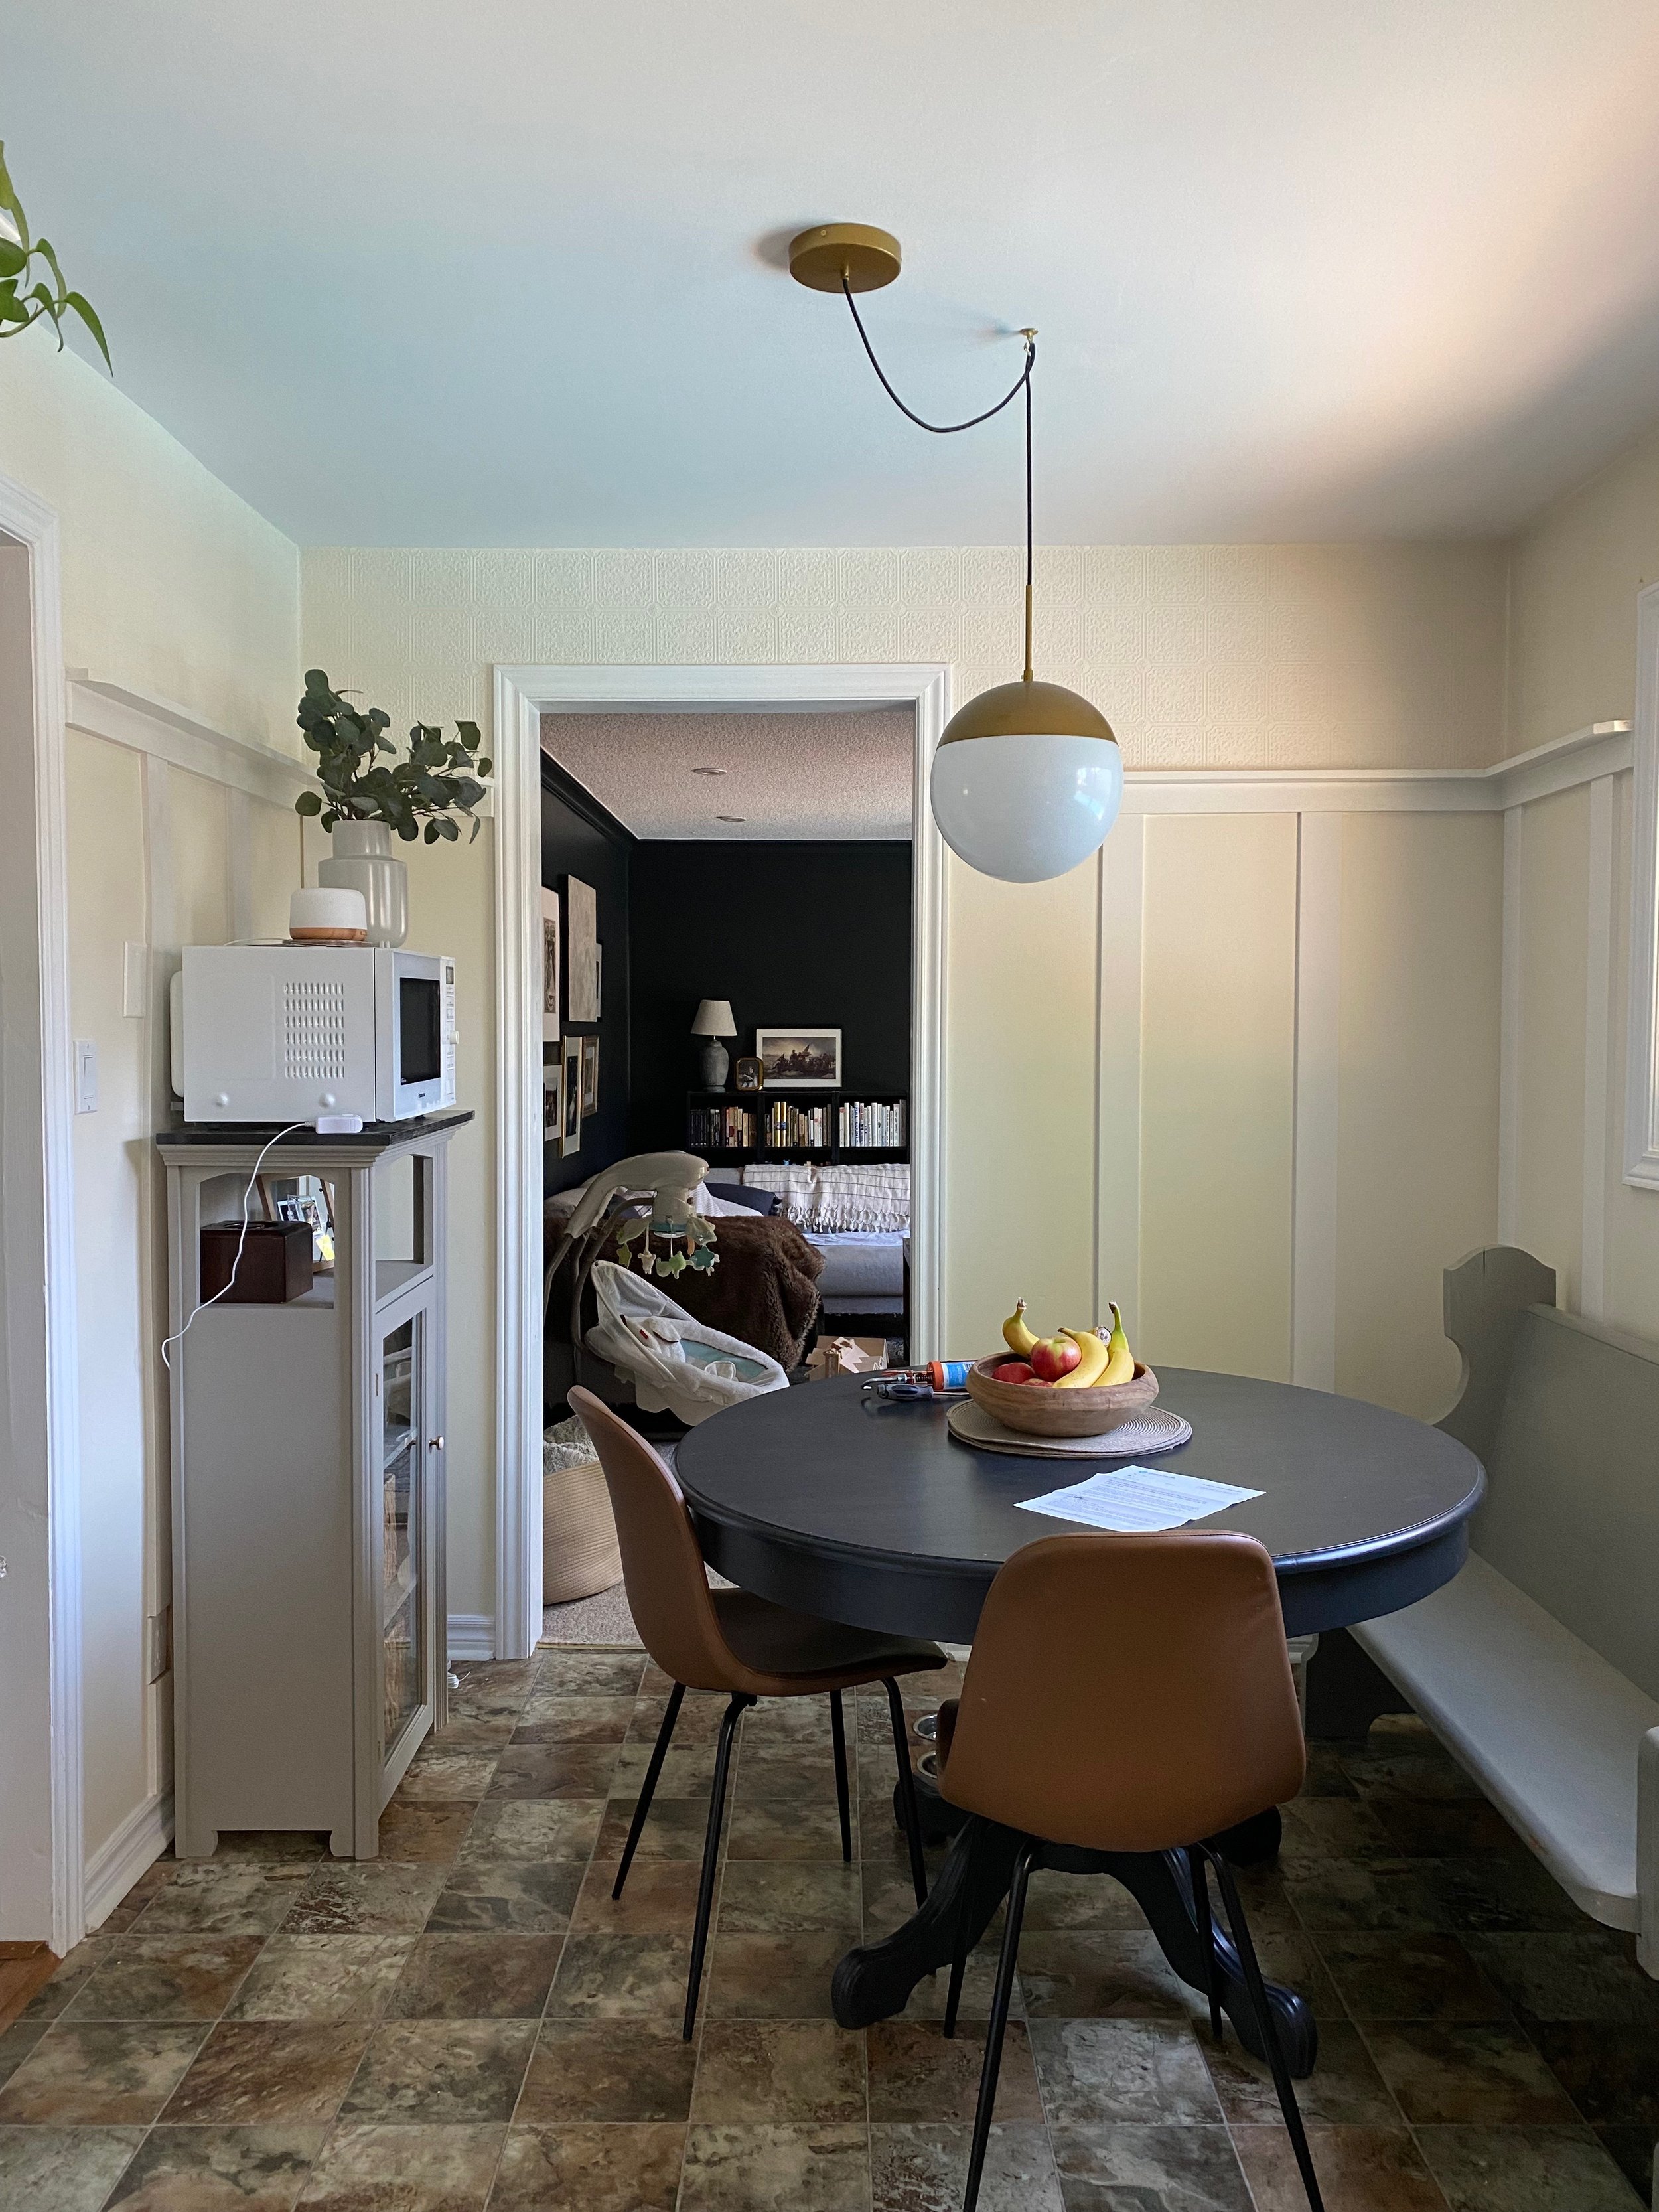
I used 4” square baseboard trim that I had leftover from facing our built-in dining room bench, cut it to length, and nailed it into the wall with a brad nailer. It ended up being the perfect dimension to mimic the plate rail. In an ideal world, I would have also glued the pieces to the wall as well as nail them in, but I didn’t have the glue on hand and the material was really light and bendable, so I just made sure to use quite a few nails to hold it securely in place. Once fastened, I went in with spackle to fill all the nail holes and caulked all the cracks with paintable caulking.
In keeping with this project remaining costless, I tested a series of paint samples that I had in my collection. Back when I was figuring out what to paint our fireplace mantle, I had purchased a series of beige paint samples from Sherwin-Williams and Benjamin Moore. I swatched each on the wall, hoping one would work well with both the textured wall paper and the backsplash tile. I settled on Accessible Beige from Sherwin-Williams.


Once I added a couple of coats of paint to new battens, the textured wallpaper suddenly looked too buttery. Most people would probably never notice and would consider it perfectly acceptable, but I couldn’t quite let it go. I remembered that I had leftover white paint that we had used in the rest of our house (Falling Snow by Behr) and decided I’d paint the textured wallpaper. I dug out what was left from the gallon and went to town. It instantly felt so much better. I ended up having to work my way around the whole kitchen, as the textured paper isn’t limited to this corner, but thankfully the surface area of the textured wallpaper was pretty minimal. It ended up bringing such a breath of fresh air to our whole kitchen and even made the ceilings appear taller. It almost made me wish I had done it sooner. It was a good reminder to never underestimate the power of paint!


With the painting complete, I decided to add just a few simple pieces of decor to this corner to really amp up the cozy factor. I had these inexpensive throw cushions in my decor stash. The covers can be removed to wash (essential in an eating area), but also are super affordable, so if they ever need to be replaced, it’s not a huge expense lost. They may not be my top preferred colours for the space, but they definitely work and fit the bill to at least warm up the area.
The second thing I added to this space was a simple hanging planter. I picked it up at Target the last time we were in the States and I love that it adds a pop of life to this corner. While I always love art, this area has a clear sightline to the room behind with an expansive gallery wall, so I thought it would be nice to incorporate something a little different here.


It only took a few afternoons worth of baby nap times to create this updated space, but what an impact it has. It feels exactly like it was always meant to be this way. I can imagine cozy candlelight dinners in this corner and rainy Saturday morning crafting sessions with Mabel. Mmmm, what a cozy visual.

I hope you enjoyed this quick update! I shared more about the process on a recent Instagram reel, so if you aren’t following us there, be sure to check out our profile. We should be back soon with more projects and more updates, so long as the baby keeps napping!
Until next time -

Disclaimer: This post contains affiliate links. Please read our full Affiliate Disclosure for more information.
Kitchen Nook Source Guide
DIY: Batten Wall Colour // Textured Wallpaper Colour // Table Chalk Paint // Bench Chalk Paint
Decor: Pendant // Table, Bench (thrifted) // Chairs (Homesense) // Hanging Planter // Brown Velvet Throw Cushion Cover // Green Canvas Throw Cushion Cover // Throw Cushion Inserts