Master Bathroom Reveal | A No-To-Low-Budget Transformation

We’re rolling up towards our two-year house anniversary and I’m embarrassed to admit that up until a couple of weeks ago, we still had some moving boxes kicking around. It became one of those scenarios where you just get so used to living with them, that you barely realize they exist in your space with you. However, when the new season hit and I got all the spring cleaning feelings, I turned my attention to those sad old cardboard boxes and decided the time was now to finally unpack them.
Those boxes lived in the corner of our master bathroom. Our master bathroom is a converted bedroom, so it really is quite spacious. In fact, it’s almost too spacious. One day we plan to do a full renovation to reconfigure it and make better use of the space for our needs. But for now, other than the hideous vinyl sheet flooring, it really does have some good bones with fairly neutral finishes and many luxuries (like double sinks!) that we are endlessly grateful for after coming from the small single bathroom in our previous home. Is it our dream bathroom? No. Can we still love it anyways?
I definitely struggle with the in-between space. It is something I am working on accepting in every area of my life, but in particular, the in-between space of our home can get me feeling down sometimes. It’s impossible not to compare your own home to those beautiful, perfectly curated homes all over the internet and wish you were at that place with your own. Only then. But the in-between space is where you learn the new skills, where you develop your taste, and where you make your memories by truly living your life in your home, regardless of how photo-worthy it feels. I know that one day we will truly make this space our own, but I realized that until that day comes, I have the opportunity to love and appreciate this space in the in-between too. There is no reason it has to feel lifeless until the day we rip out the floors and shower tiles. We can love this room now and I set out to make that happen.
But without spending any money.

Before

Before

Before
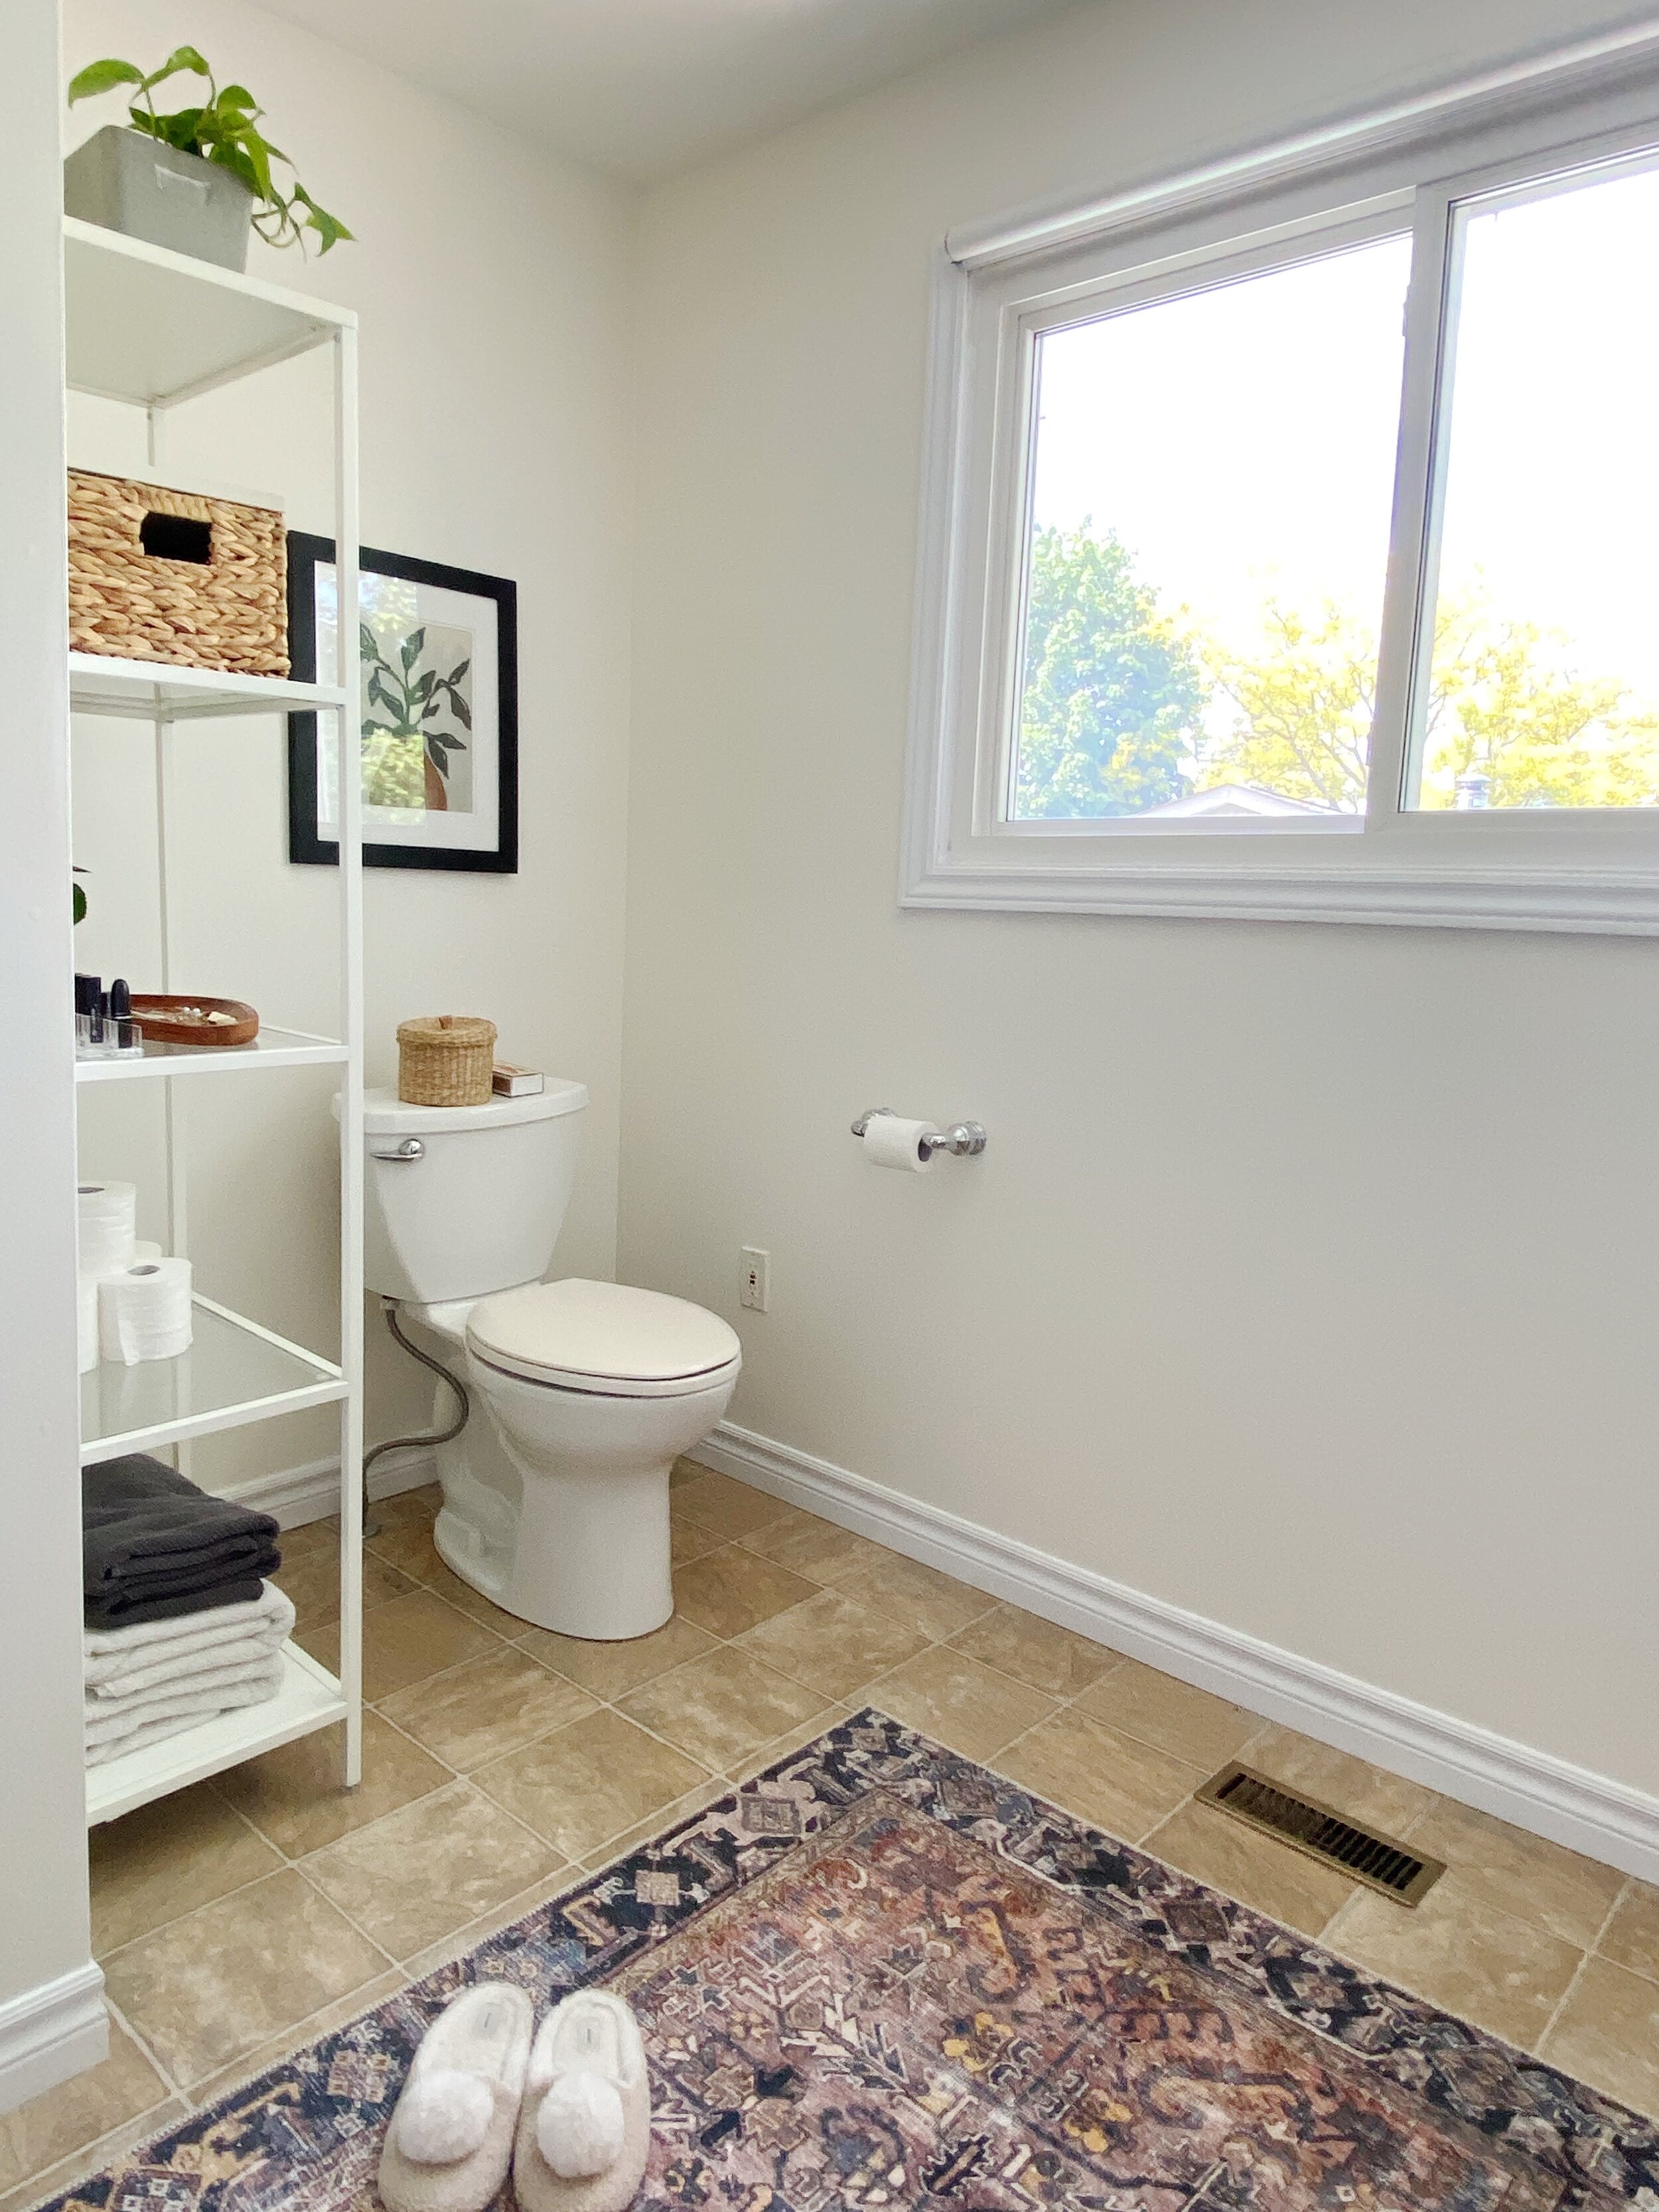
Before I show you exactly what I did, I should probably start by showing you where we started - moving boxes and all! As I mentioned, our master bathroom is spacious with all the fixtures pushed against the walls, leaving an abnormally large open space in the middle. When we bought our home, this bathroom was painted a periwinkle blue, but my uncle very graciously offered to paint it for us before we moved in. We picked Swiss Coffee by Benjamin Moore in a semi-gloss finish. Other than that, we also replaced the dated wall sconce between the mirrors with a more modern fixture and added a roll blind from IKEA to the window. Everything else, such as the vanity mirrors and towel hooks and bars were already in here.
And this is the blank slate I started with when I began this no-spend transformation. I had a few goals for this project:
Make It Affordable - I wanted to use items I already owned or DIY with supplies I already had. I didn’t want to spend any money on this transformation. (For full disclosure, I did end up spending some money in here, but I’ll get into that as I walk you through the process below.)
Make It Cozy - This is the first space we visit every morning and the last space we visit every night. It definitely didn’t feel warm and inviting and I really wanted to change that and make it feel like an extension of our bedroom.
Make It Functional - In case the moving boxes didn’t give it away, we desperately needed storage, storage, storage. In particular, a place to put some spare towels and a place to store our medications that were safely out of reach of our daughter.
Here’s what I did.
Deep Clean
The first thing I did was give this space a really solid deep clean. I scrubbed everything, including the baseboards and walls. I also went through the cardboard boxes containing makeup and medications and got rid of anything that was expired or unusable. This immediately freshened up the space and made it easier for me to figure out the next steps I wanted to take.

Storage
We had an IKEA Vittsjö shelf unit in our family room that served no purpose other than collecting decor. It was the perfect size to fill the big space beside the toilet. There was an existing towel bar on that wall, but I simply removed it, patched the holes, and touched up the paint. We have two other towel bars on the back of the door and a towel hook beside the shower, so I knew we wouldn’t miss having this bar. The shelving unit fit perfectly in this space and added some much needed visual height to this corner as well as a place to keep items up high, out of reach of our daughter.
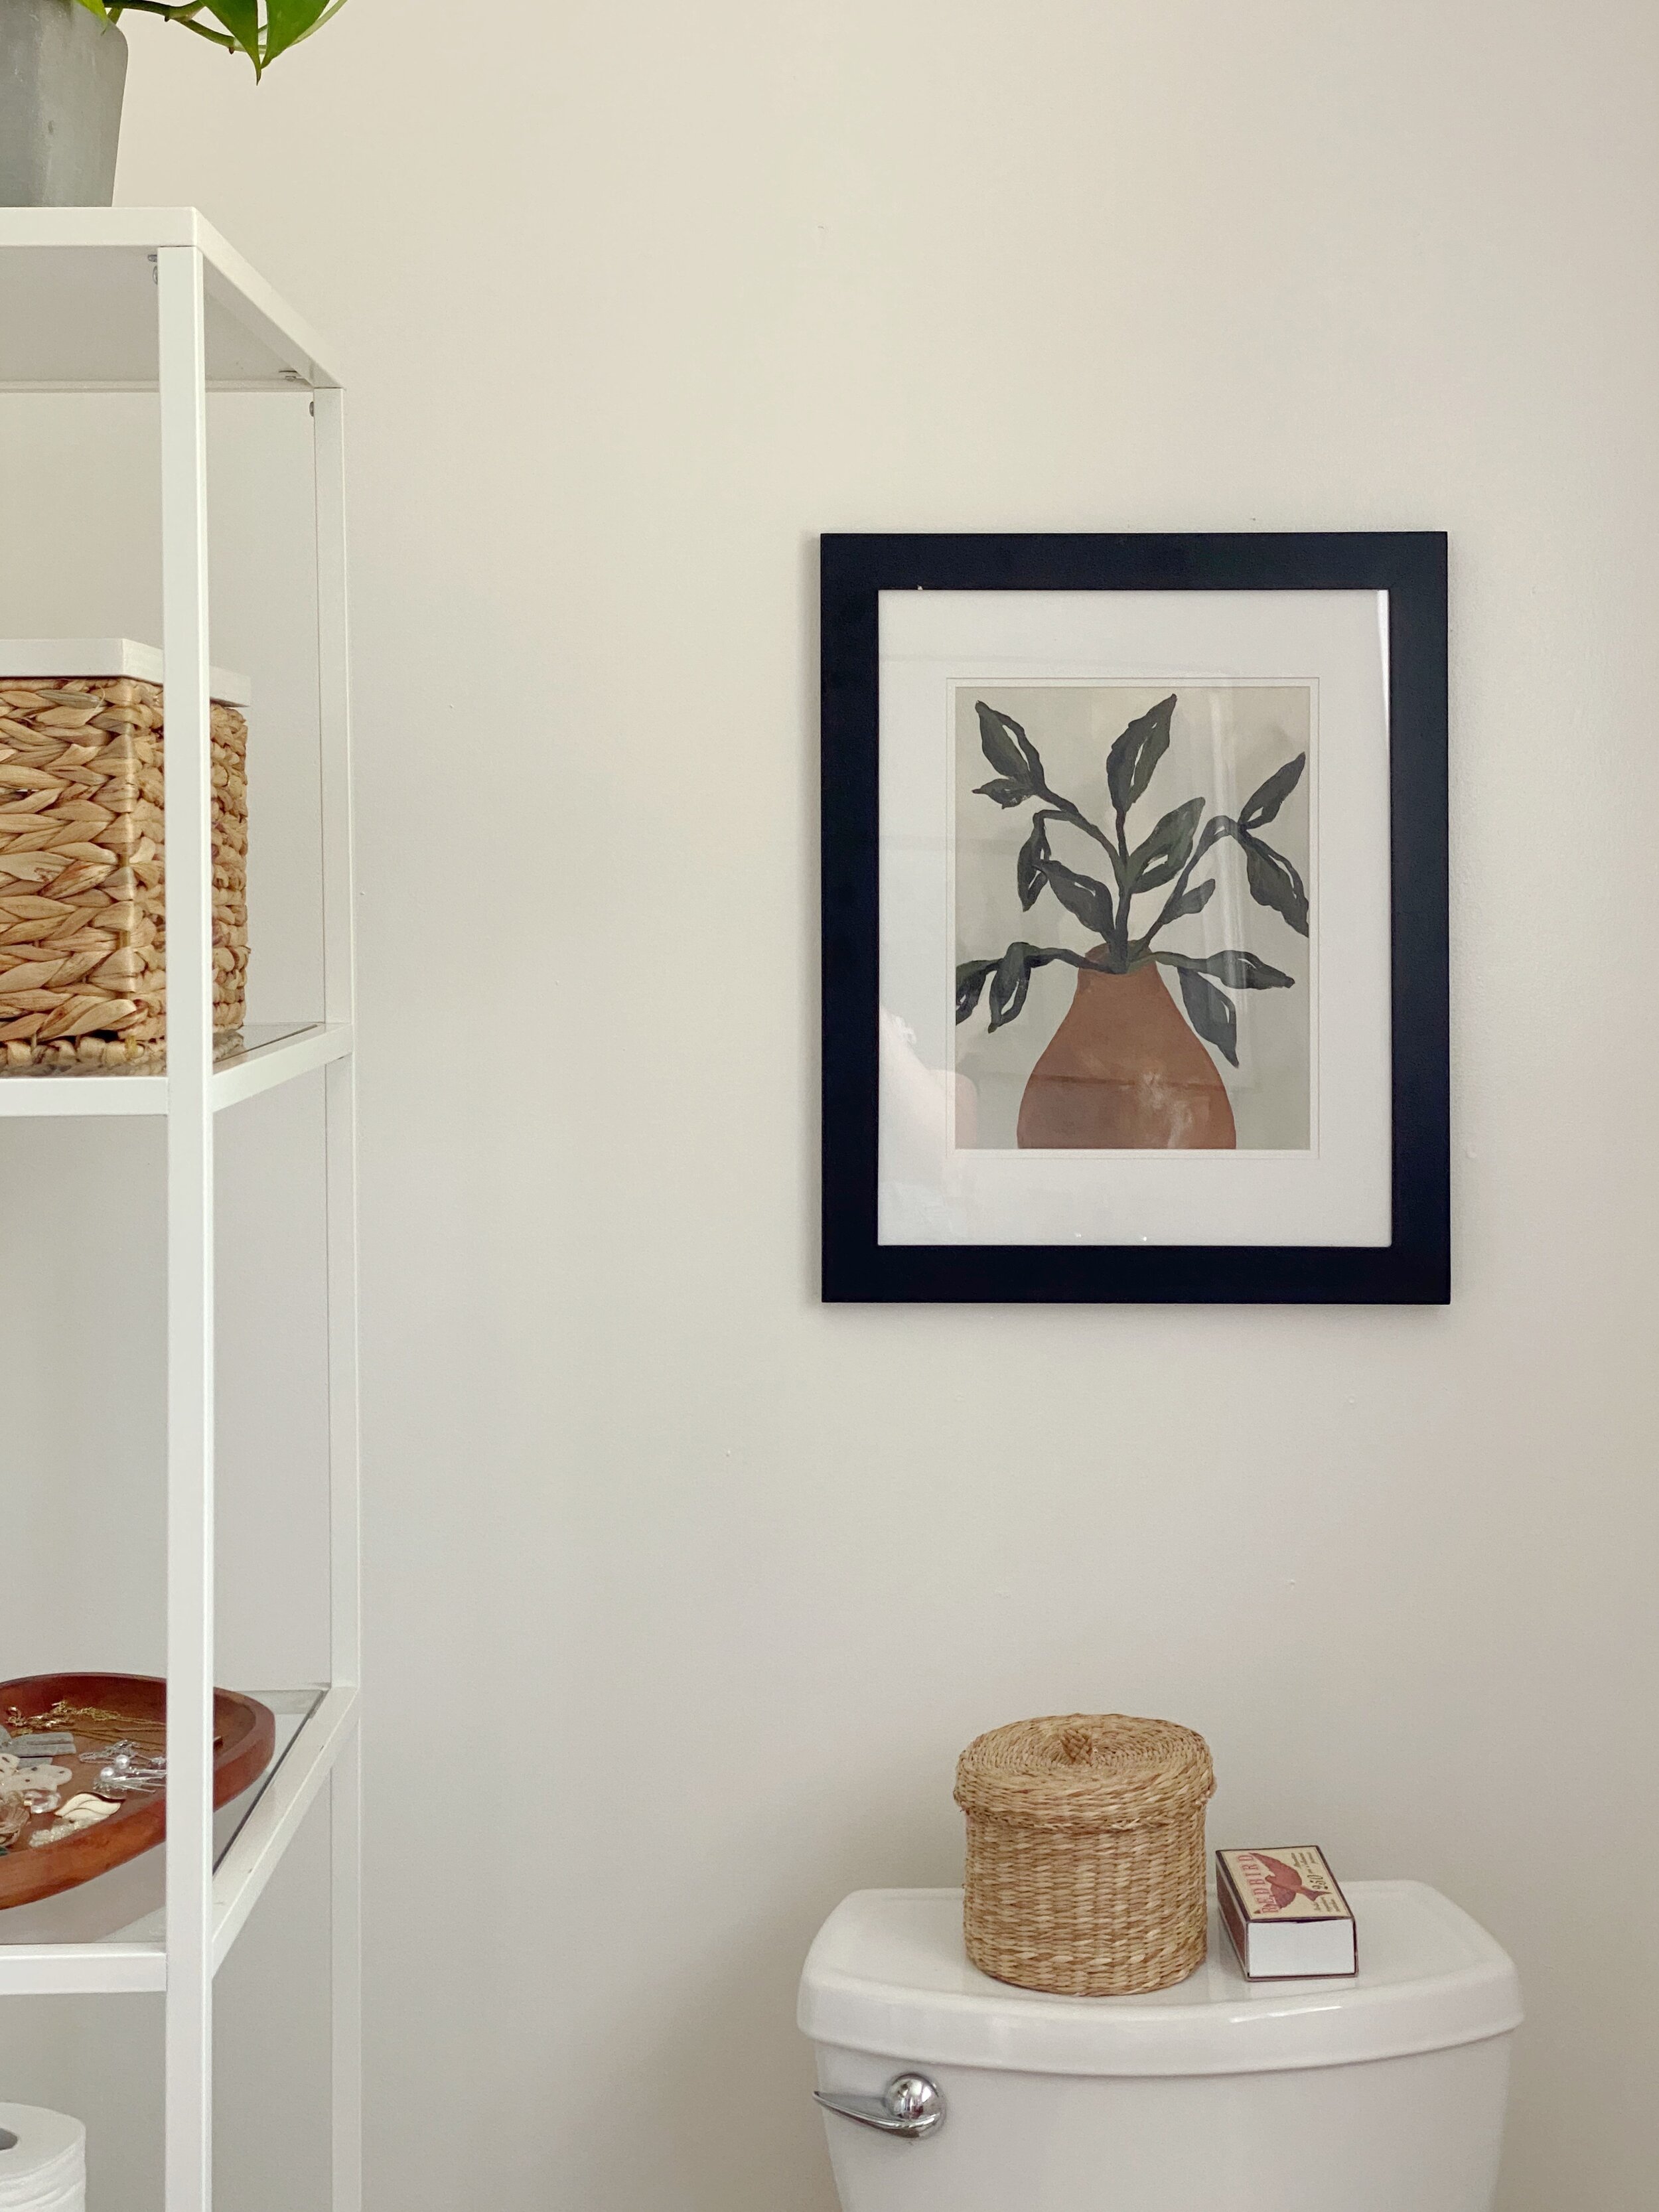
I shopped my basement to see if I could find a few decor pieces and some sort of lidded box to store our medications in. I didn’t find exactly what I was looking for, but I did find a large rectangular open-top seagrass box that fit perfectly on the shelf. I opted to DIY a lid for it with some scrap 3/4” plywood. I cut two rectangles out of the plywood - one that was the exact dimensions of the box and one that was slightly smaller by an inch or so on each side. I glued and nailed the rectangles together, sanded down the edges, and painted them a soft, warm white. The idea of the design was that the smaller rectangle on the bottom would fit inside the box, preventing the lid from sliding, and the top rectangle would sit on the top of the box as the lid. It worked perfectly and took a total of 15-20 minutes to create.
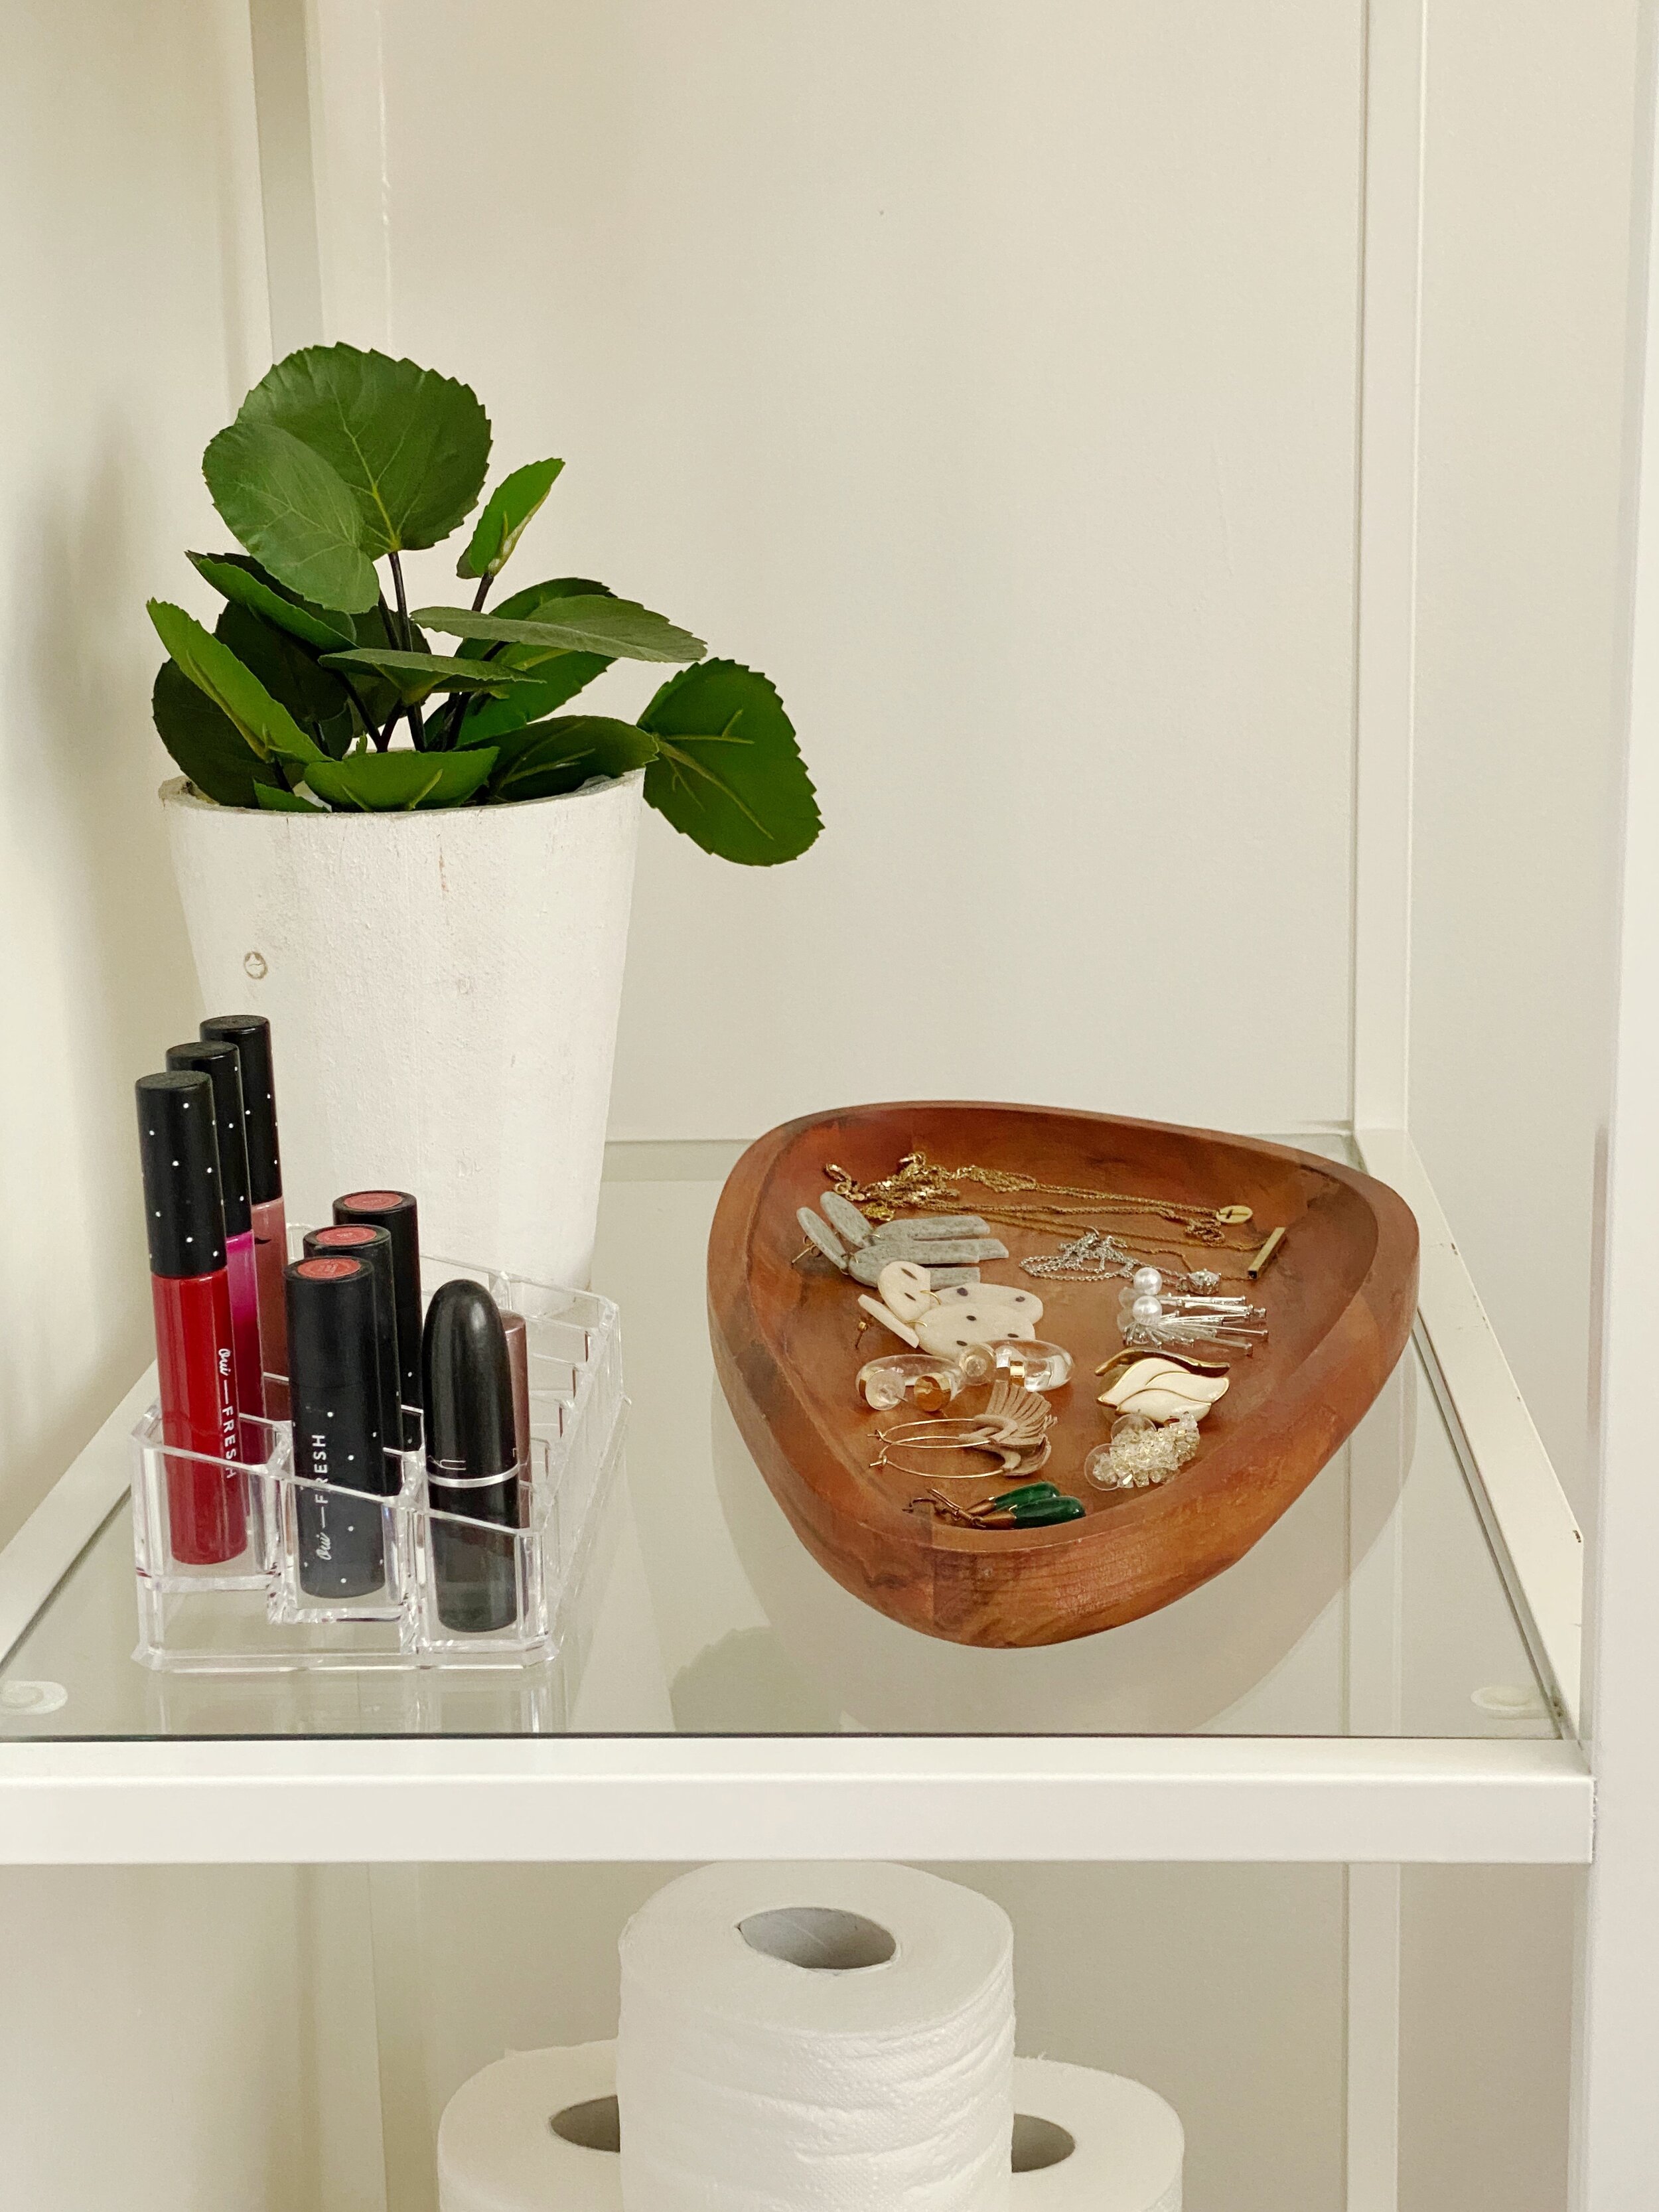
I also found an organic-shaped wooden tray in my basement and decided to use it to lay out my earrings and necklaces for a touch of aesthetically-pleasing storage. I also stacked my favourite lipsticks in an acrylic lipstick container I already had to place on the open shelf and piled up some spare towels to sit on the bottom.


Decor
And now, the fun part! I tried to use items I already had to add some much needed style and warmth to the space. I created a DIY art piece using some acrylic craft paint and shared all about that process on my Instagram (it is in a saved highlight there if you are interested). I popped the painting in a simple black frame I sourced from my basement and hung it above the toilet.
Although I tried my best to use what I had, the decor is where I ended up spending some money on this transformation. The biggest investment I made in this space was purchasing an area rug. One of the pain points of this room is how cold it feels with the big open middle floor space, so it felt important to me to use a properly-sized rug to pull the space together. I ended up selecting the Terracotta Jules rug from the Chris Loves Julia x Loloi collection in the 3’x5’ size. It cost me $150 CAD, but was well worth every penny! The rug draws in all the warm, cozy colours I was after, while allowing the rest of the space to stay bright and airy.


The second place I ended up spending money was on two new matching vanity mirrors. I didn’t intend to update these mirrors right now, but I came across a matching set of mirrors in the perfect size one day while browsing at Homesense. They cost me $30 each, which was a deal too good to pass up for matching wall mirrors of this size. I knew I had to jump on this budget-friendly upgrade now since the stock at Homesense rotates so frequently. I painted the frames in a matching black paint to ensure that they perfectly matched each other before hanging them above our sinks.

On a whim, I decided to spray paint the vanity hardware with a matte black spray paint. This was an easy and budget-friendly way to draw the black highlights from the wall sconce and mirror frames down the vanity front. It only took me a couple of minutes to do (although I definitely gave it ample time to dry and cure before reinstalling) and the impact is huge.
The last thing I did was add some plants. Adding some greenery into a space really brings it to life - literally and figuratively. I am confident that these plants are going to thrive in this bright, warm space!


I hope you enjoyed this transformation as much as I enjoyed pulling it together. I set out to do this project without spending any money, and although I did end up spending a little bit to bring it all together, the entire process proved to me that there are really simple and budget-friendly ways to bring a space to life. I’m truly so grateful for our home and hope that I continue to see the potential in these in-between spaces - because there is beauty in them too.
