Styling the Built-In Shelves (With Tips)
Do you like to style shelves? In theory, I do, but when it comes time to actually do it, I often find myself overwhelmed with where to start. When I created the built-in shelves beside our fireplace, I knew it would be a great opportunity for some beautiful styling, but I wanted to be really careful with how I went about it. There were a few things I wanted to keep in mind as I started to pull the pieces together:
I wanted it to look beautiful. I wanted a collected look that was visually pleasing without looking cluttered. I knew this would require a bit of strategy and patience to collect the items that would work, so I looked up lots of inspiration images and decided I would take my time to collect the items I wanted.
I wanted it to be functional. I didn’t want to just fill our shelves with stuff for the sake of filling our shelves. Thankfully we have other areas in this room that give us some closed storage, but I did want to use some sort of baskets that could hold small items, like tech chords or controllers.
I wanted it to be budget-friendly. I did not want to spend very much money on this. First of all, styling props can be expensive and add up when you are paying $20-$40 per item, and second of all, I really didn’t want to spend a lot of money on what feels like just stuff. Styles change fairly often and I didn’t want to feel tied down to whatever items I put on the shelf because I had poured a lot of money into it.
With those directives in mind, I decided to hit the thrift store and see what treasures I could find. We entered into another round of strict lockdowns in our area that shut down all non-essential business, but I managed to squeeze into our local thrift store on the last day it was open. I am so glad I did because it was a gold mine! I found so many styling treasures that were right up my alley, including books, baskets, vases, and a beautiful set of wooden bookends.

It’s worth noting that when it came time to style the shelves, I also scoured my house for anything I could find that may work. I have been collecting thrifted pieces for eons, so many of the pieces I ended up using were previously-thrifted treasures or decor pieces I had purchased at another time for another purpose. Sometimes, all we need to do is shop our own homes to bring a fresh twist on our space. Simply moving items around can help you scratch a decor itch without spending anything at all.
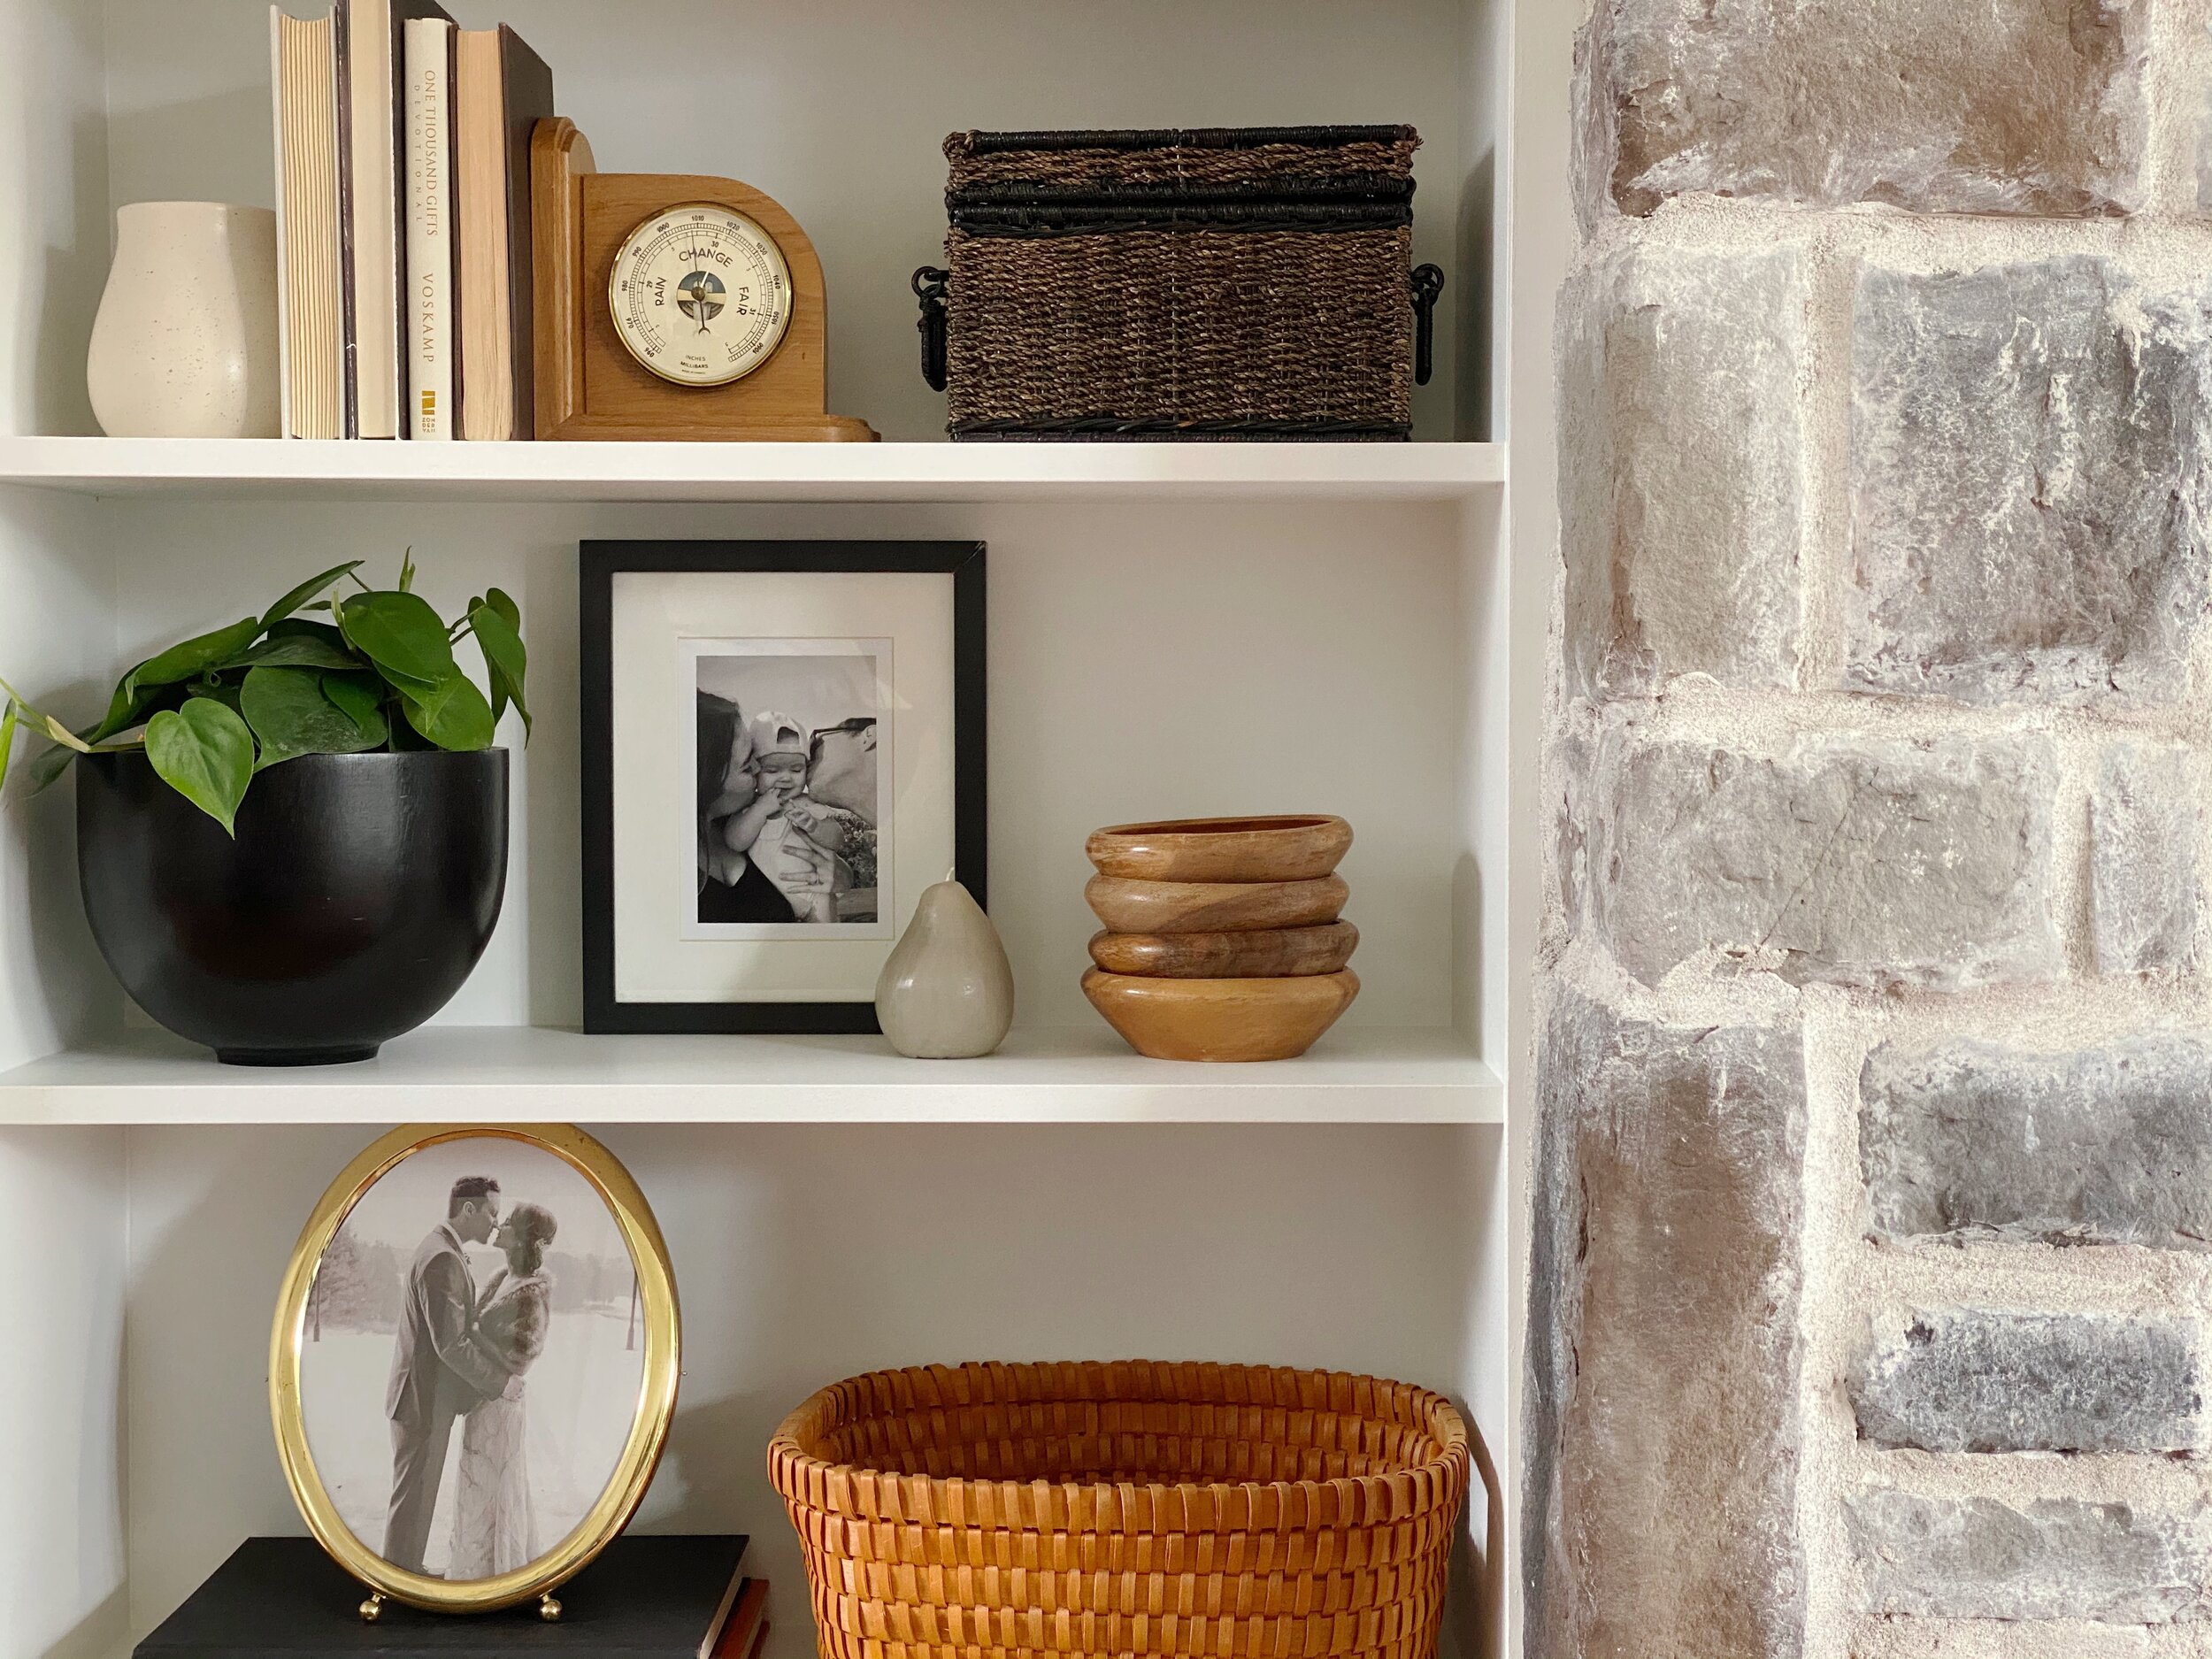
I finally felt like I had gathered enough items to get started. I laid everything I had collected out on the floor in front of the built-ins. The actual styling can certainly feel like the most intimidating part, but I find that I just need to see all my items in front of me to get going. When gathering your items, it’s important to have a variety of shapes, textures, and sizes, but to also think about establishing a sense of repetition to maintain some connection and cohesion. This sounds more complicated than it is - simply just focus on having some repeated elements throughout your items. For my shelf, I gathered a variety of different-shaped photo frames, but they were all metallic gold. I also used wicker baskets of different shapes and sizes, but they all were a similar orange-brown tone. These visual connections will likely happen naturally as you gather based on your tastes, but it’s definitely something to be aware of to ensure that everything feels well connected.


The next thing I did is pre-group my items in little vingnettes or pairings. I separated my books into piles, grouped vases, and paired decor pieces up. Pre-grouping allows you to spread your different materials across different pairings and groups and gives you a starting point to place items. Grouping them before styling doesn’t mean they have to stay in those groups once you get rolling, but I just find it to be a helpful step when you feel frozen about where to start - like writing out a plan.
When pre-grouping, I like to think about shape and scale. There are some design elements that you could have control over, like texture or colour, so focus on grouping items based on components that you can’t change, like how tall or wide they are. Try to think outside the box about how you could potentially adapt some items to be feel cohesive. For example, if your books look mismatched with different coloured spines, consider turning them spine-side-in, or if you have a vase with a strange finish on it, you could paint it in a more neutral tone. You won’t be able to change the roundness of a vase or the squareness of a frame, though, so those components need to dictate how you arrange pieces together and find the balance between groupings.


With the pre-groups set up, I was then able to dive right in and start placing items on the shelves. I did this quickly, but then sat on it, rearranged, moved an item or two, tried this there or that here, sat on it again, moved this little piece here, sat again, and repeat. There are tons of great formulas and image inspirations out there, but styling really comes down to how something feels and you likely won’t get it quite right on the first try. I kind of like that about styling though - you have lots of opportunity to play and experiment. Embrace it!
Once I sat with my own shelves for a few days, I decided to create some DIY’s to help with the sense of balance. I painted two different vases with a textured paint in neutral colours in order to draw attention away from them. I also built a simple storage box out of scrap 3/4” plywood and added a simple decorative faux-leather pull to tie into some of the other colours I used on the shelves. Both of these projects were so easy to pull off and did wonders to bring in the elements of repetition and cohesion that I mentioned above.

That was it! When all was said and done, I spent under $50 on this project. I used the items I found at the thrift store, objects I already had around my house, some strategic DIY’s made out of supplies I already had, and brought in some personal framed photographs to round it all out. I shared all about the styling process (including my amazing thrift haul!) on my YouTube channel, so if this topic interests you, you may enjoy watching the process in action over there. It feels so good to finally bring a little bit of life to these shelves, especially on such a low budget. With each step we take in the living room, it continues to feel more and more like home.
